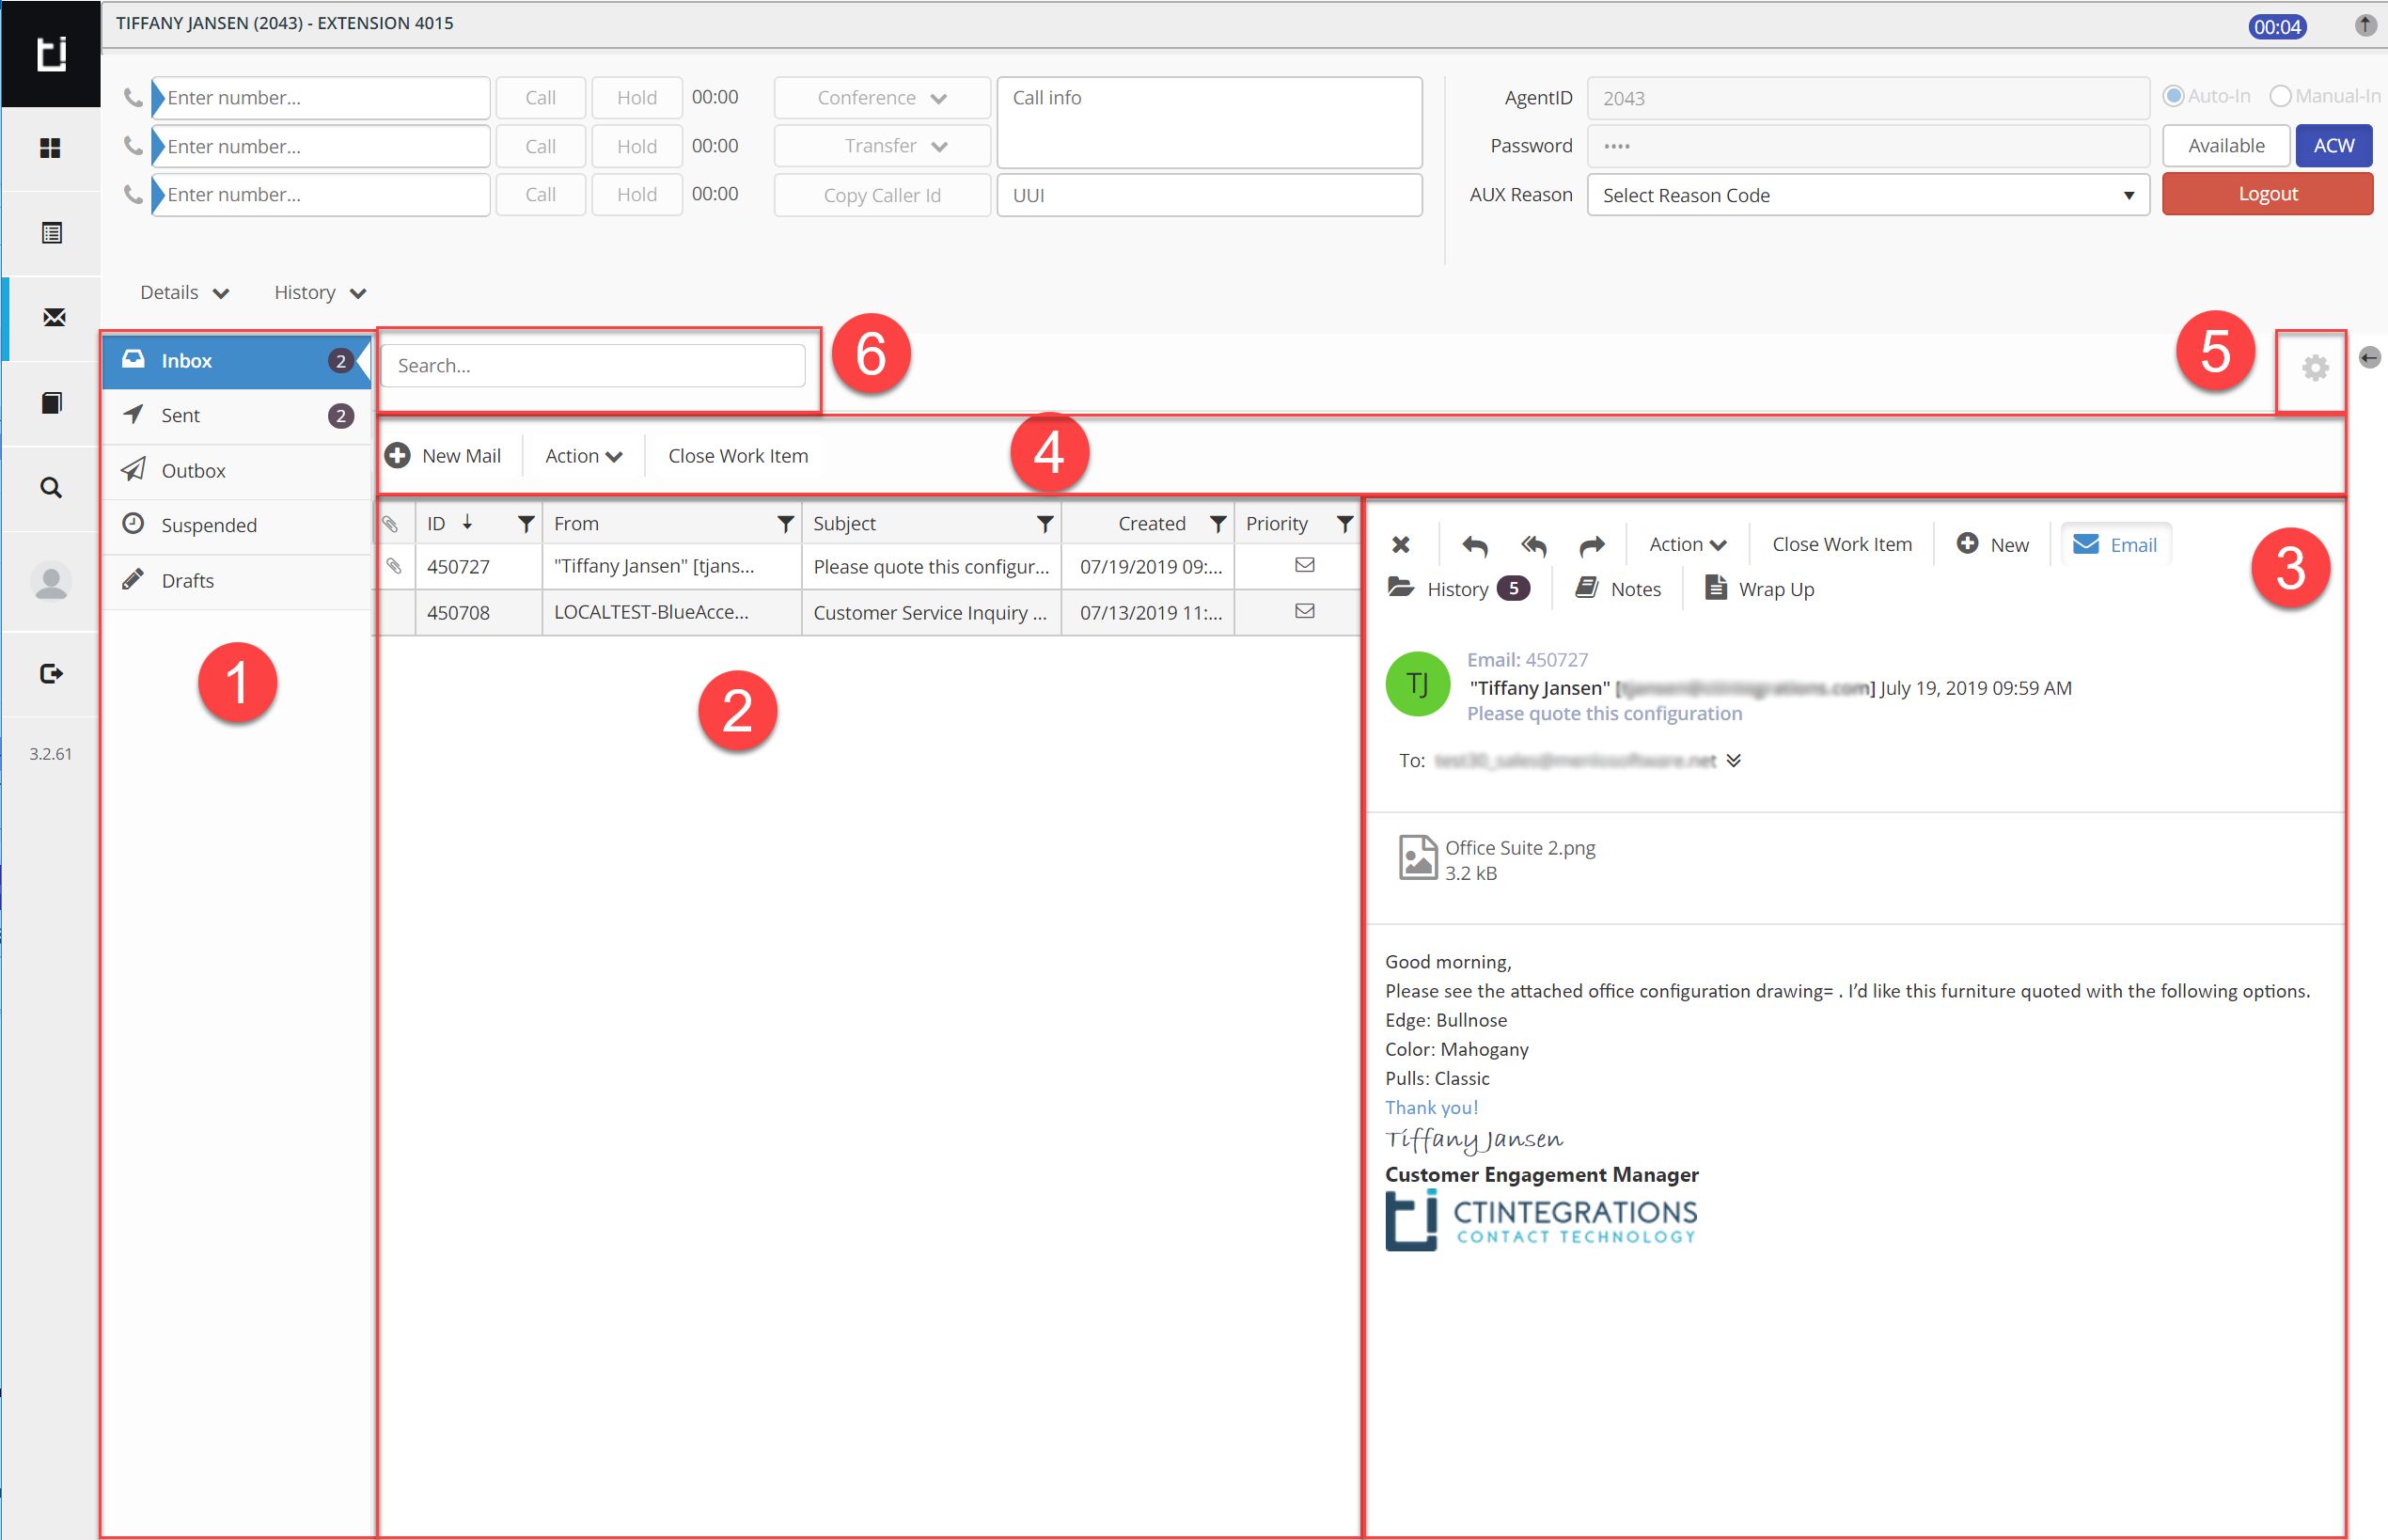
Main Screen Components
See sample screenshot of the Email widget below. Additional information about each section is below.
- Mailbox Navigation Bar: Select mailbox folders
- Mailbox folder list view: Shows the contents of the selected folder
- Reading Pane: View and take action on emails. More information about reading pane is covered in other sections of this guide.
- Mailbox Toolbar: Take actions on an email.
- Reading Pane settings: Adjust reading pane position.
- Search: Find emails using key words.
Email Widget in Classic Layout
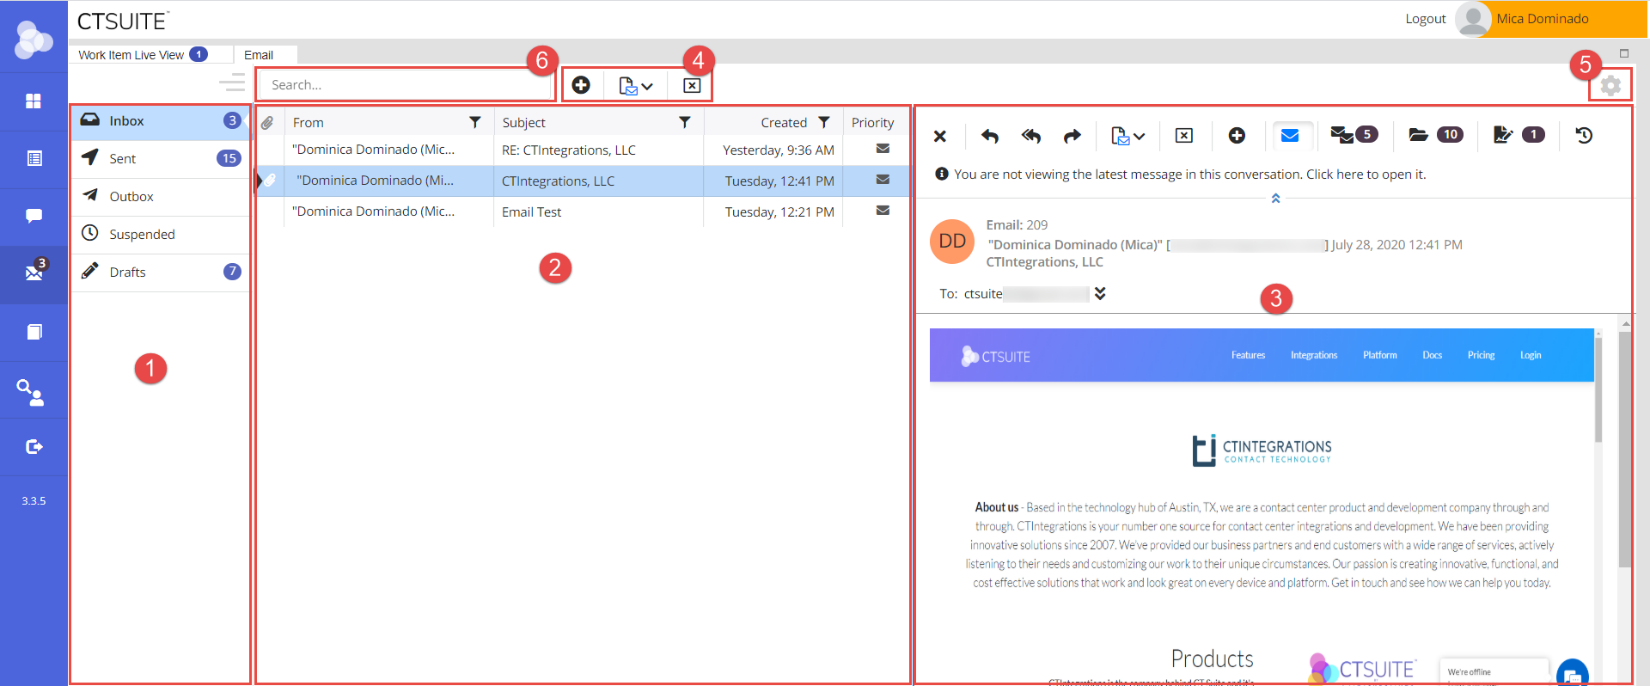
Email Widget in Flex Layout
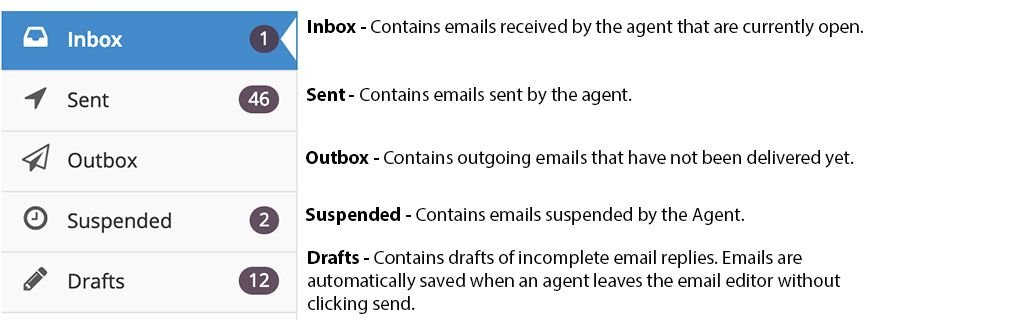
Mailbox Navigation Bar
Emails are stored in the following mailbox folders. Select the desired mailbox folder to view its contents.
Folder List View
When clicked, each folder will display a list of its contents. The fields displayed in the list are:
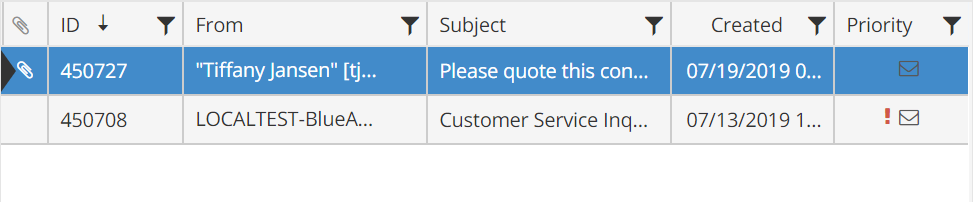
Attachment: A paper clip icon
ID: This is the unique ID that is assigned to an email when it arrives. More information about email ID's can be found in the Email ID section of this guide.
From: This is the email address of the person who sent the email
Subject: This is the subject of the email
Created: This is the date and time that the email was brought into CT Suite. Depending on your settings, it will be different than the actual time the email was sent by the sender.
Priority: A red exclamation mark
Color Coding: Emails that have been transferred will have blue shading in the list view. Emails that had been suspended will have purple shading.
Secure Messaging: When receiving a secure email, an icon

Each folder is automatically sorted by the email ID, largest to smallest. You can re-sort any list simply by clicking the field header (where the name of the field is displayed). The first click will sort ascending, the second click will sort descending, and the third click will clear your sort. An arrow icon will appear in the field header to help indicate the field that's sorted and the sort order.
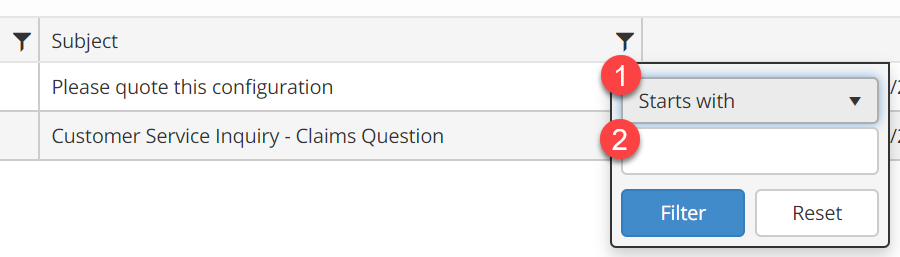
Lists can also be filtered by any of the fields. To do this, click on the filter icon
Mailbox Toolbar
There is an email toolbar above the list view that allows you to take action on a selected email in the list.
New Mail: This button allows you to create a new email that is not related to any other email in CT Suite. For more information, see the Parent / Child Email Relationship section.
Action: This is drop down menu that allows you to take one of several actions on an email. For more information about these actions, see the Email Commands section.
Close Work Item: This allows you to close a work item.

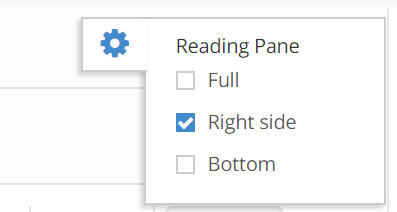
Reading Pane settings
The gear button allows you to change the position of your reading pane. From the drop down, select Full, Right side (default), or Bottom.
The full reading pane view will open on top of the settings button. To adjust the setting, close the reading pane.
Search within agent Inbox
Use this field to search within the ID, From and Subject fields in the list view. Typing in the search field will narrow the list of emails displayed in the list based on key word matches.
