Outbound campaigns are handled in the POM widget.
To access, click on the POM button in the main Navigation Bar
Note: this will only appear if you have POM configured for you.
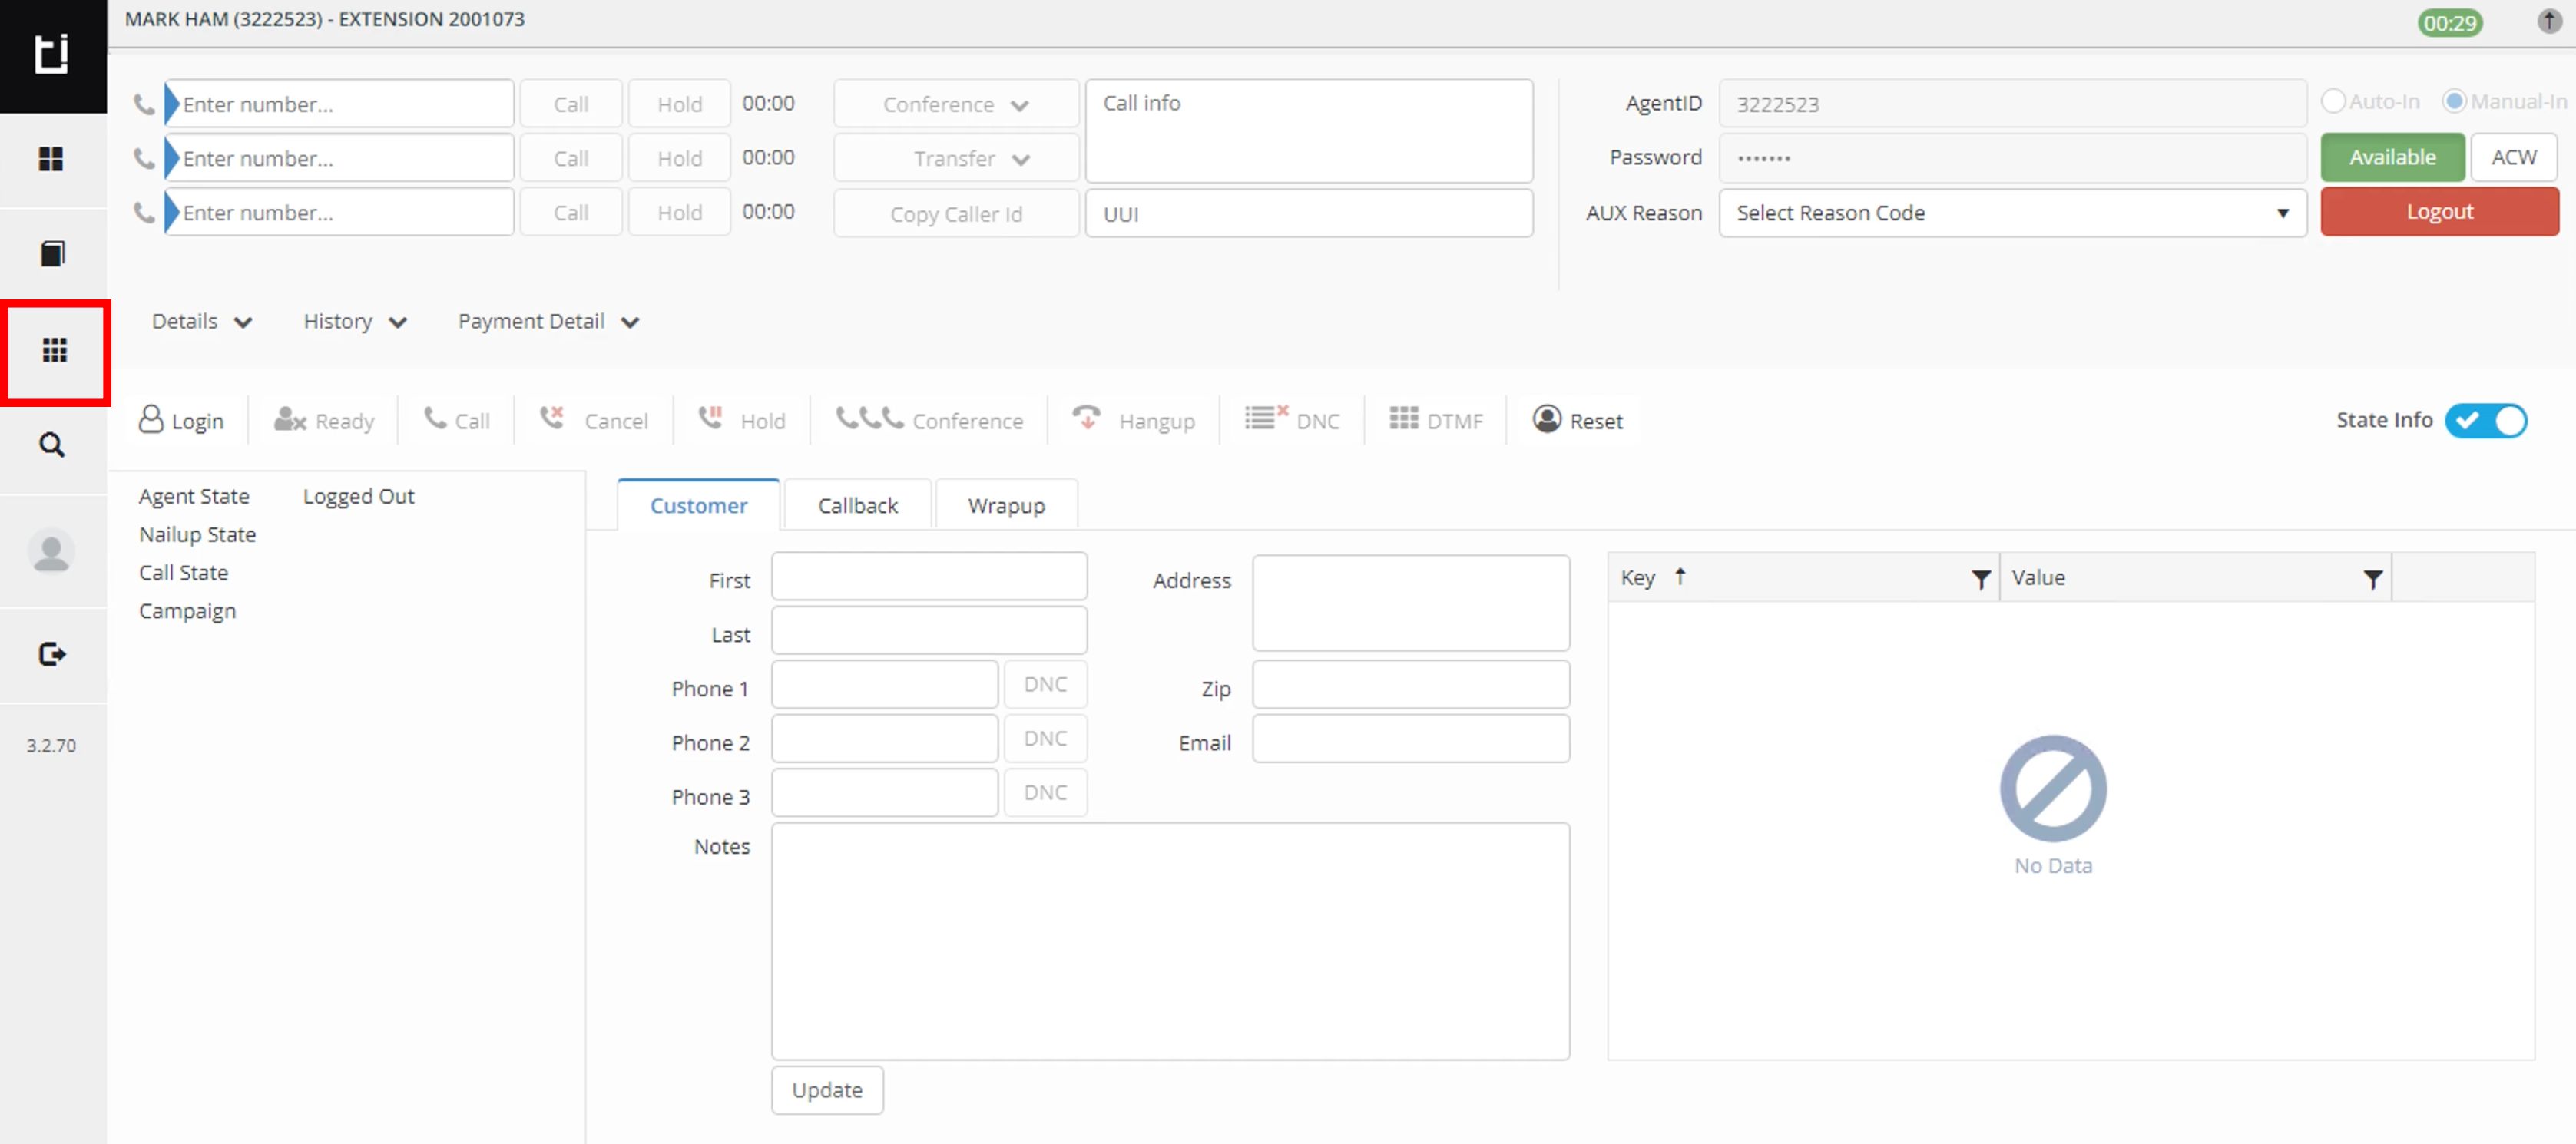
POM in Classic layout

POM in Flex layout
Logging Into POM
To start taking calls from the Avaya POM server, make sure you
- Set your CT Suite Agent status to “Available”,
- press the Login button in the POM widget
- and then Ready button
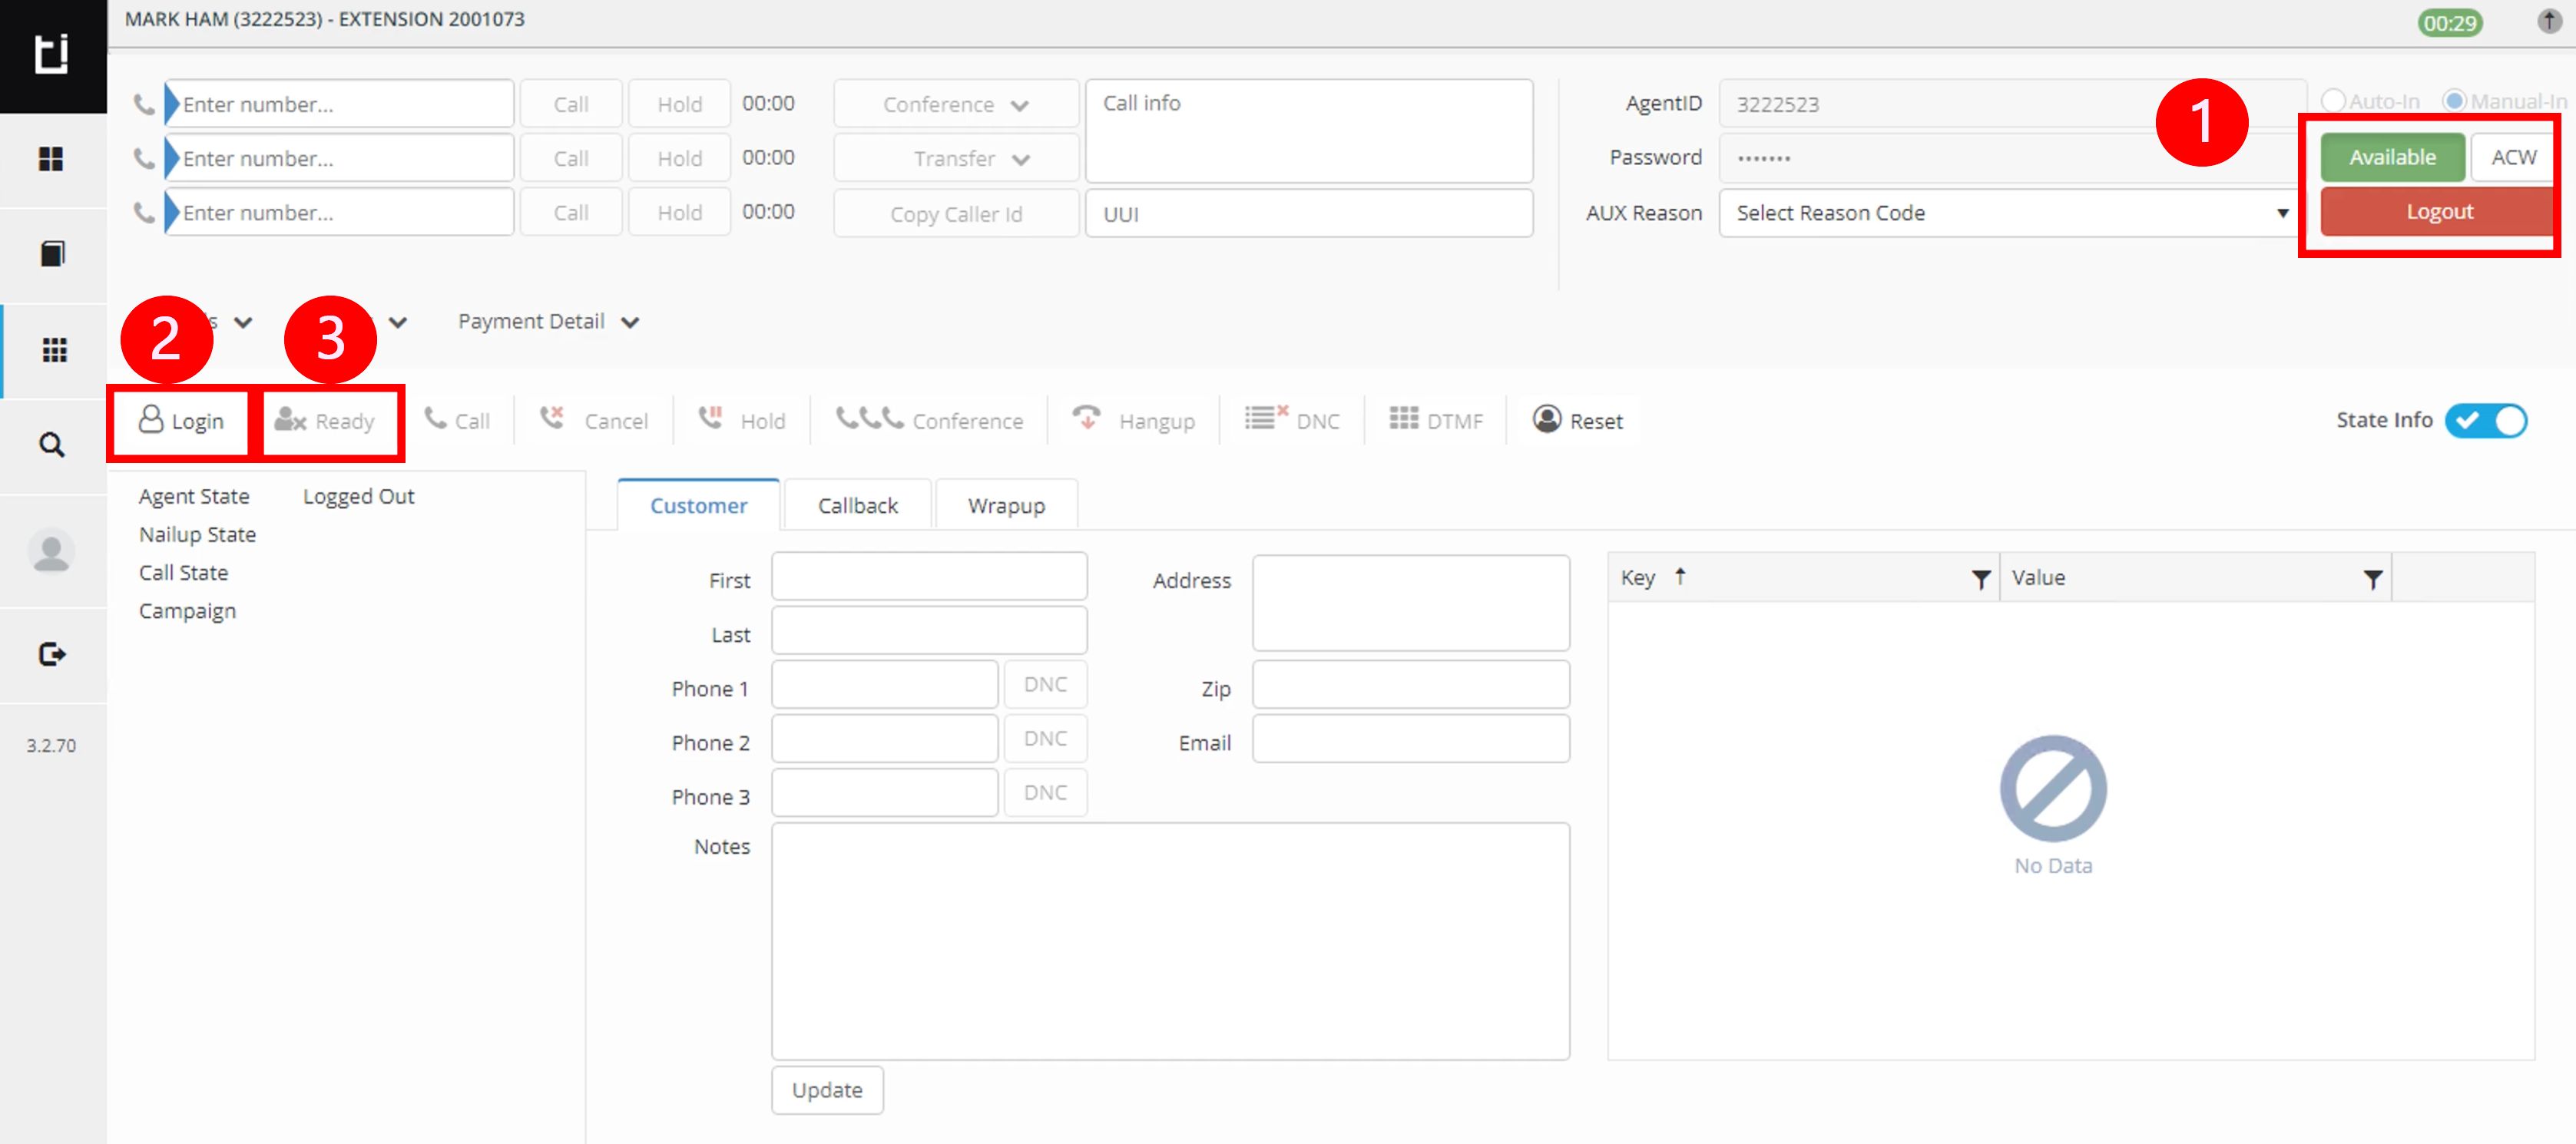
Logging into POM in Classic layout
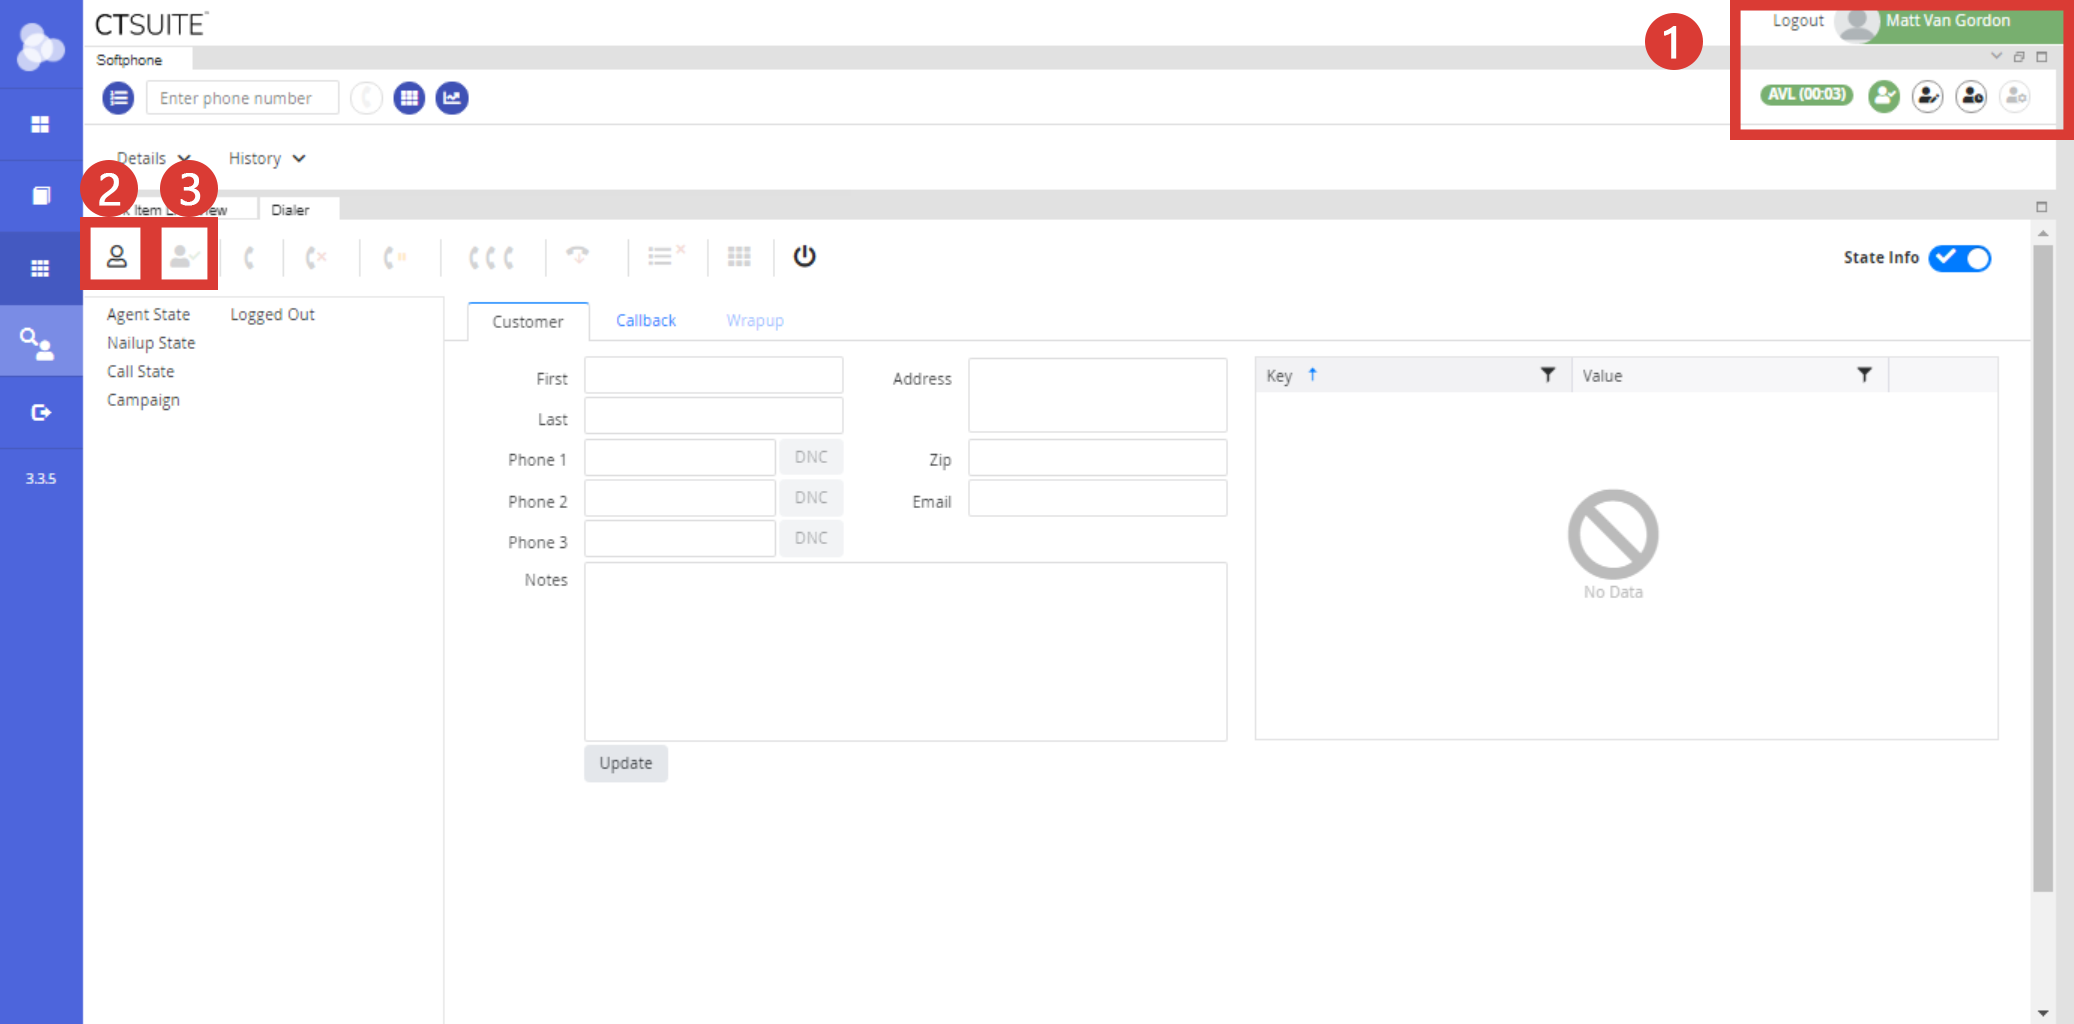
Logging into POM in Flex layout
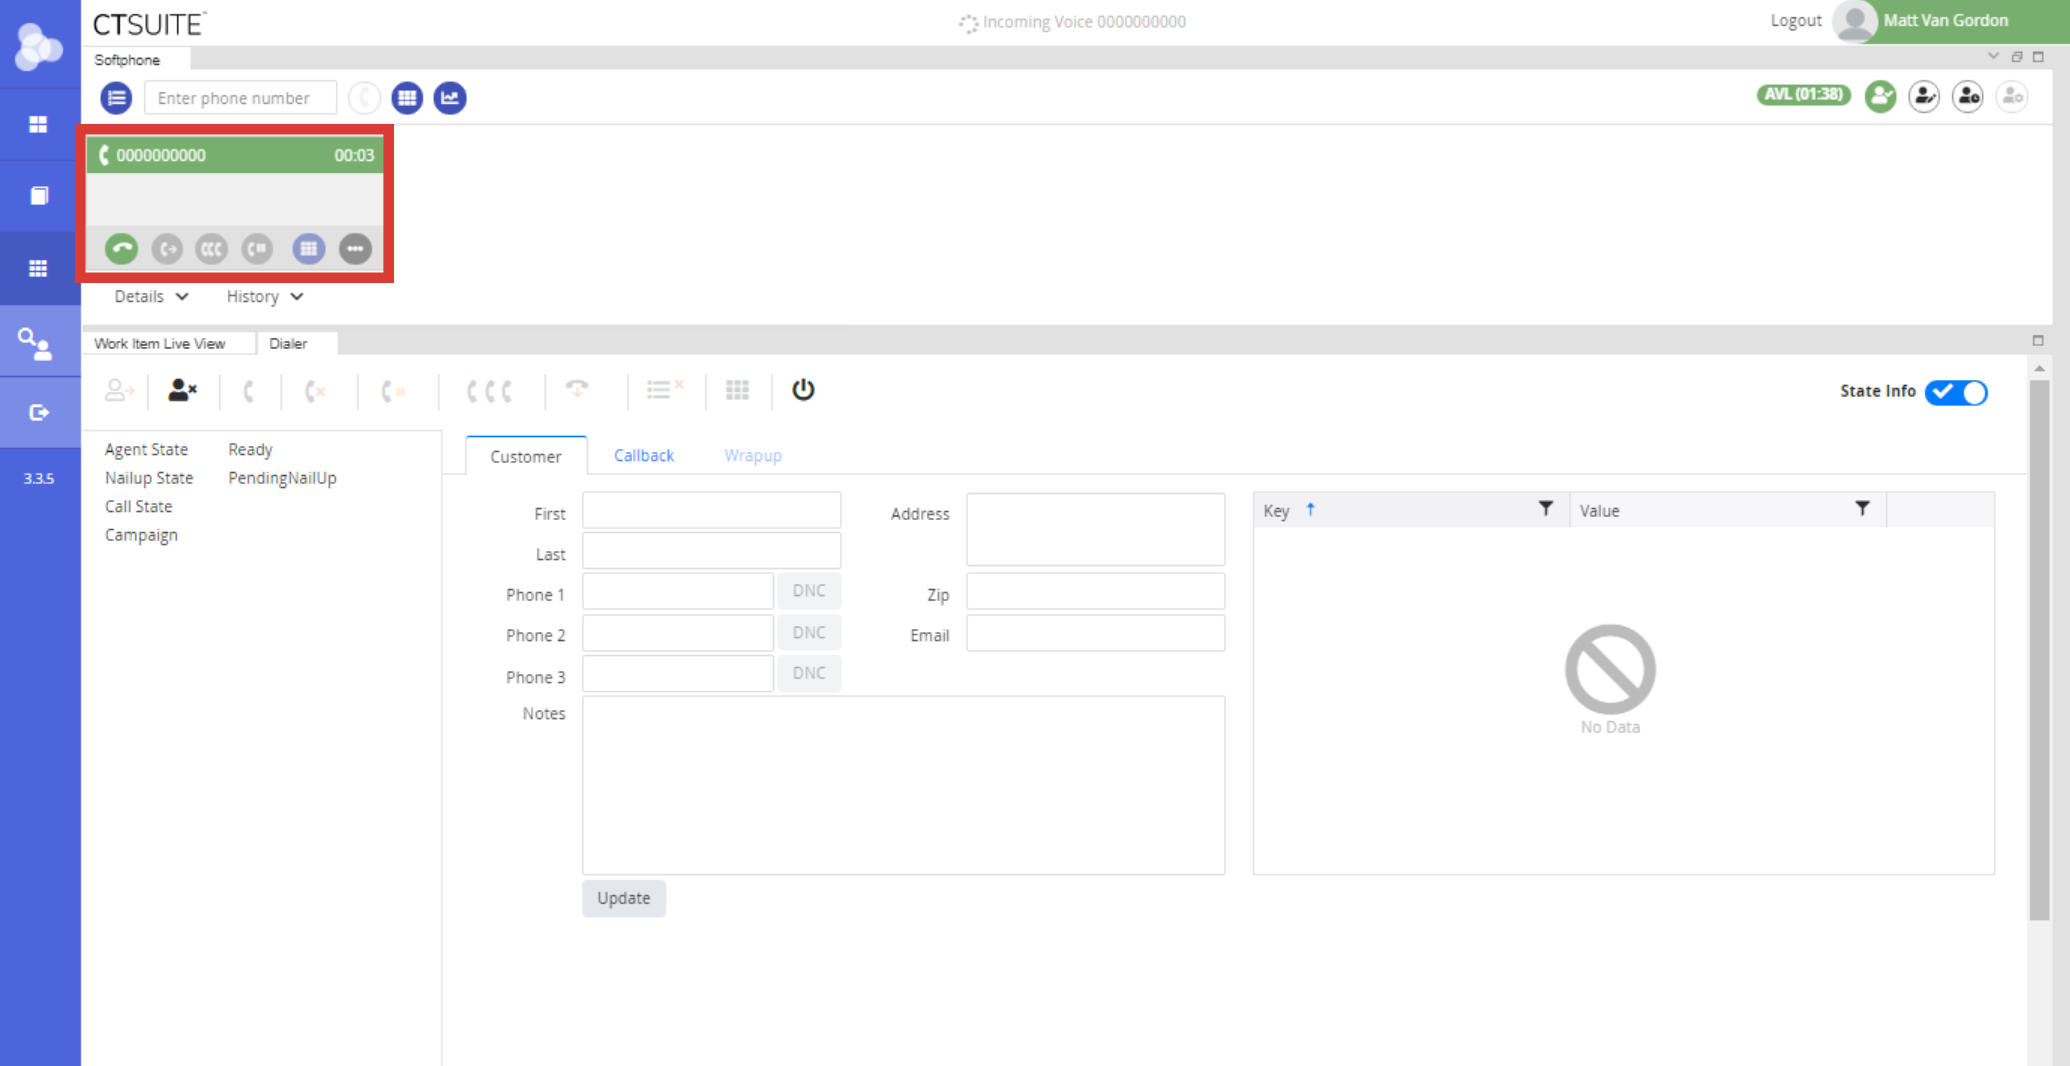
Upon clicking ready, the NailUp process begins.
Going Ready AKA "NailUp"
Before the POM Server can assign calls to you it must first “NailUp” your telephone to the POM Server.
The POM Server will call your telephone on the first line appearance. Answer this call to NailUp the extension.
The NailUp call will not have any audio, the agent will hear silence. This call will remain active while using POM, and should not be ended.
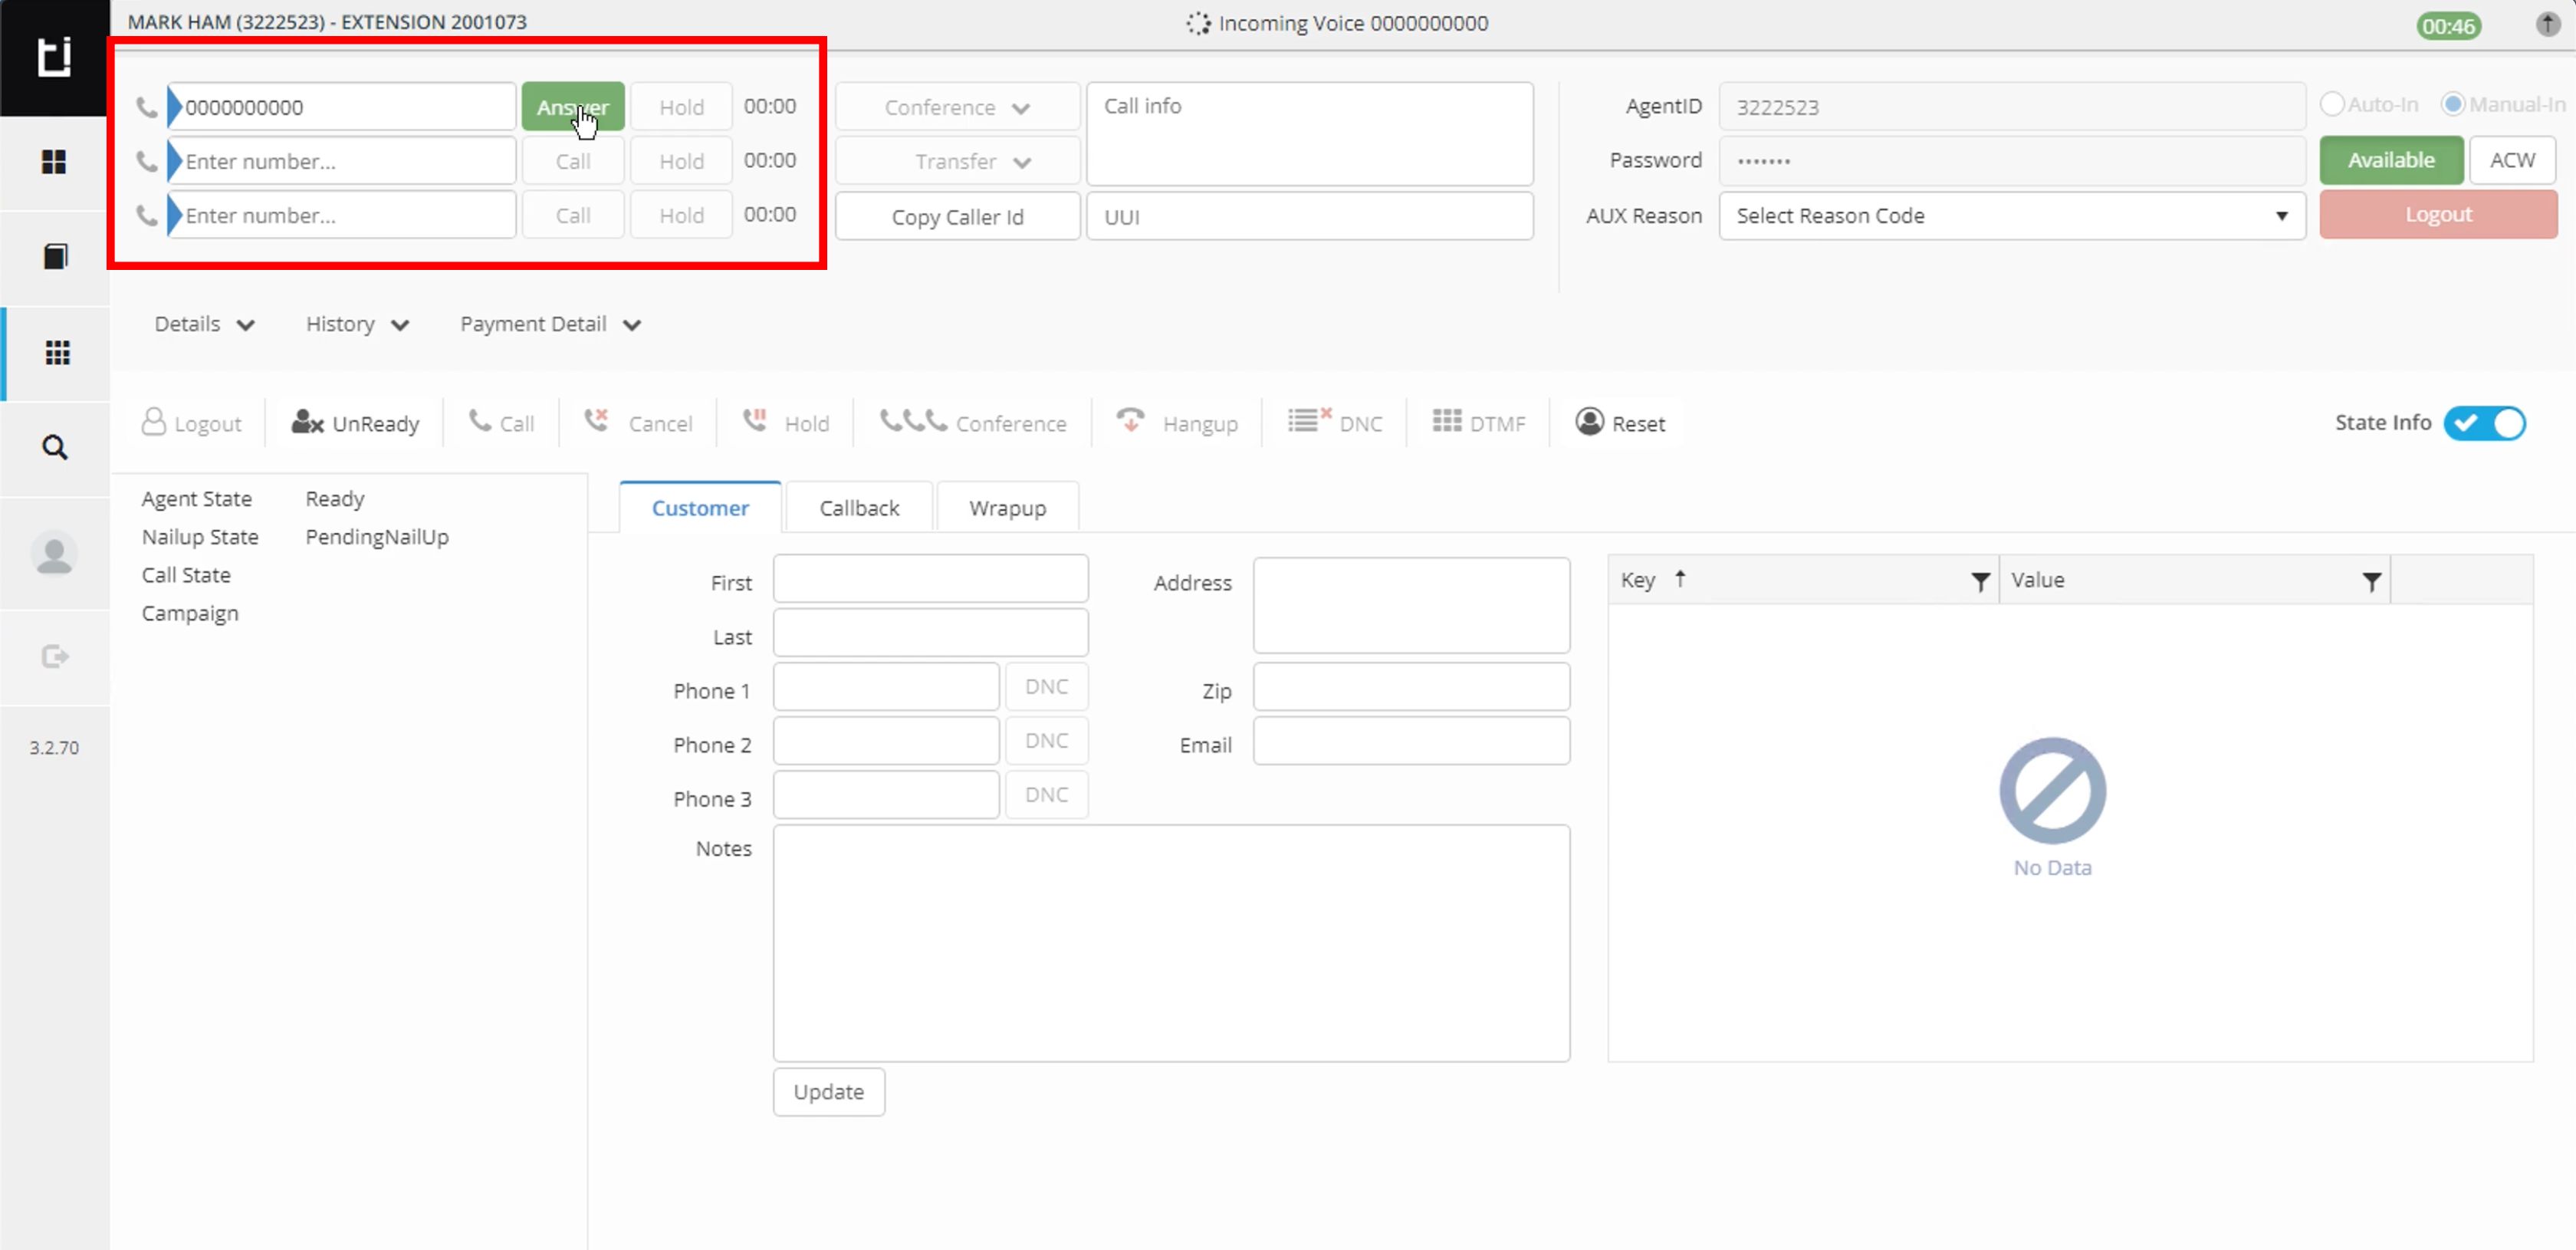
Receiving NailUp call in Classic layout
Receiving NailUp call in Flex layout
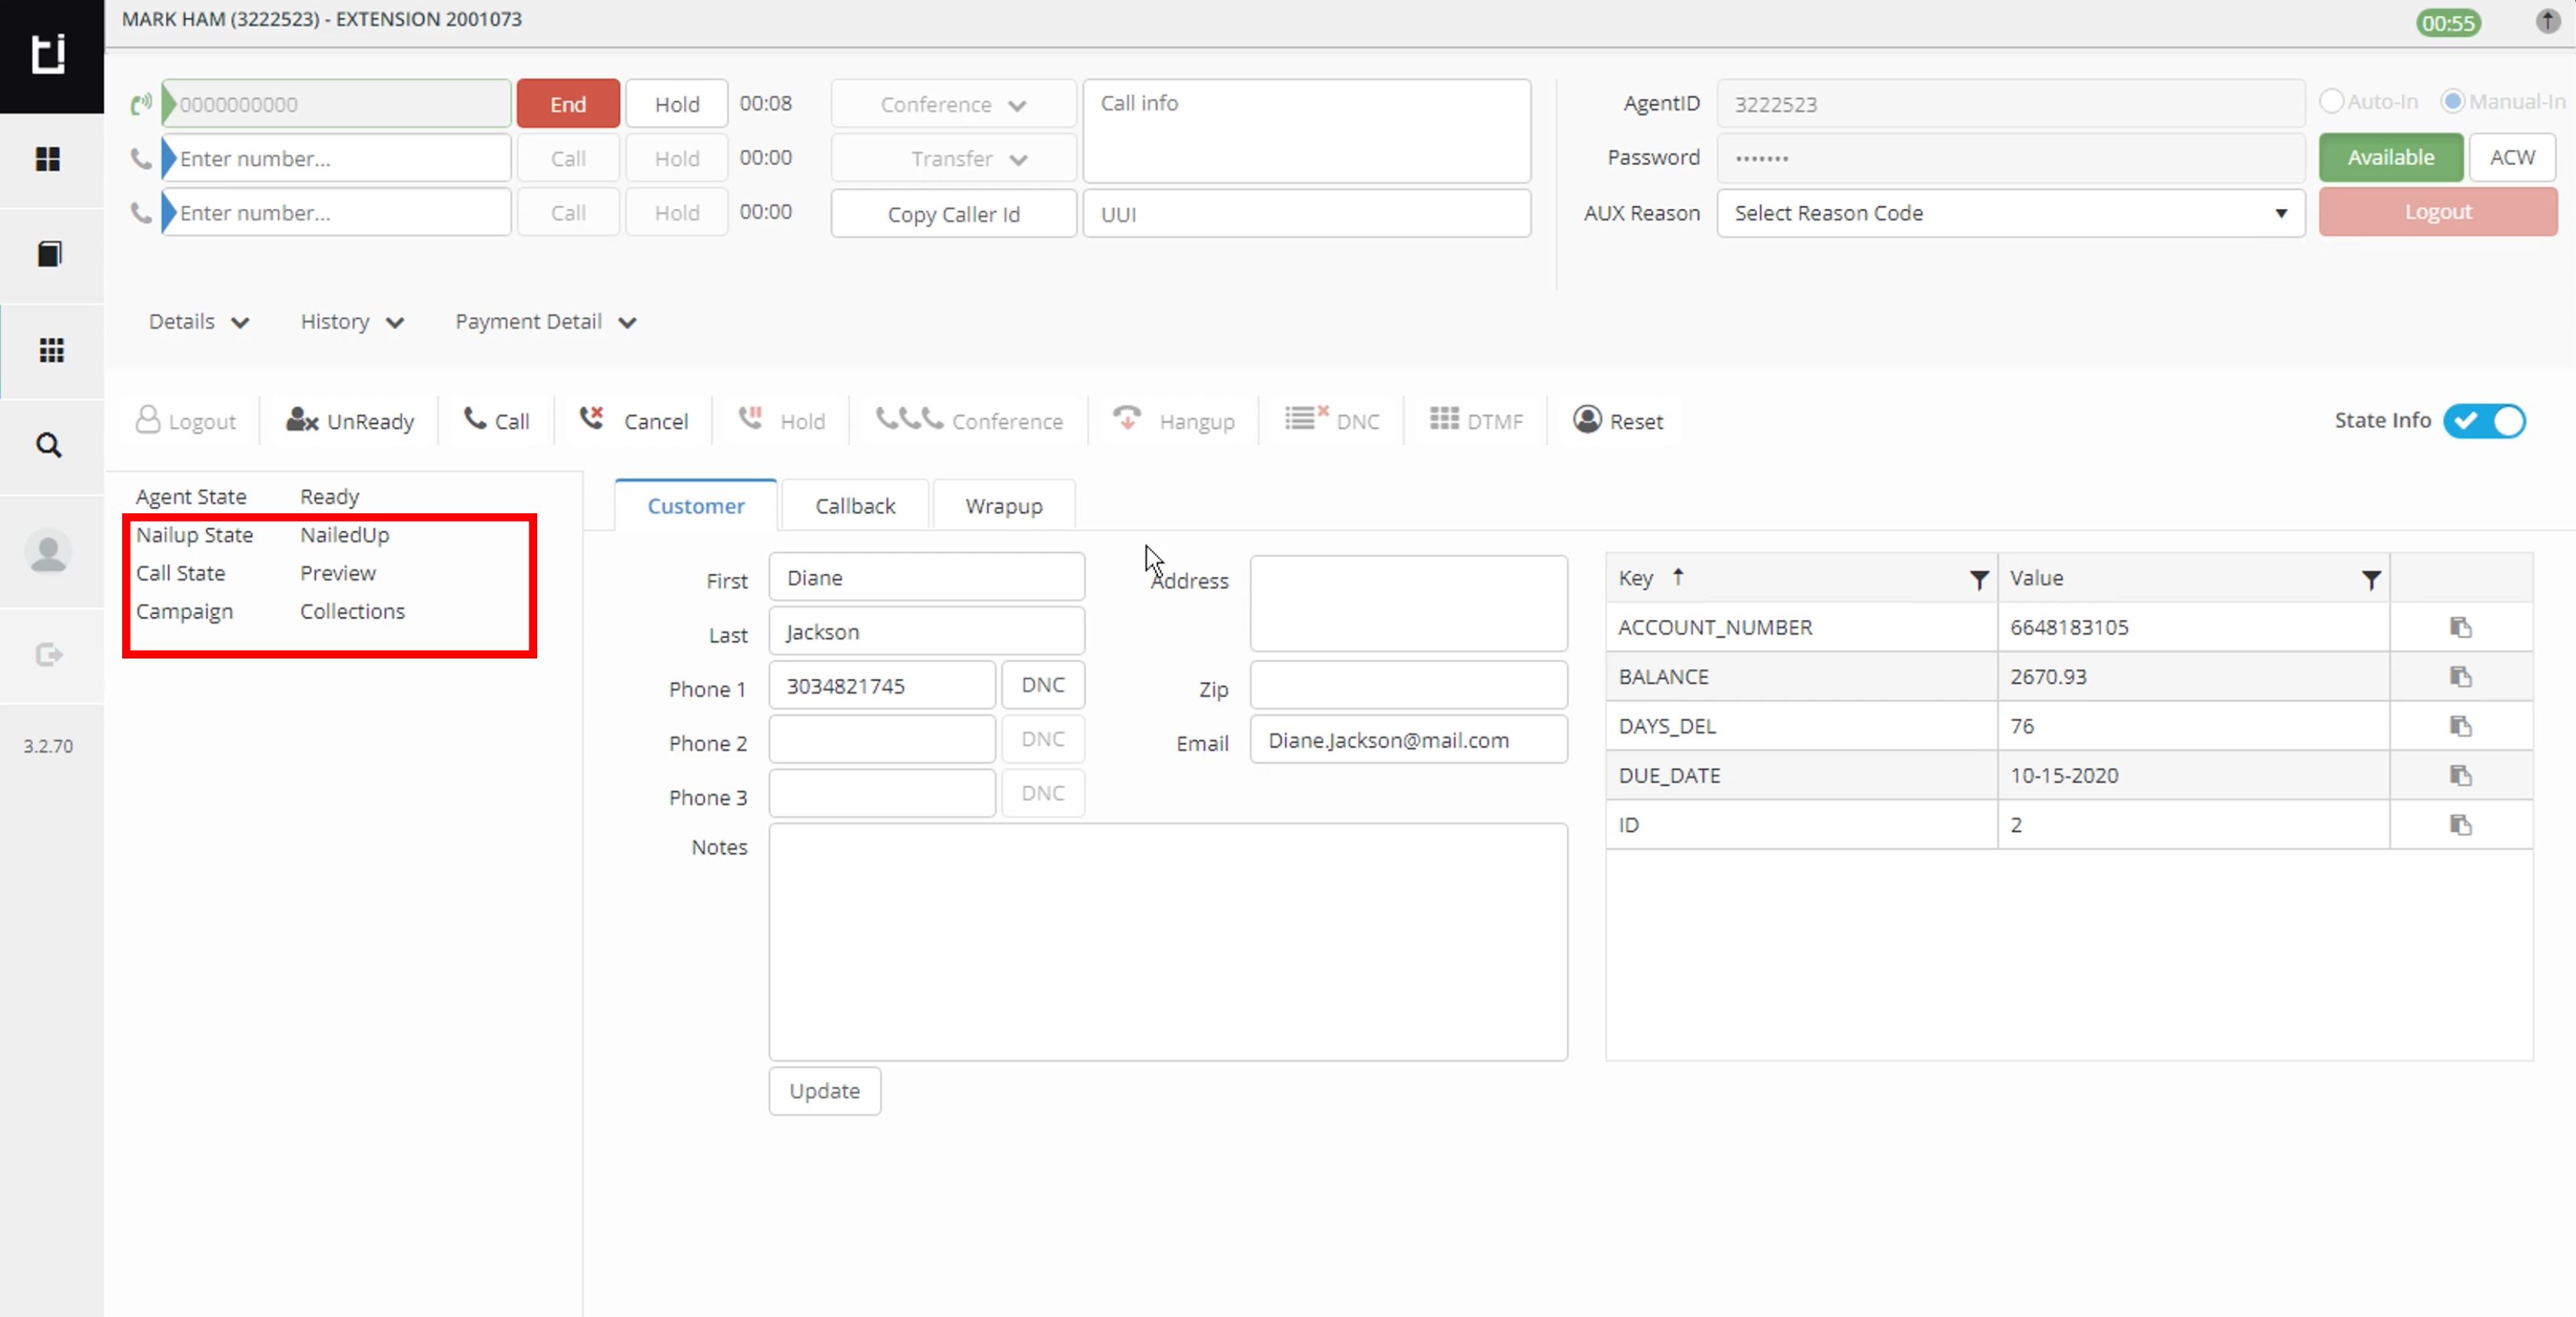
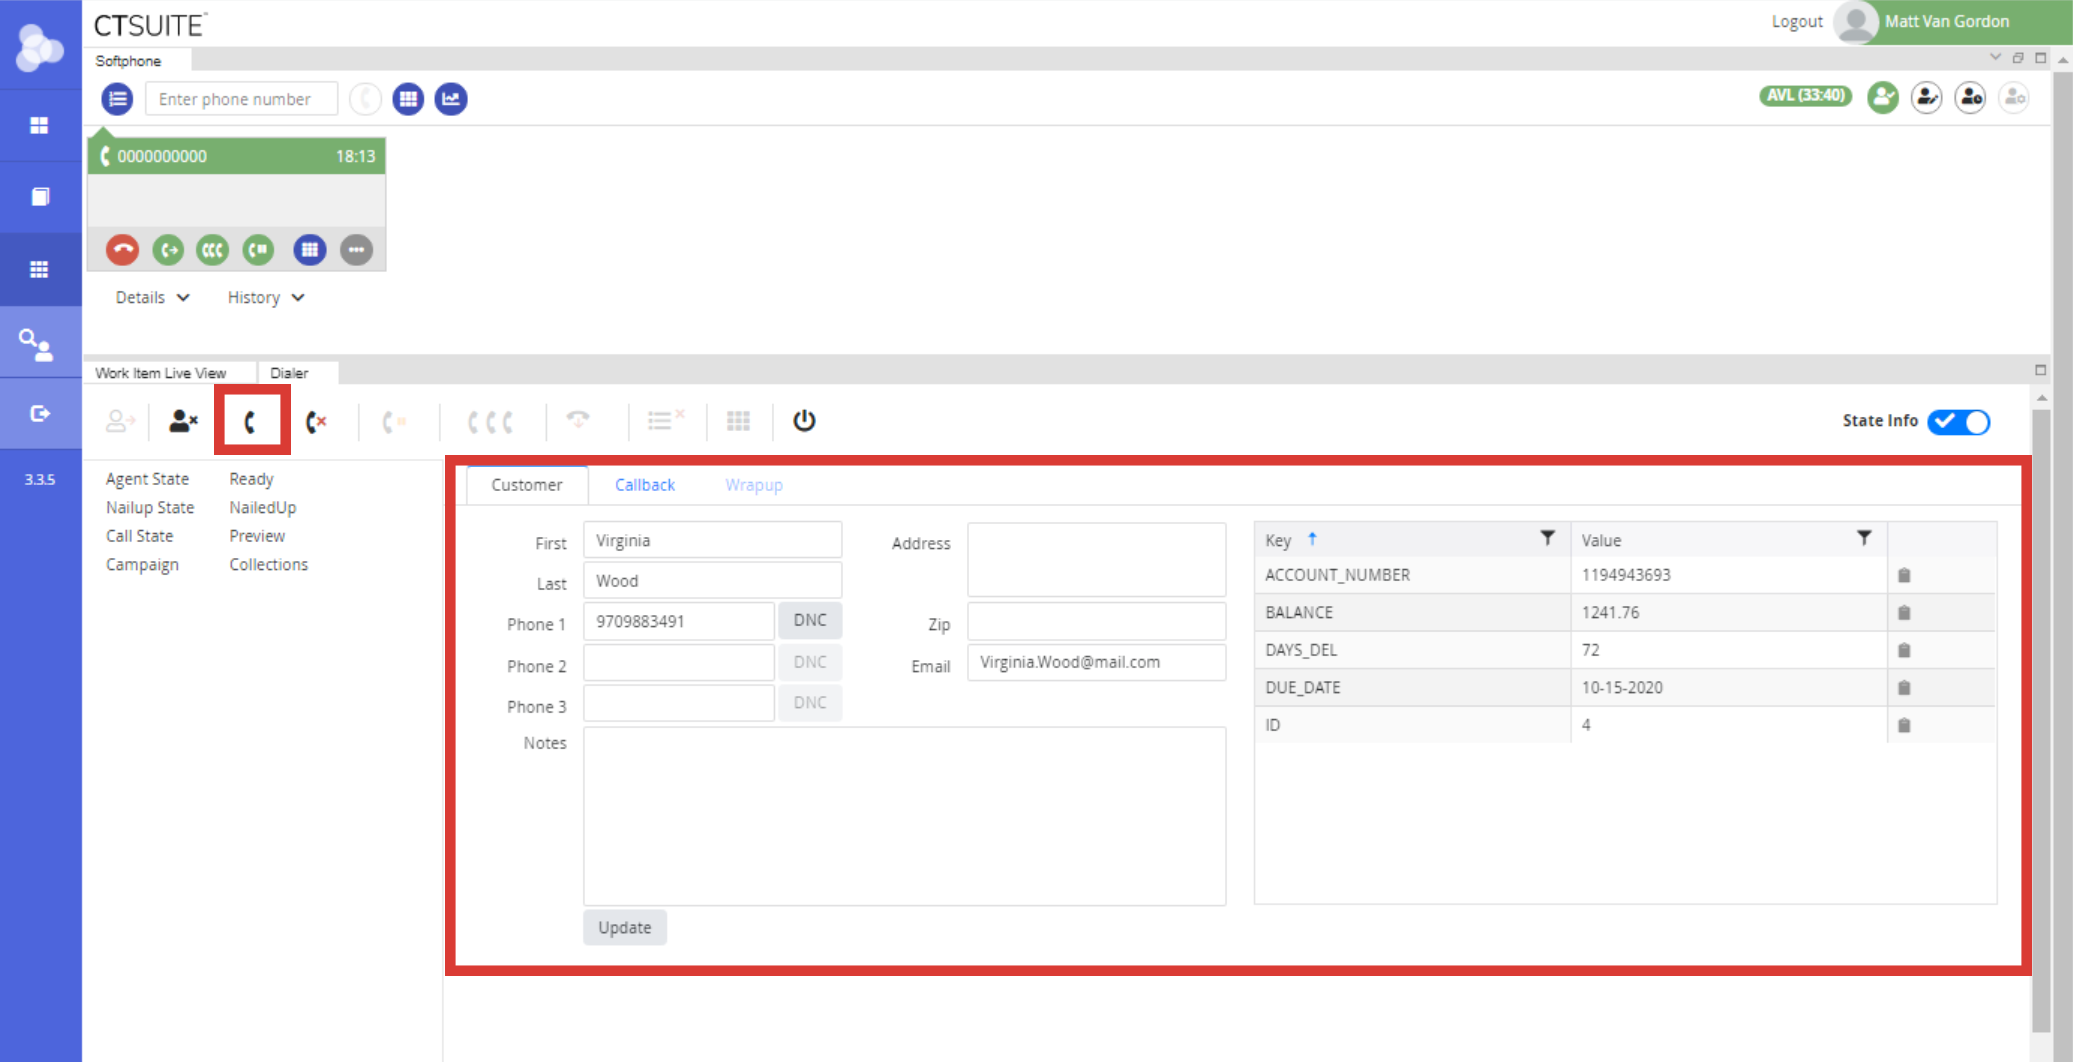
Your NailUp state will show "PendingNailUp after the ready button has been pressed, and until the agent answers the NailUp call. After answering, the NailUp state will change to "NailedUp."
The call state and campaign will populate once you are NailedUp.
POM status in Classic layout

POM status in Flex layout
If you're working a preview campaign, the customer information loads to the POM widget for the agent to review.
If you're working a predictive campaign, the customer information loads to the POM widget at the same time the customer's call is joined.
For more information on campaigns in POM, see Modes.
Once ready, the agent can click the Call button.
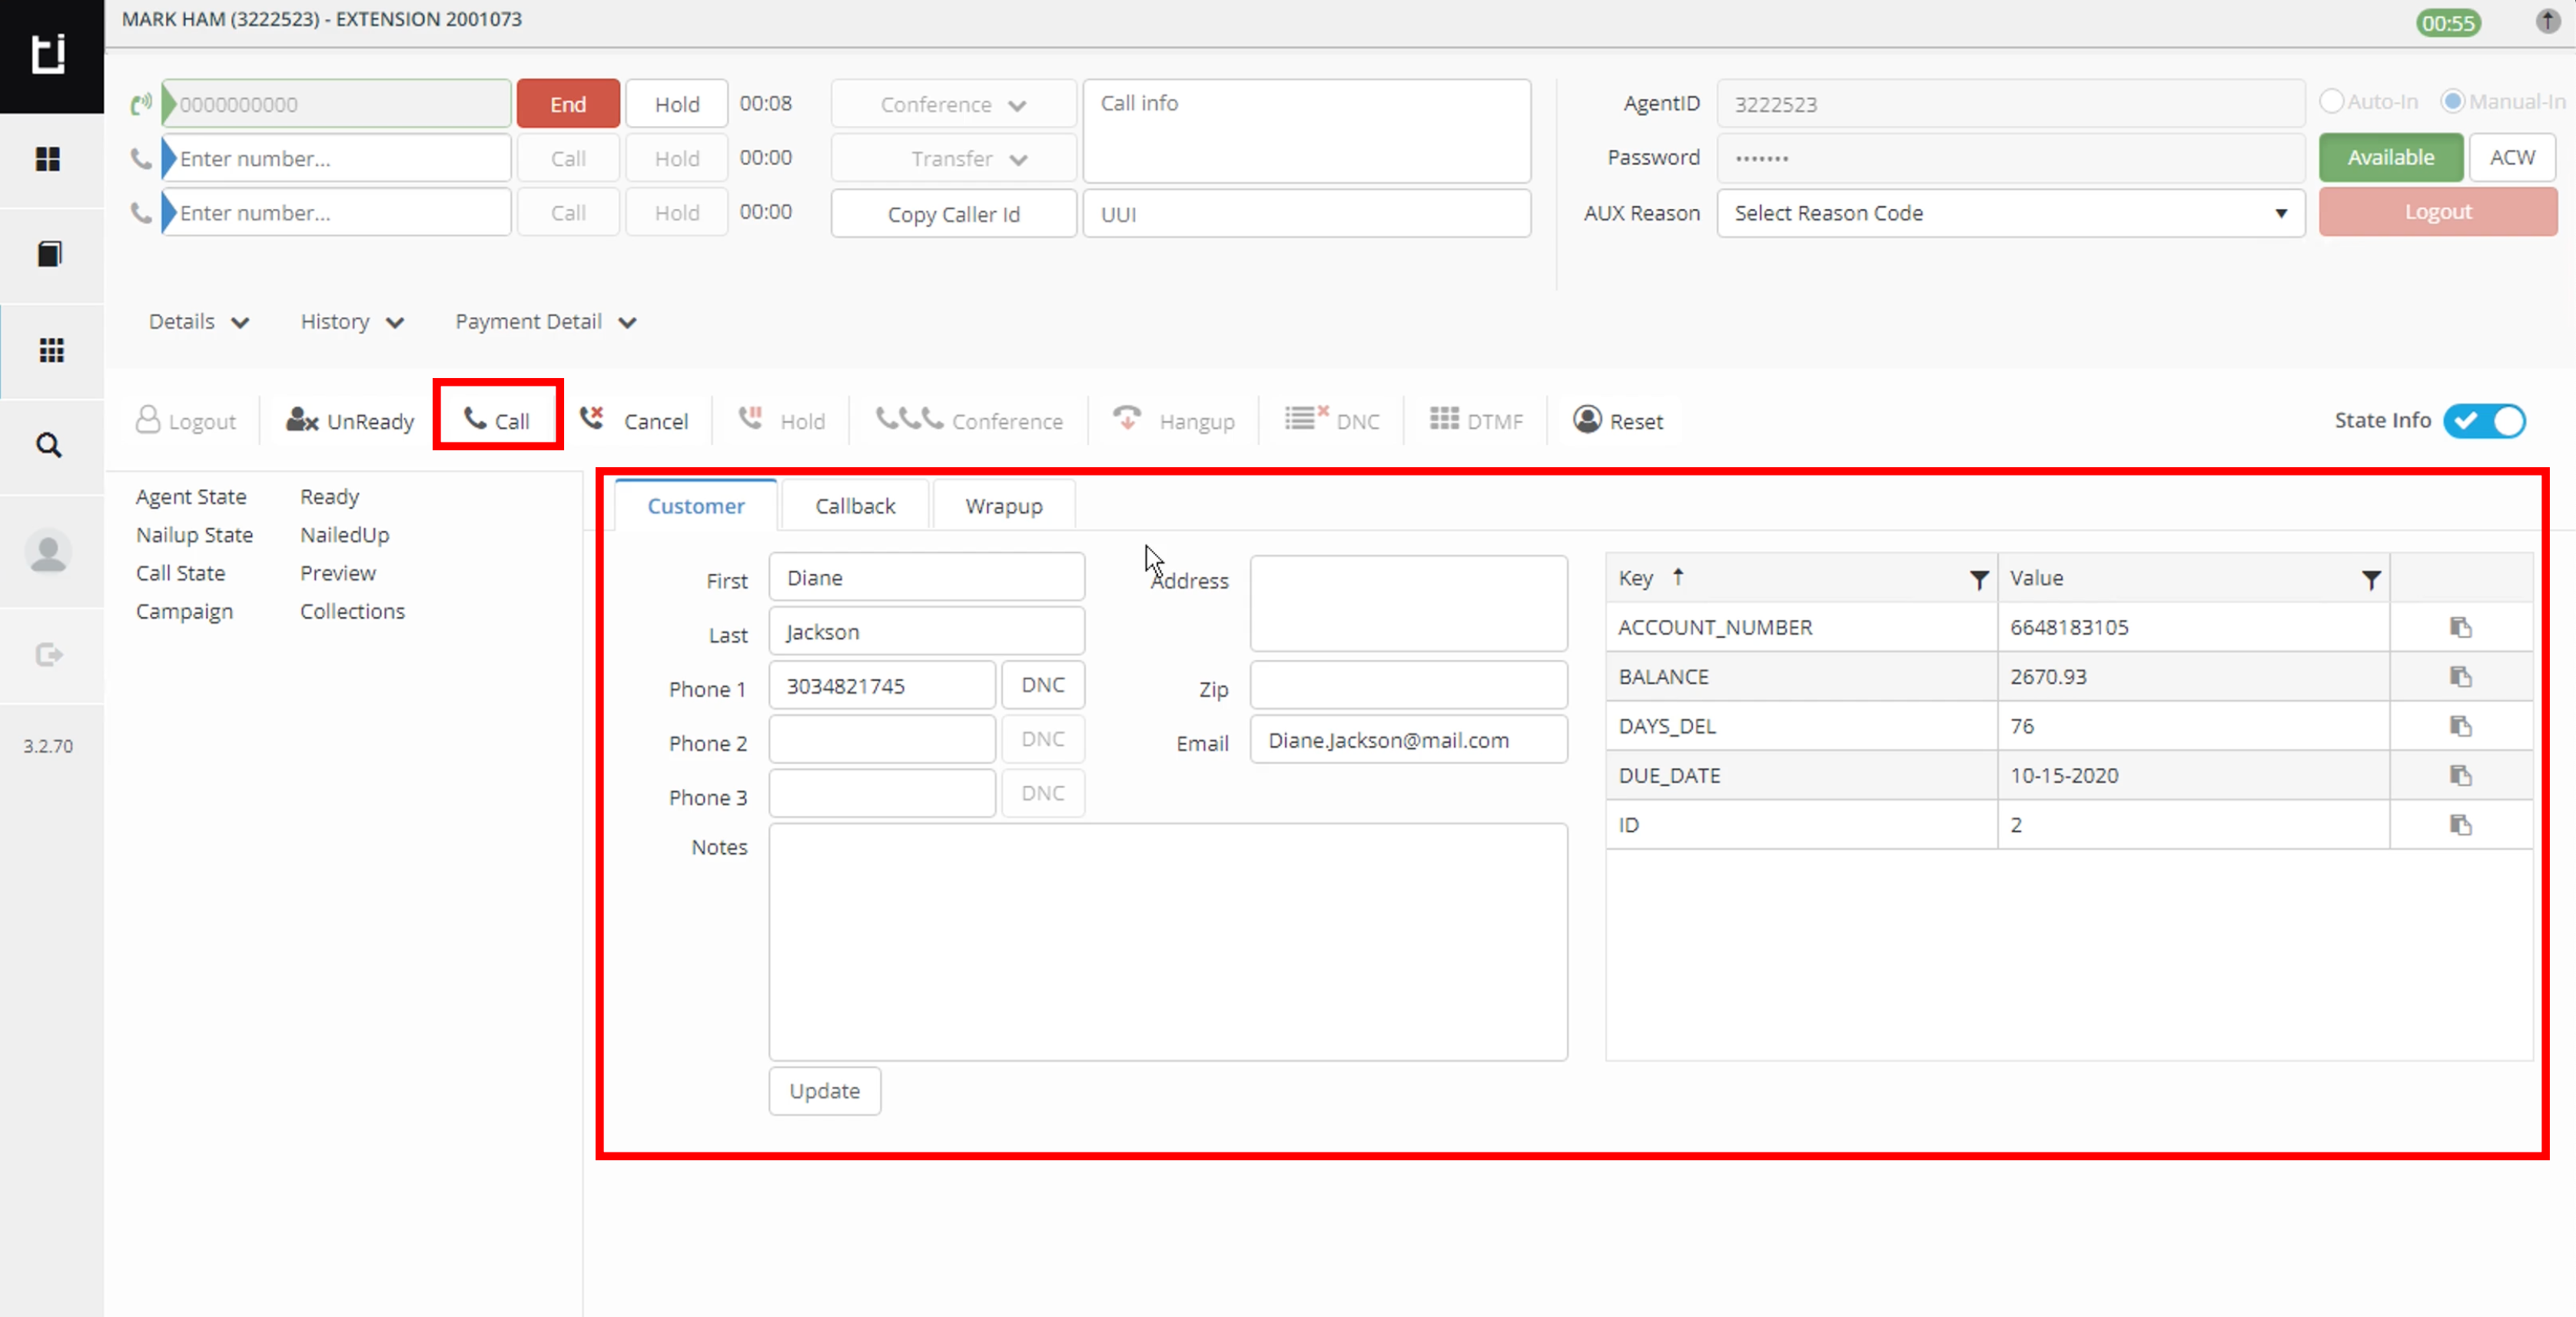
Preview campaign in Classic layout
Preview campaign in Flex layout
To stop POM from sending calls, click the UnReady button which signals POM to stop and drops the NailUp call
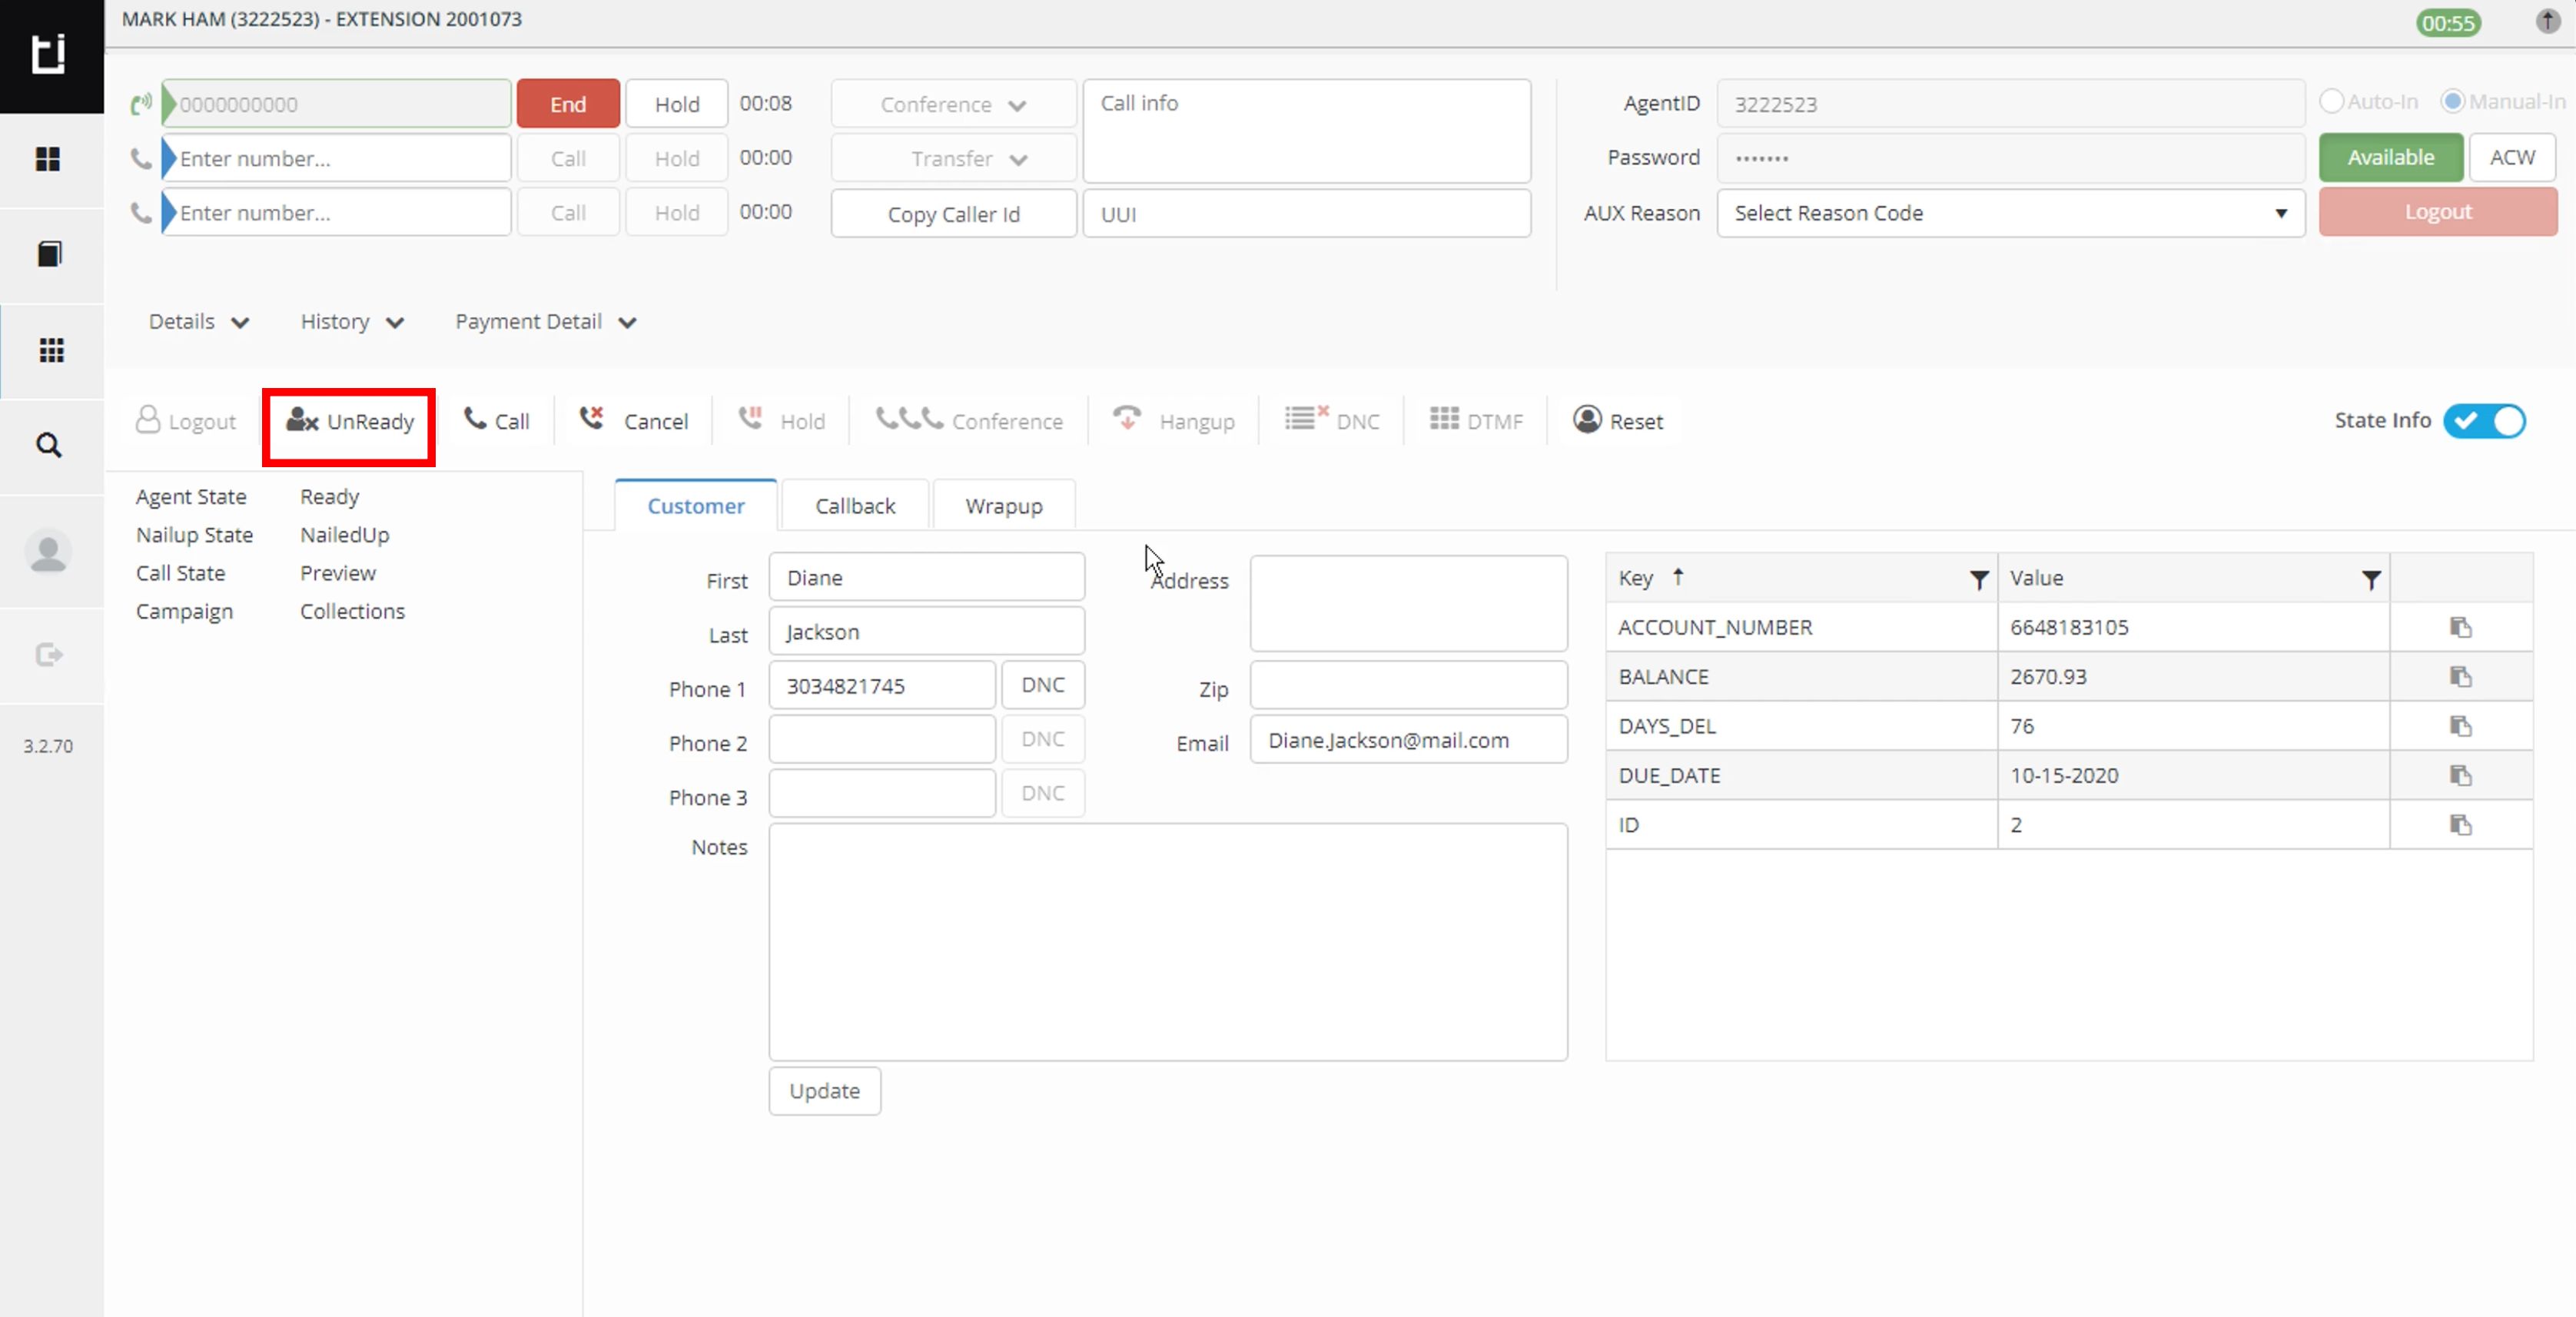
Go UnReady in Classic layout
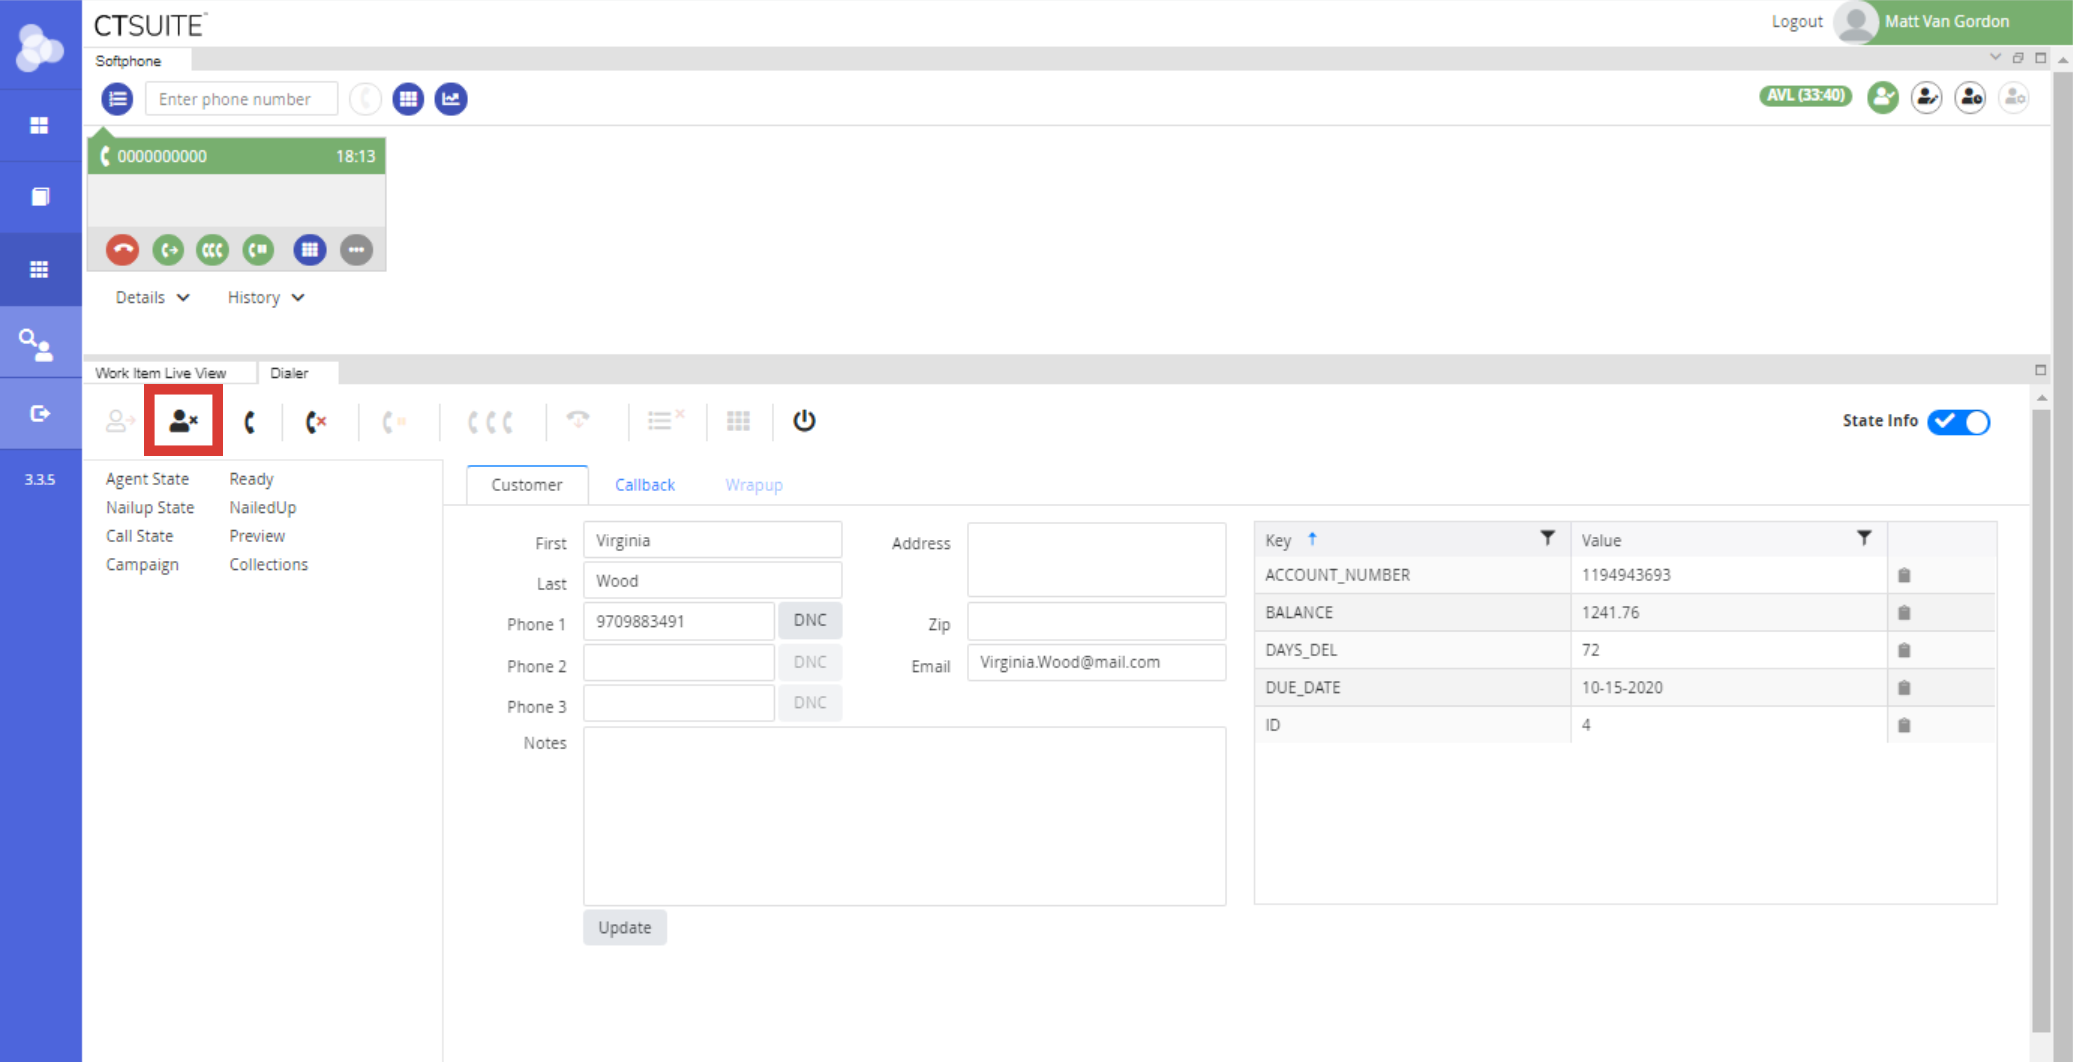
Go UnReady in Flex layout
Call Control
Hold a Call
To put a call on hold, click the Hold button in the POM call control. The button will change to say "Unhold" or "Resume". To resume the call, click Unhold/Resume.
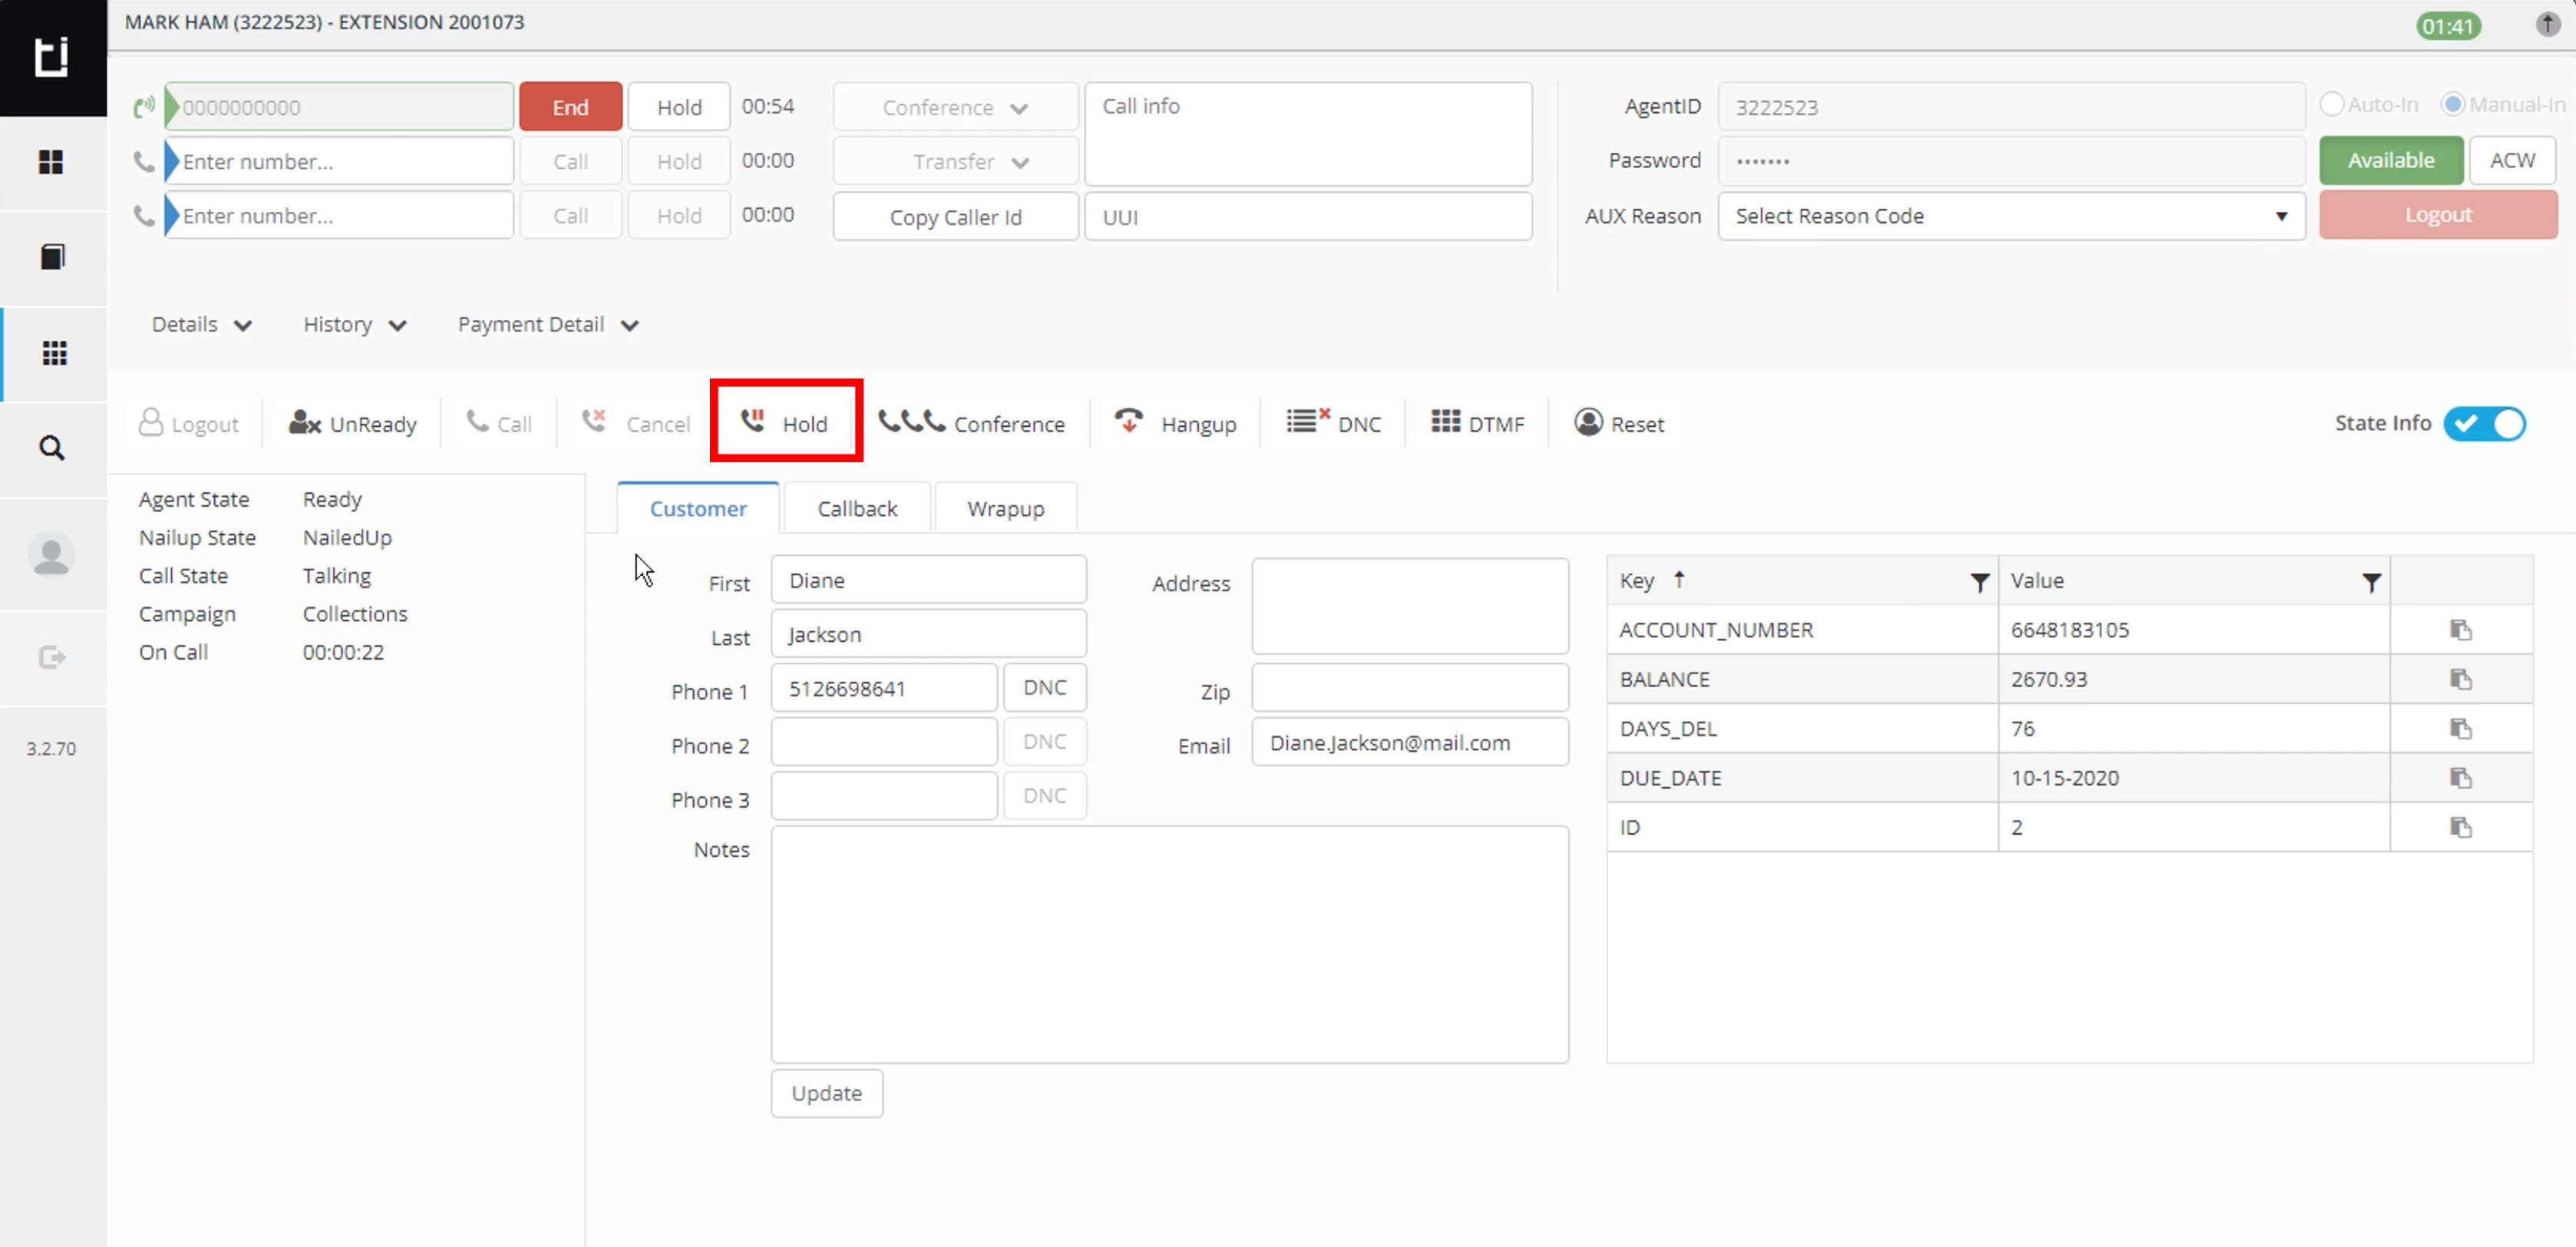
Placing a call on hold in Classic layout
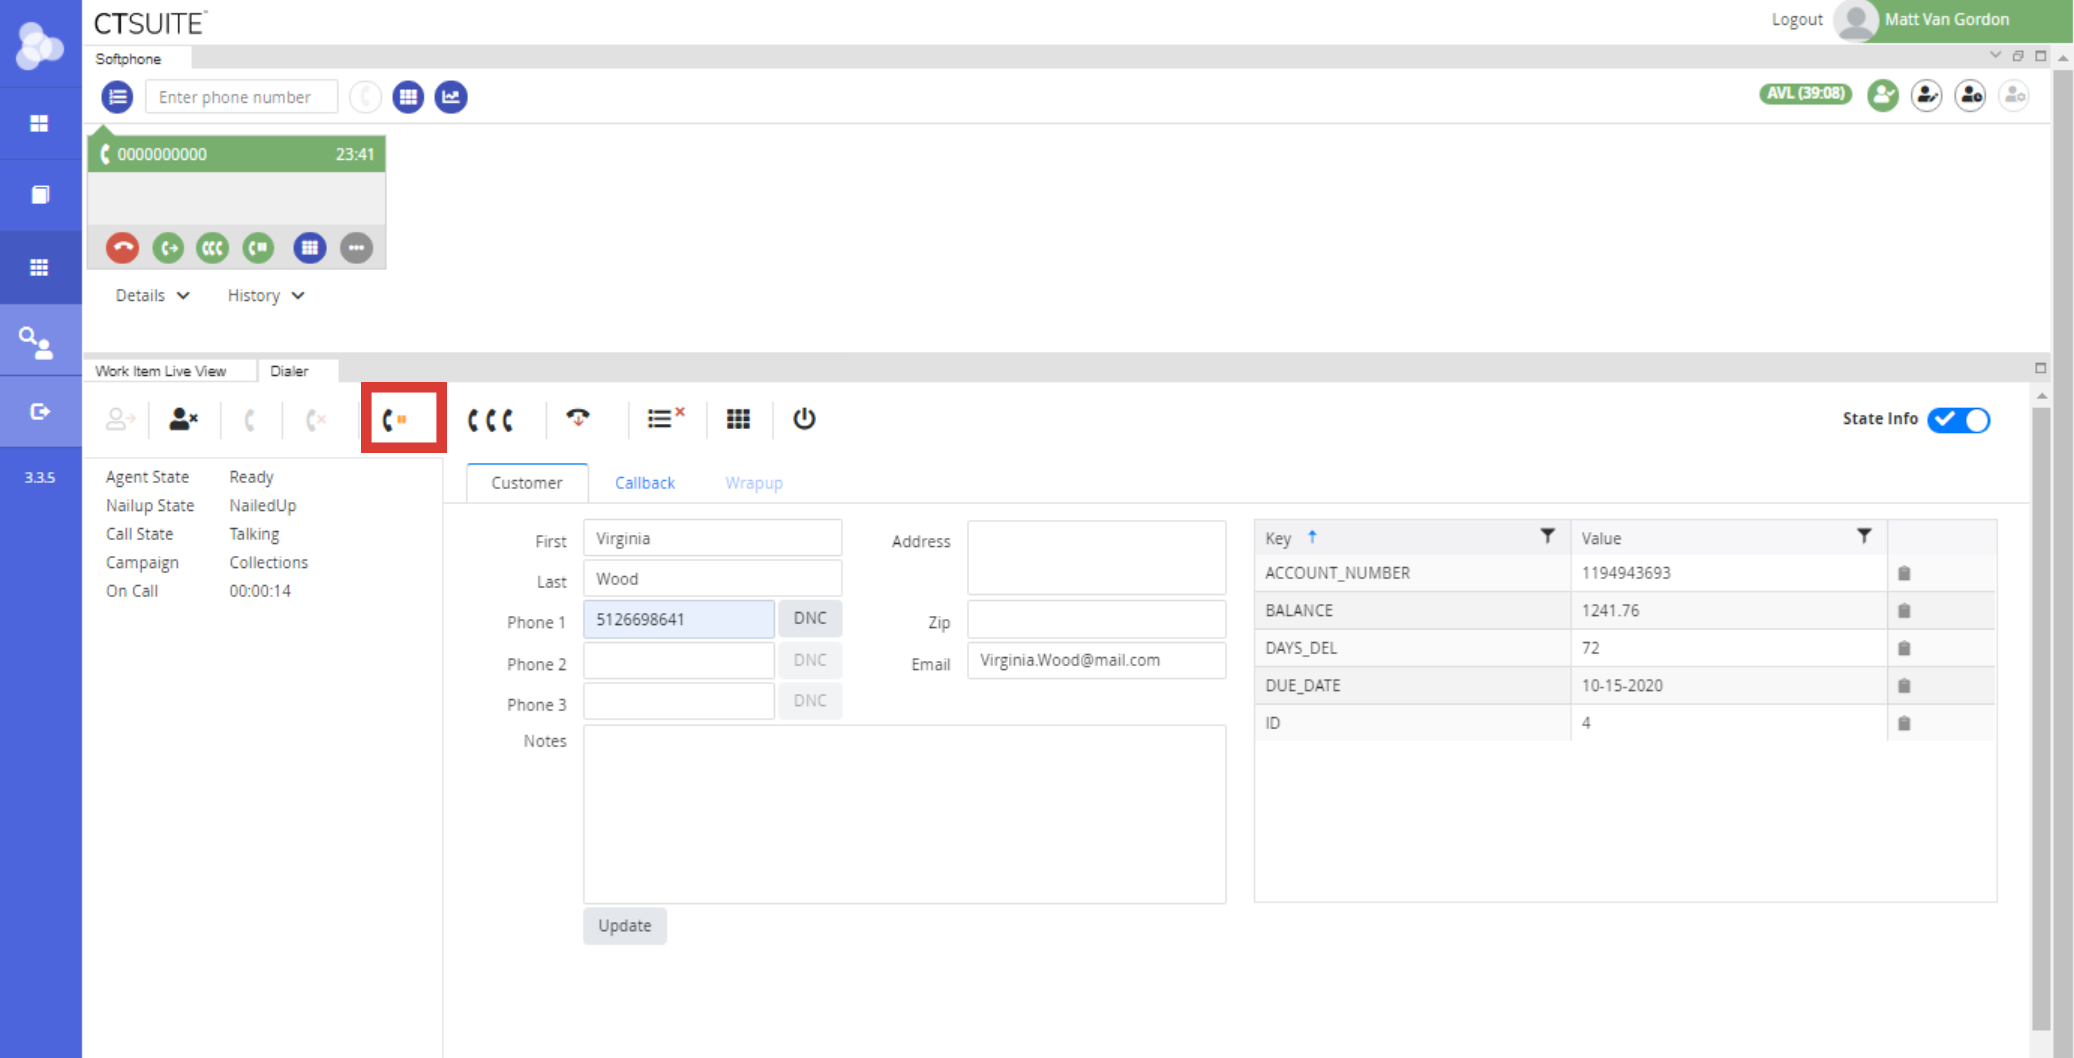
Placing a call on hold in Flex layout
Conference or Transfer a Call
In order to initiate a conference or transfer, the agent will click the Conference button. This opens a conference/consult window.
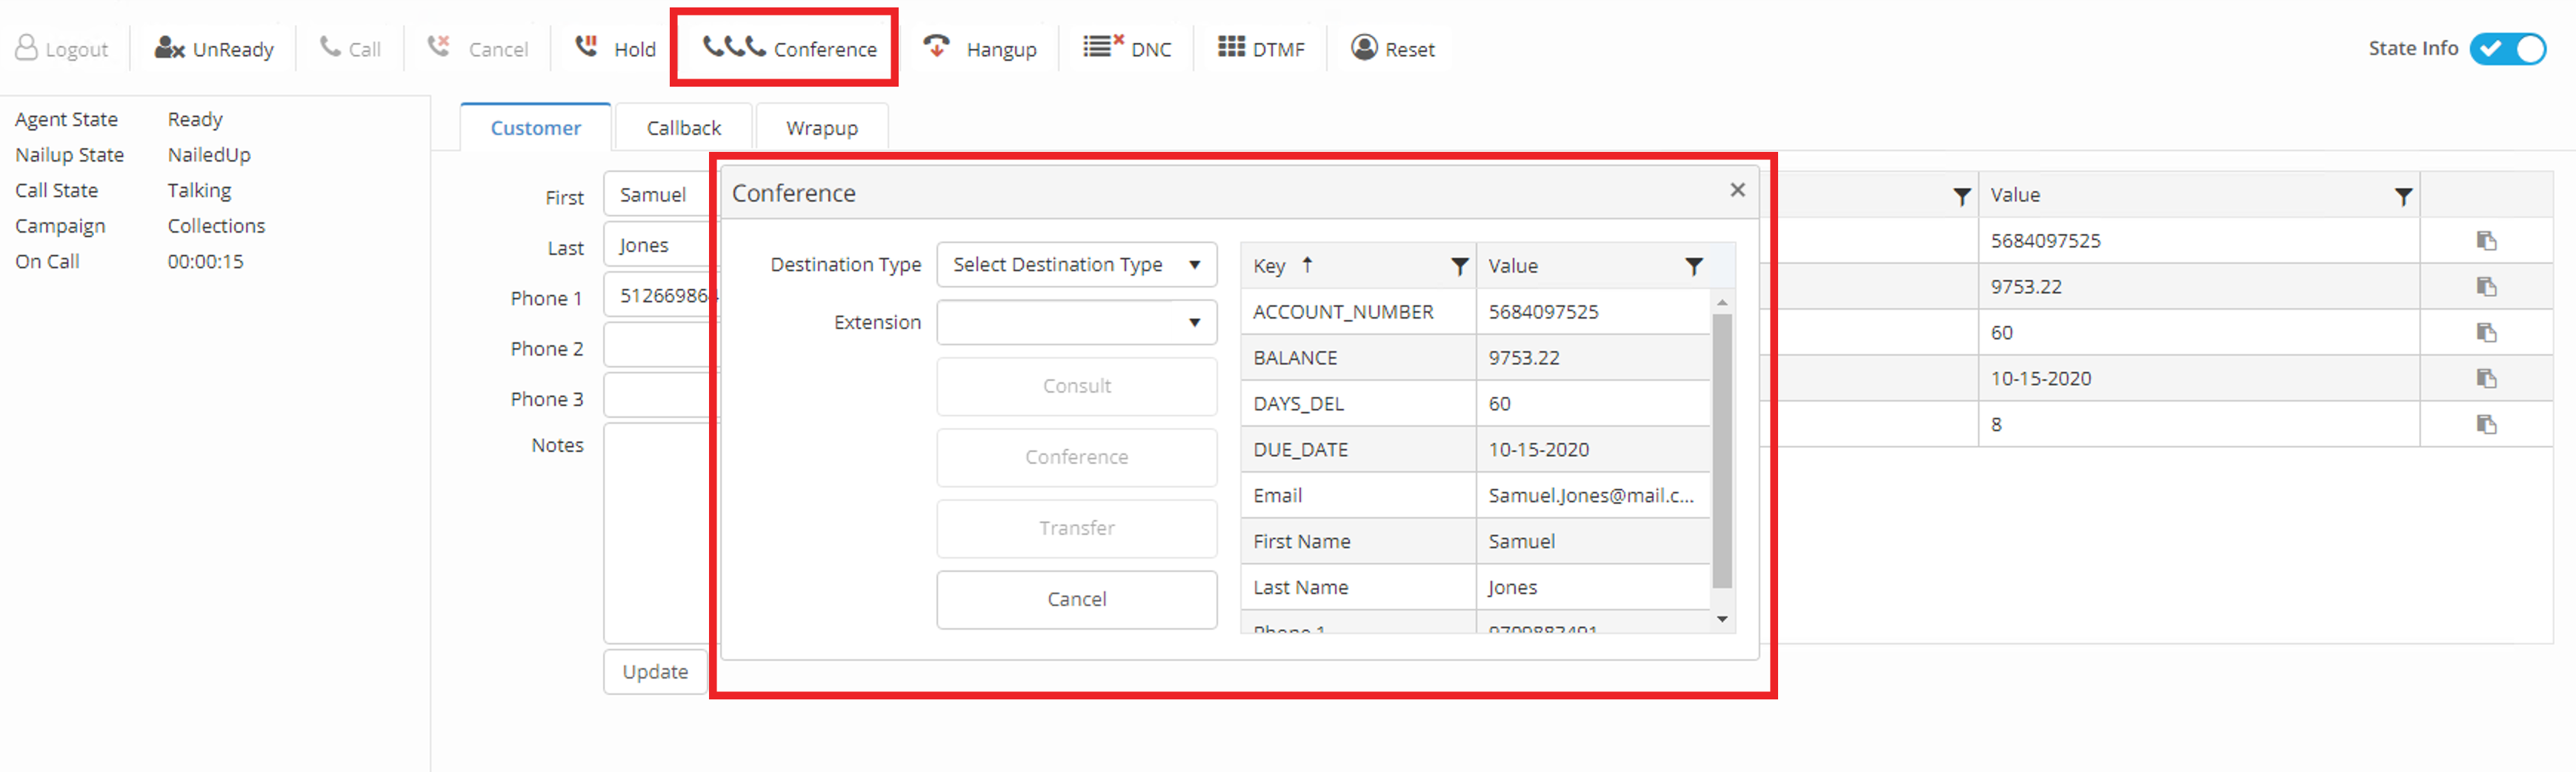
Conferencing a call in Classic layout
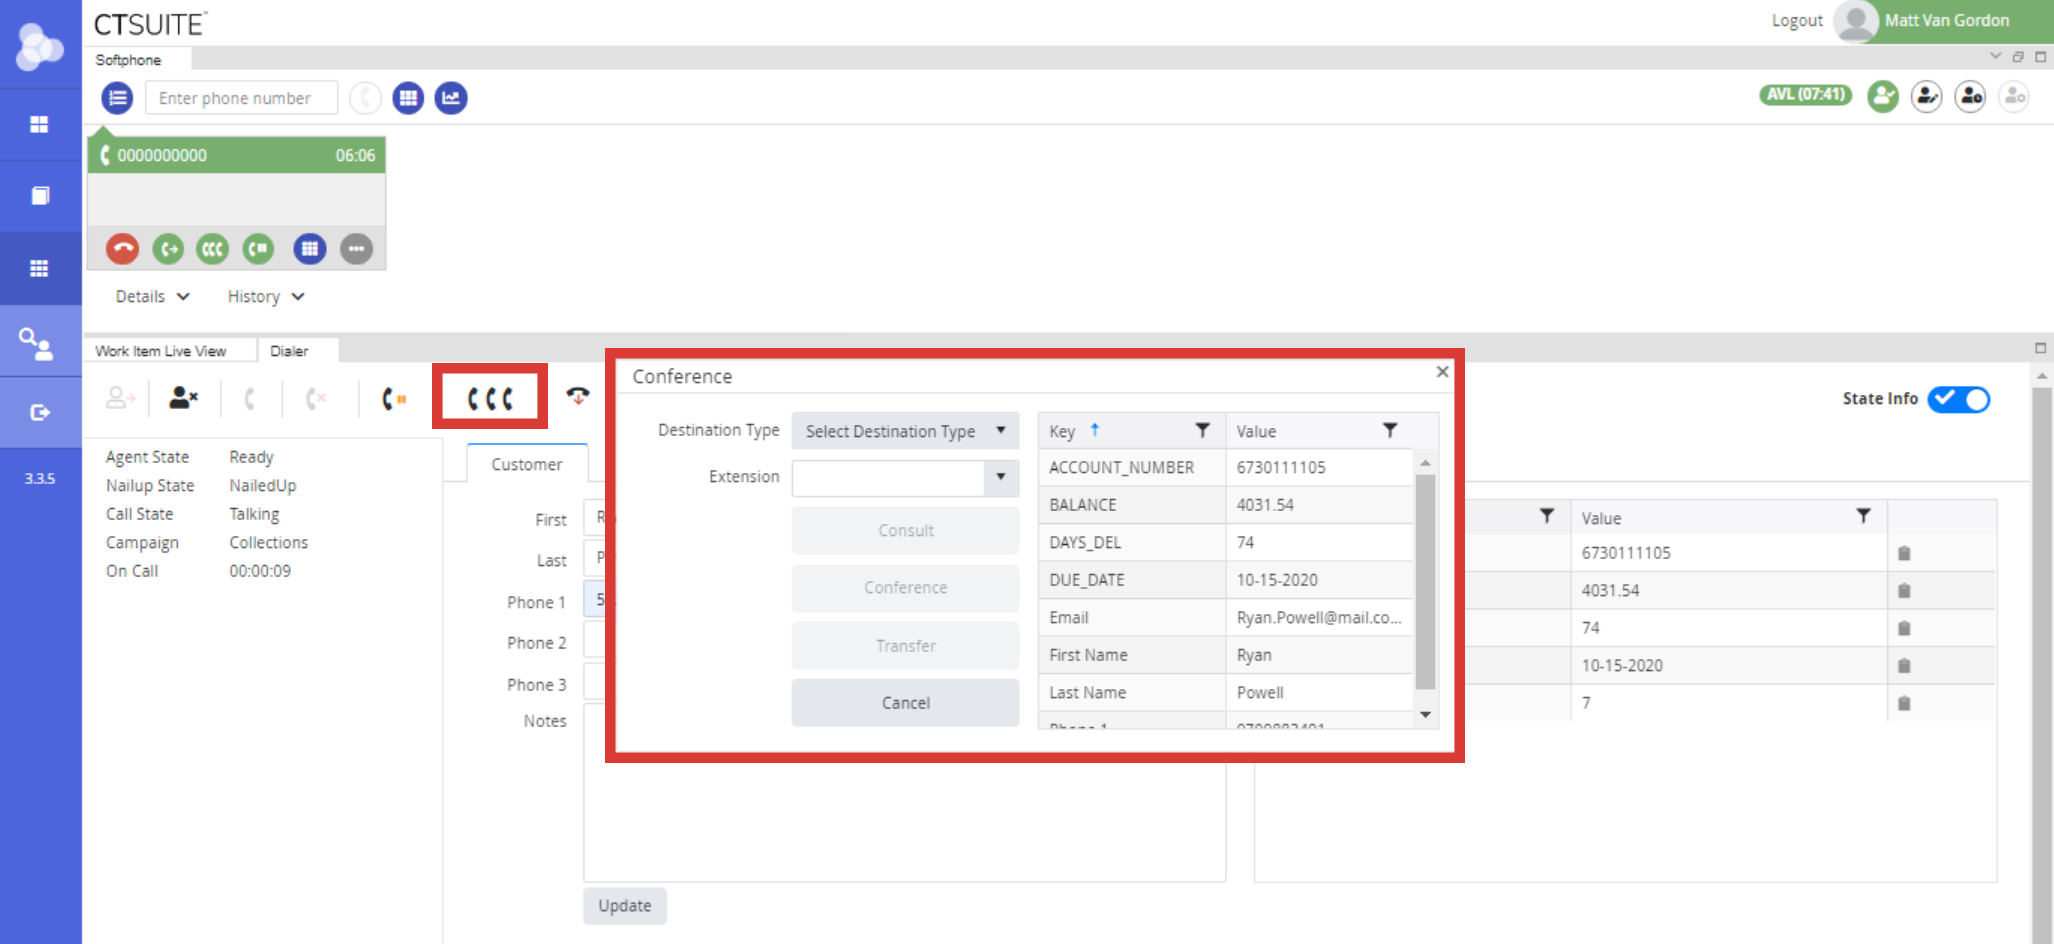
Conferencing a call in Flex layout
The first step in a conference or transfer in POM is to dial the agent or external party. The Agent must select a Destination Type and select or enter an Extension or phone number, then click the Consult button.

Clicking Cancel before dialing in the conference window will close the conference window.

Once the Agent is in a Consult with a third party, they have the option to Conference the original contact into the call by clicking the Conference button, OR the agent can hang up with the third party by clicking Consult Cancel (keeps the conference window open) or Cancel (closes the conference window).

If the agent clicks the Conference button to put all 3 parties on the same line, the agent now has the option to transfer the original contact to the third party by clicking the Transfer button (closes conference window and removes agent from the call, putting the agent in the wrap up state), OR the agent can hang up with the 3rd party while keeping the original contact on the line by clicking the Cancel button (closes the conference window, hangs up on party 3 but keeps agent connected to original contact).
*do not click consult cancel - it will throw an error and gray out the conference/transfer buttons (bug)
The POM 3.0.4 version and above support a Destination Type of “External” for Transfer. The Agent can only Conference in that scenario.
You may need to dial leading digits when calling external. +9 or +9-1, for example.
End a Call
To end a POM call, be sure to use the Hangup button in the call control toolbar, as clicking End in the softphone will end the NailUp call, and move the agent to UnReady.
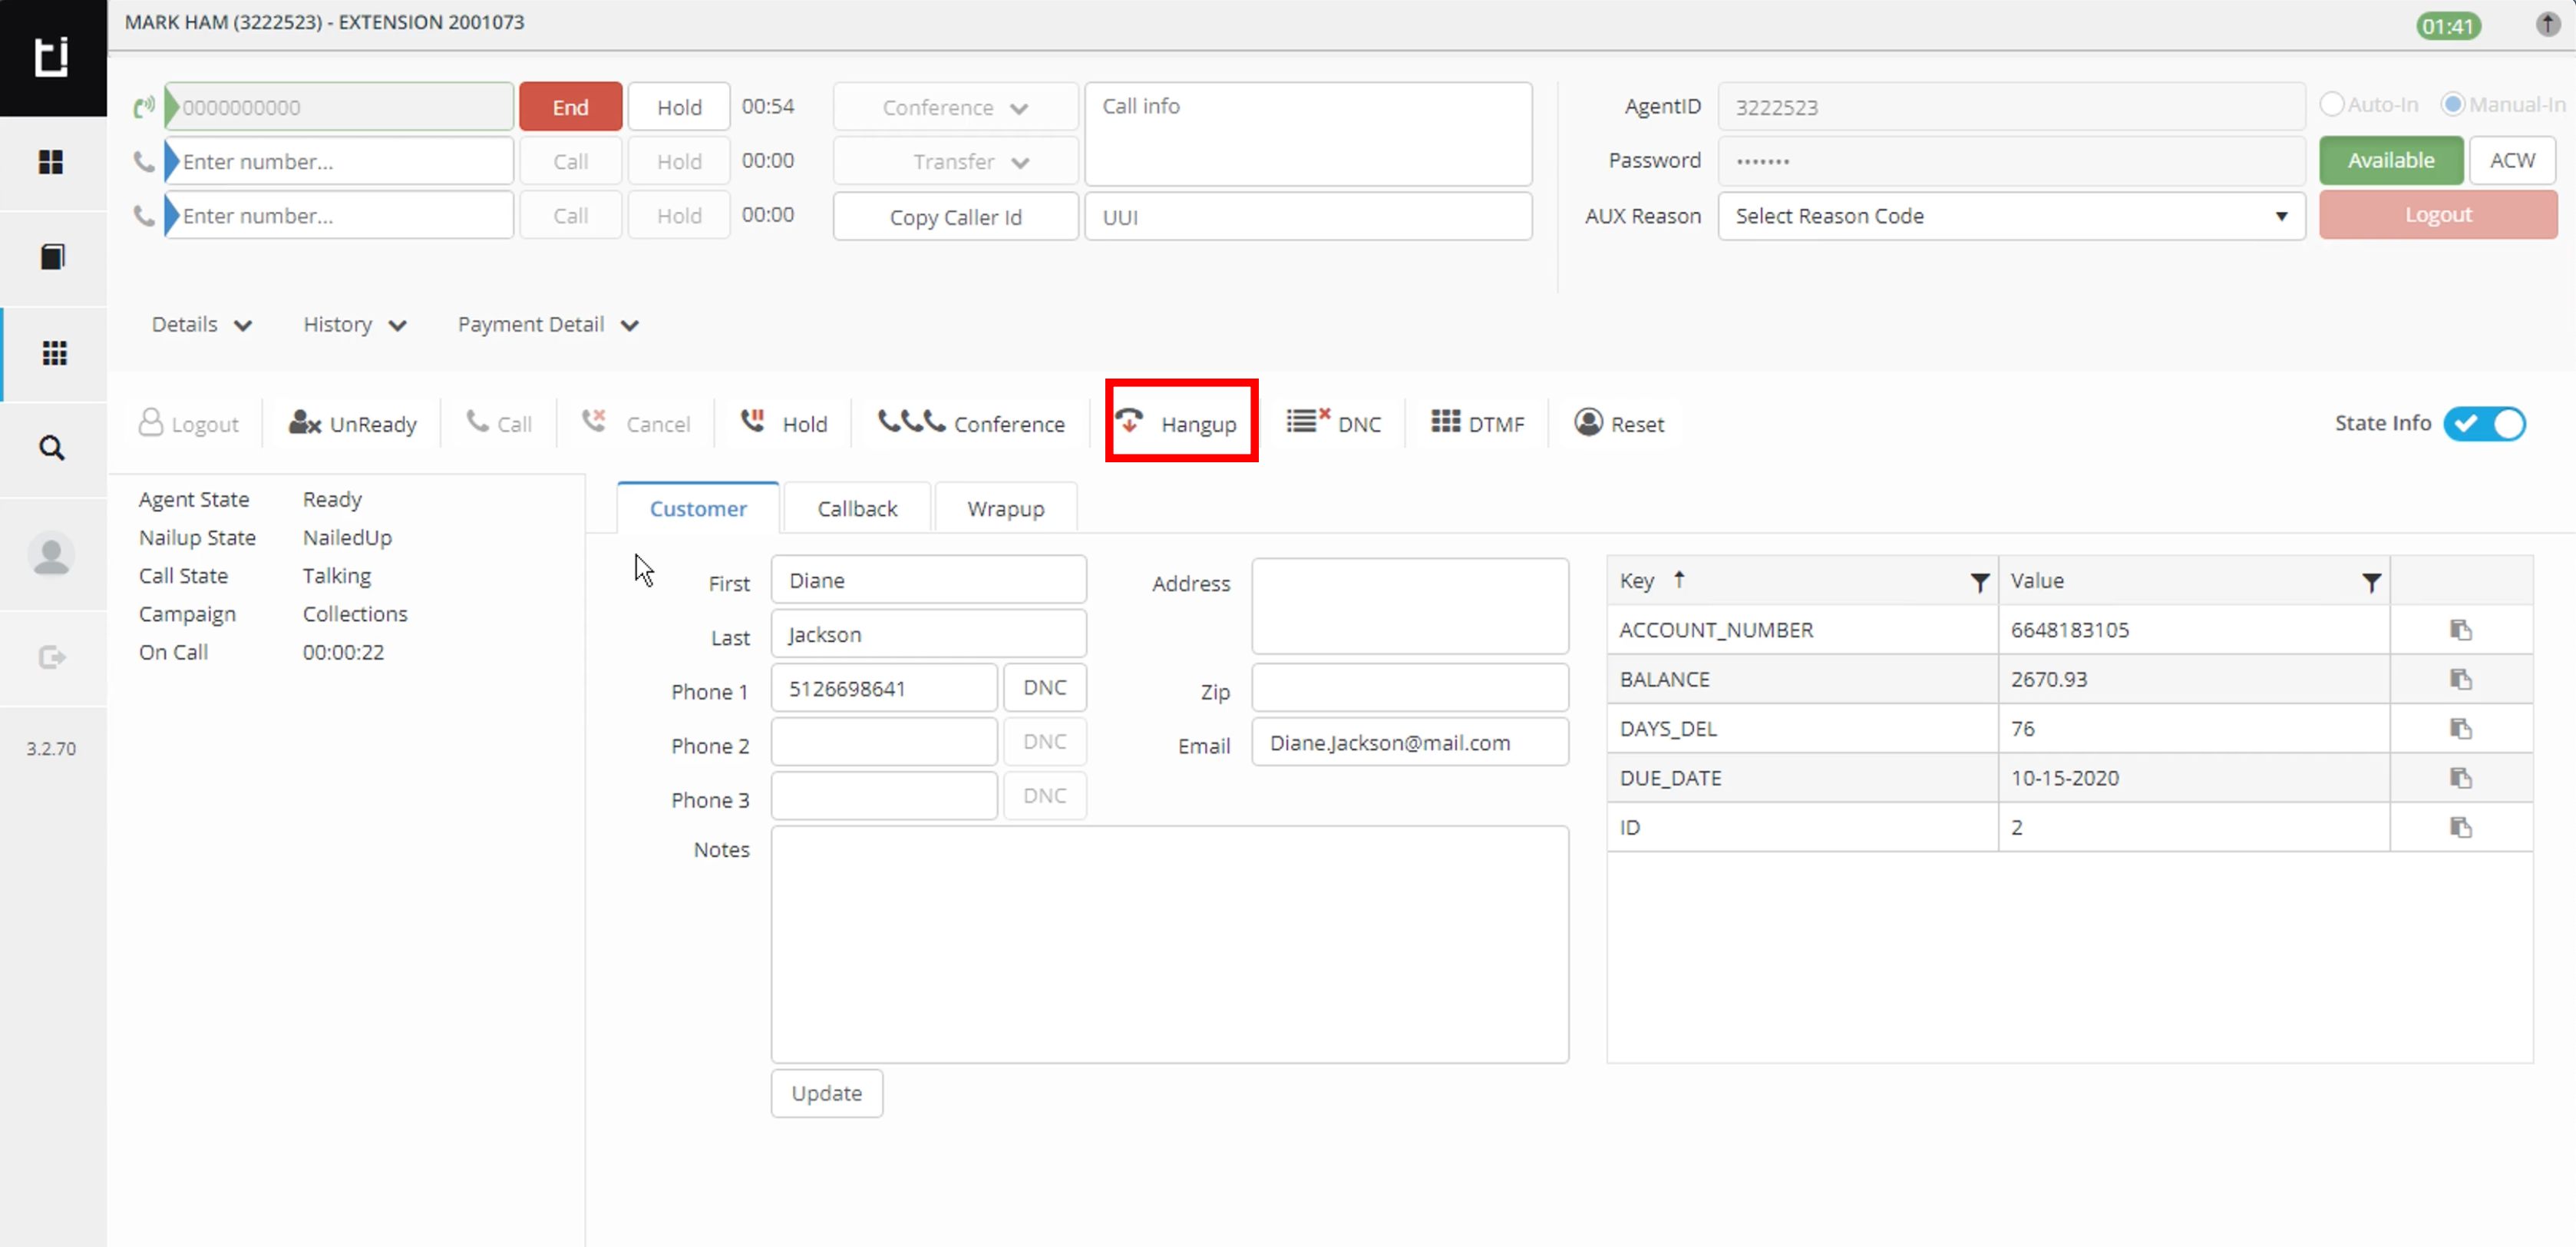
Ending a call in Classic layout
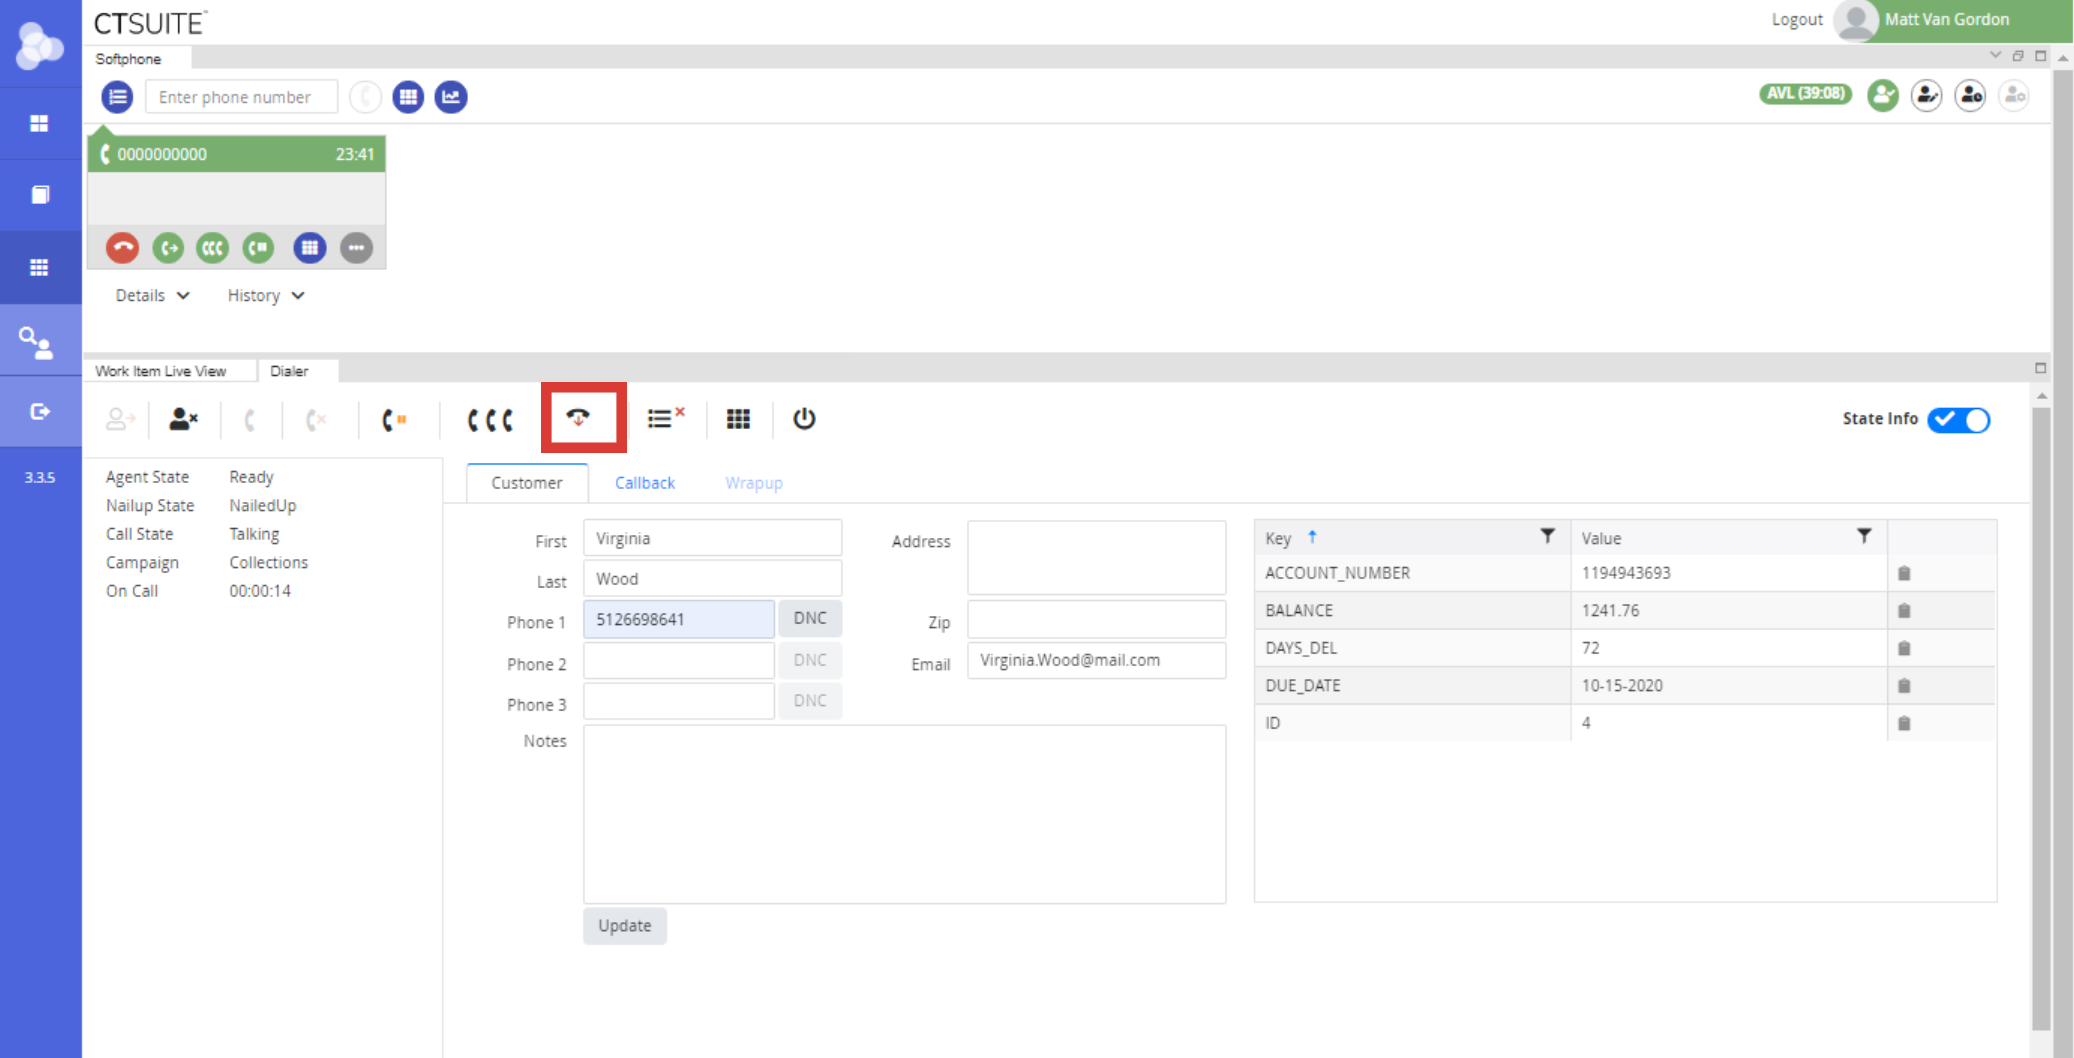
Ending a call in Flex layout
Do Not Call List
There are two ways to add a customer to the Do Not Call List
- Clicking DNC in the call control toolbar adds the active number
- Clicking DNC next to the number in customer information adds the number to the left of the button
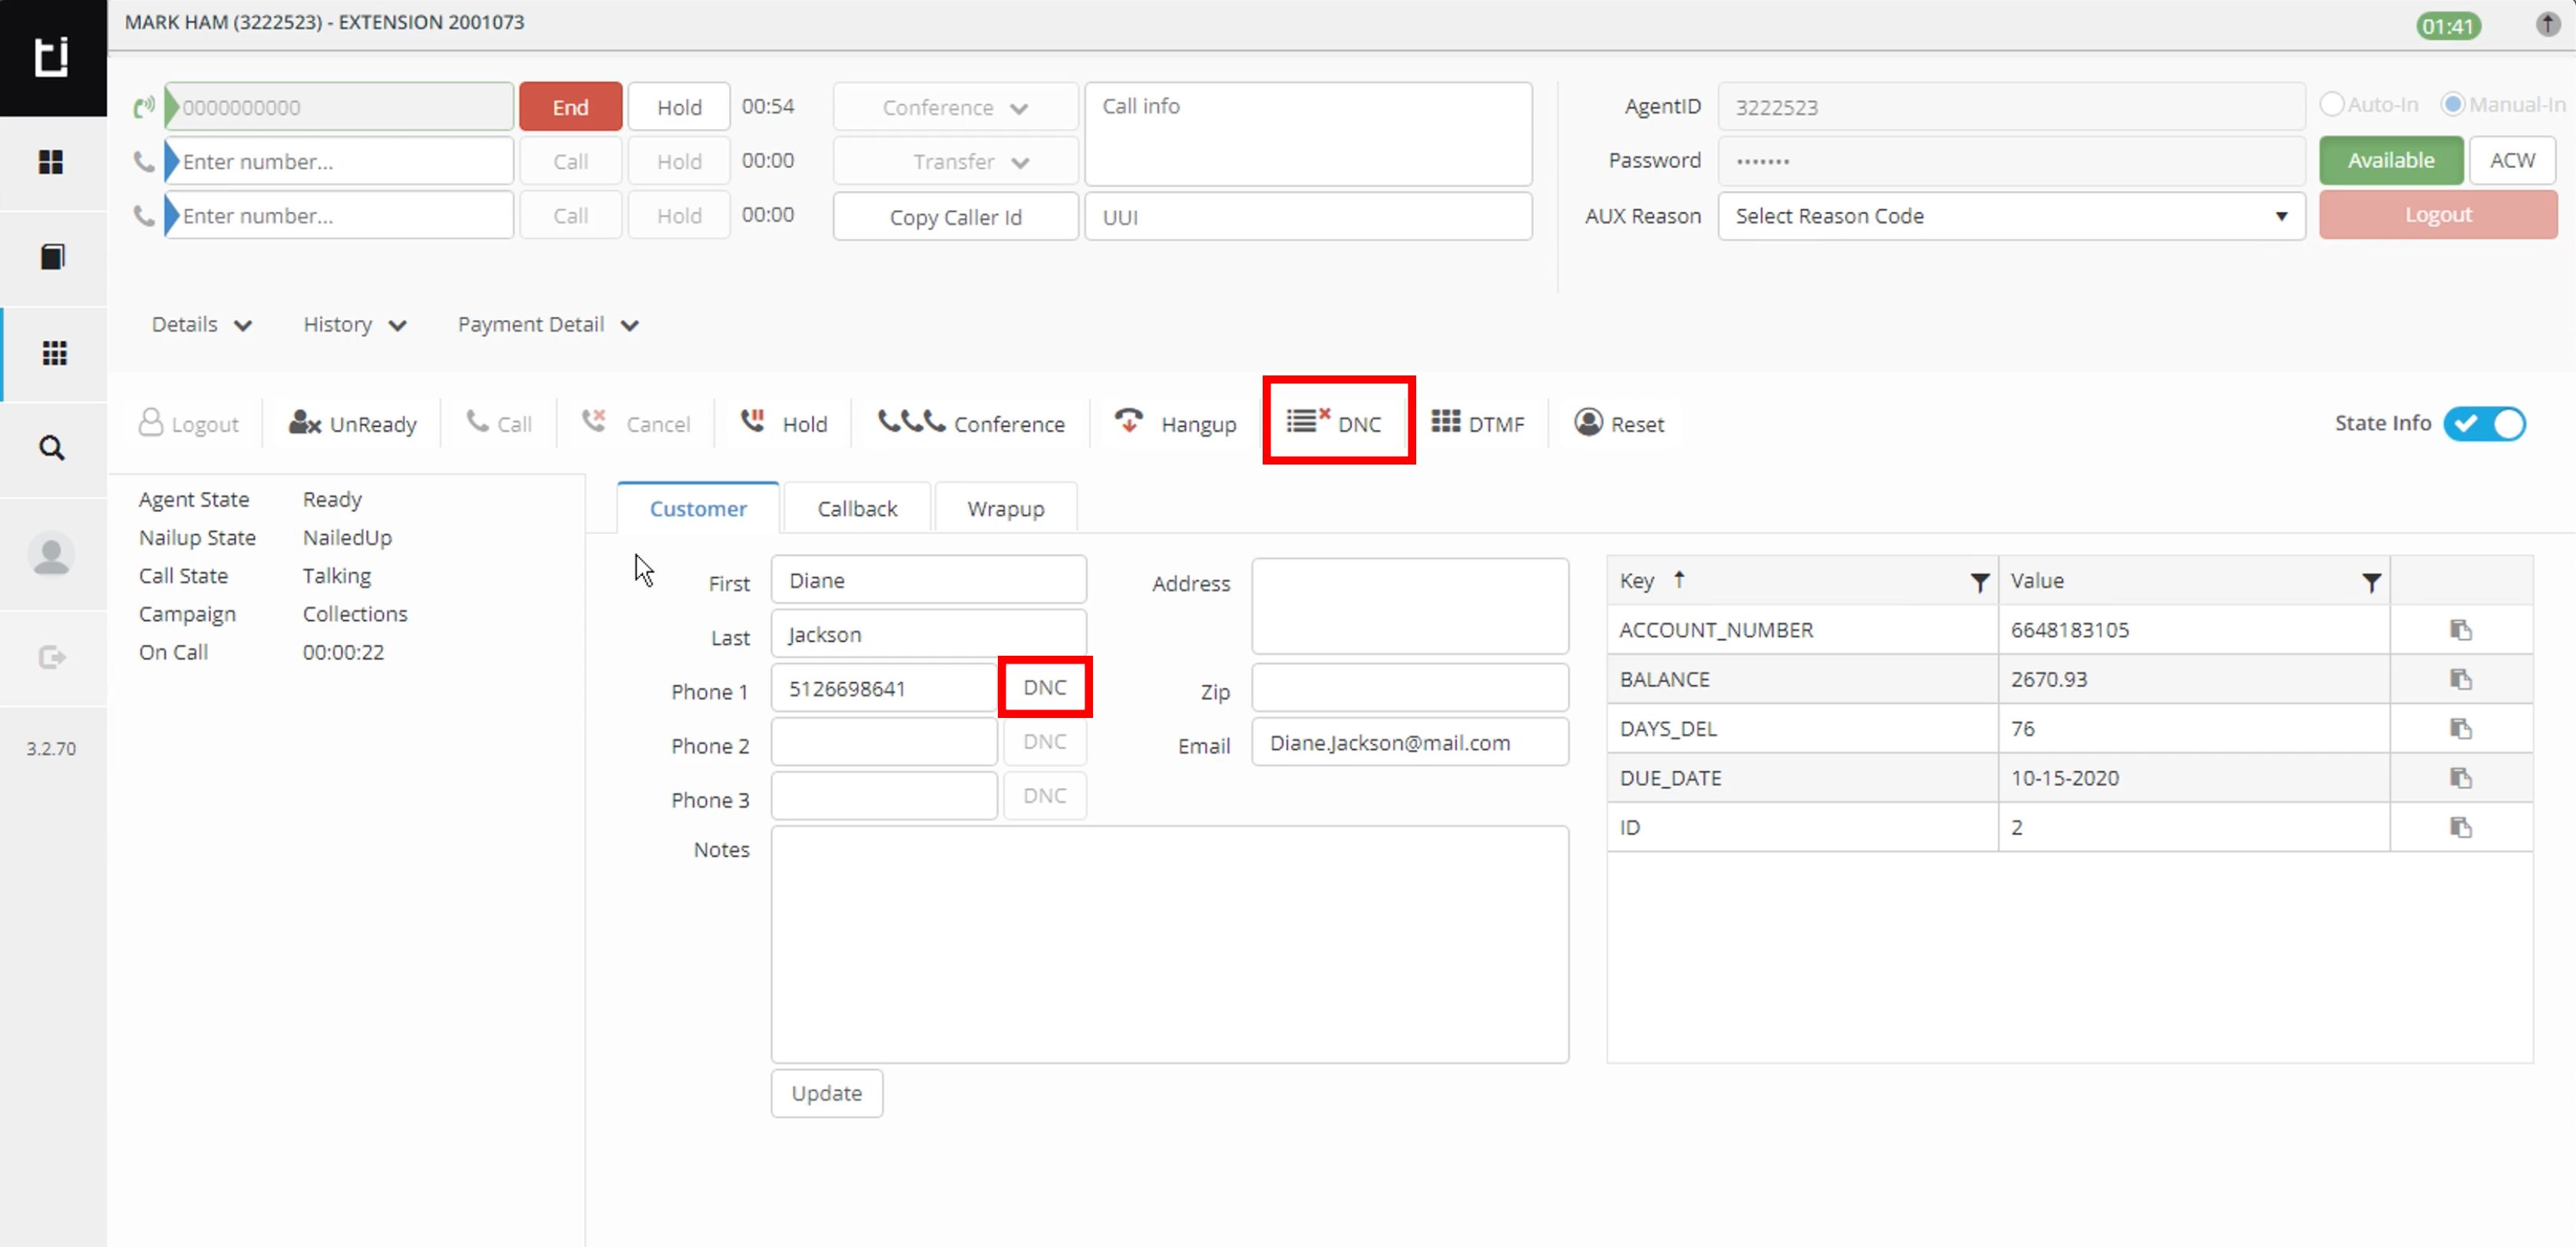
Add a number to Do Not Call List in Classic layout
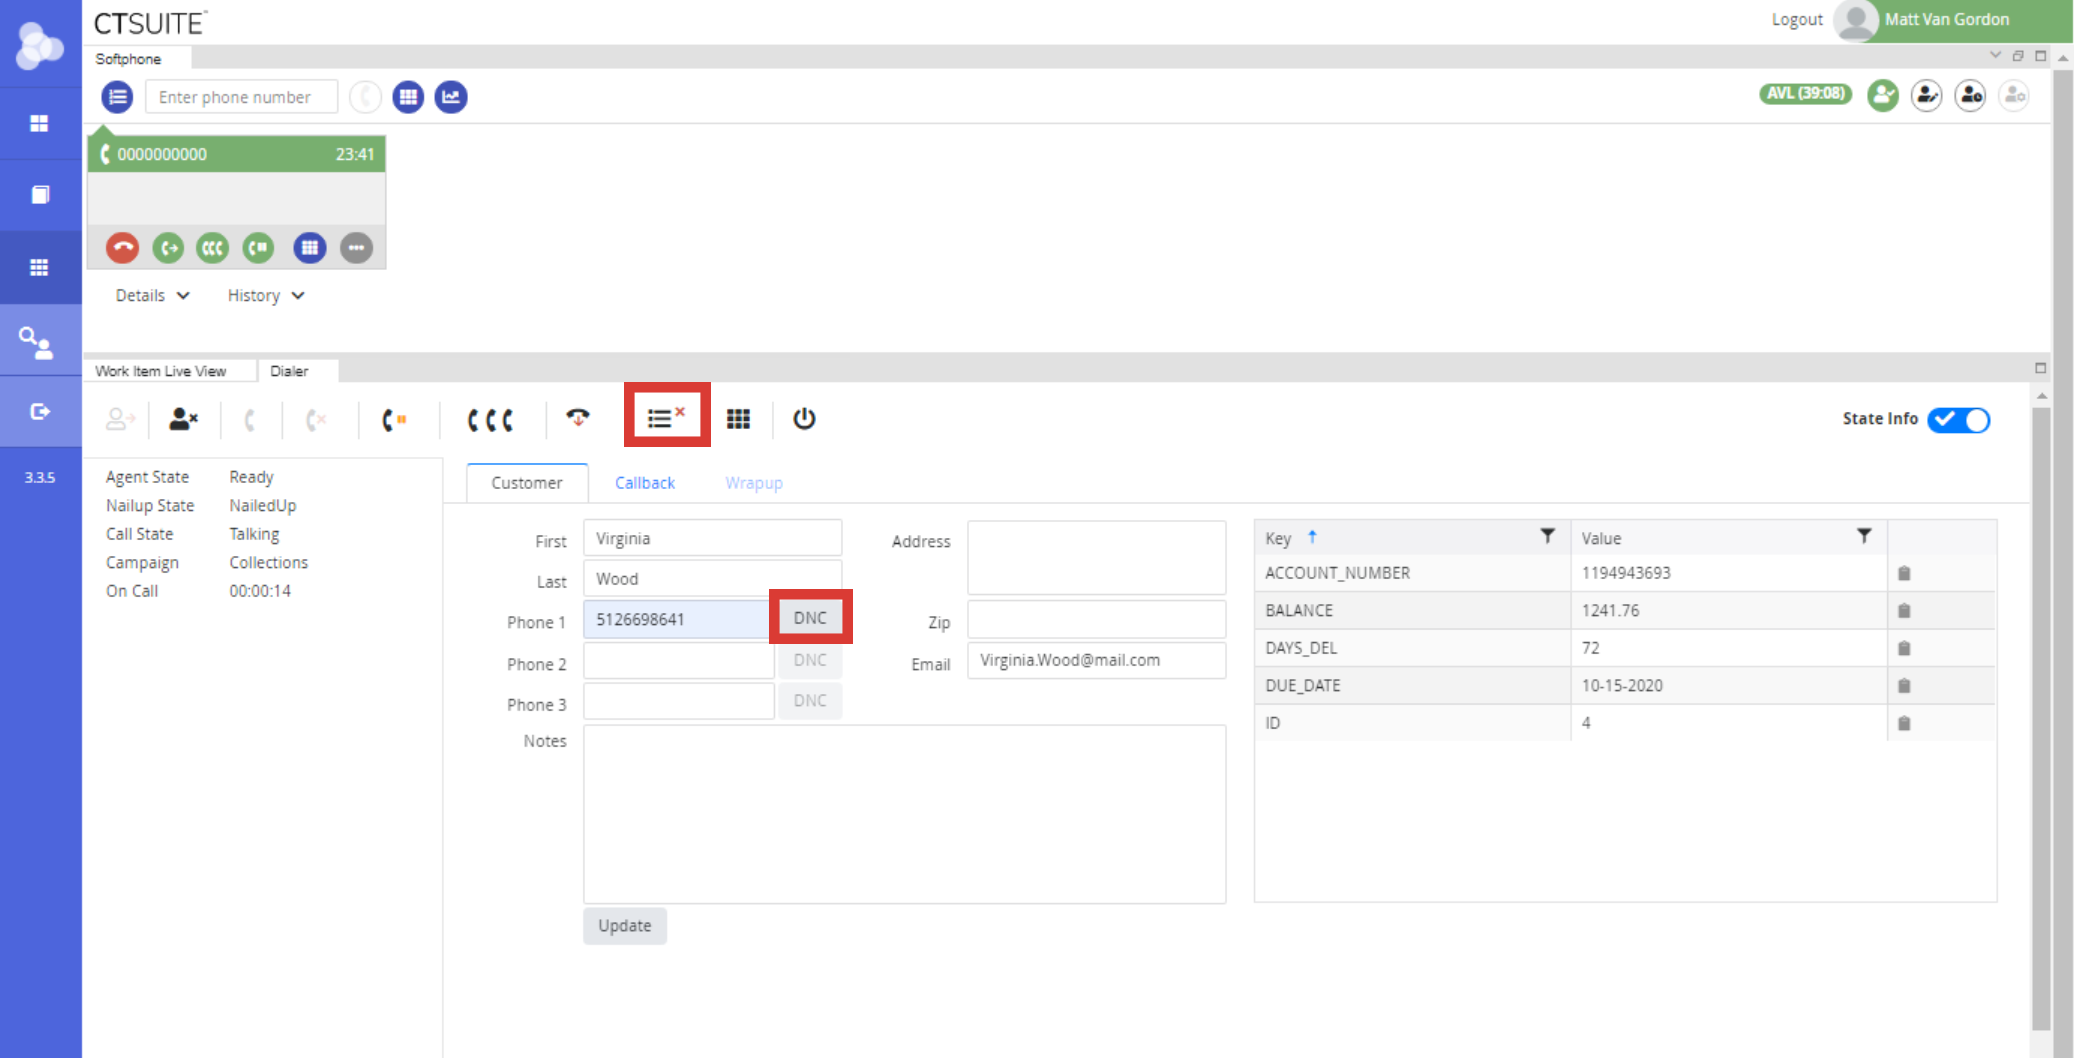
Add a number to Do Not Call List in Flex layout
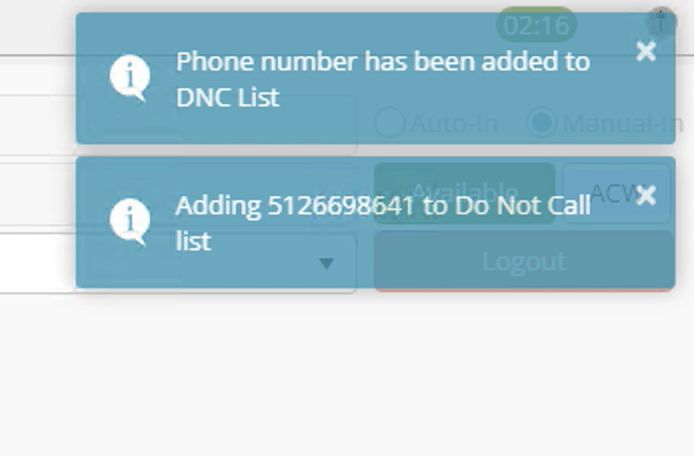
A notification will appear on the top right of the screen stating that the number has been added to DNC.
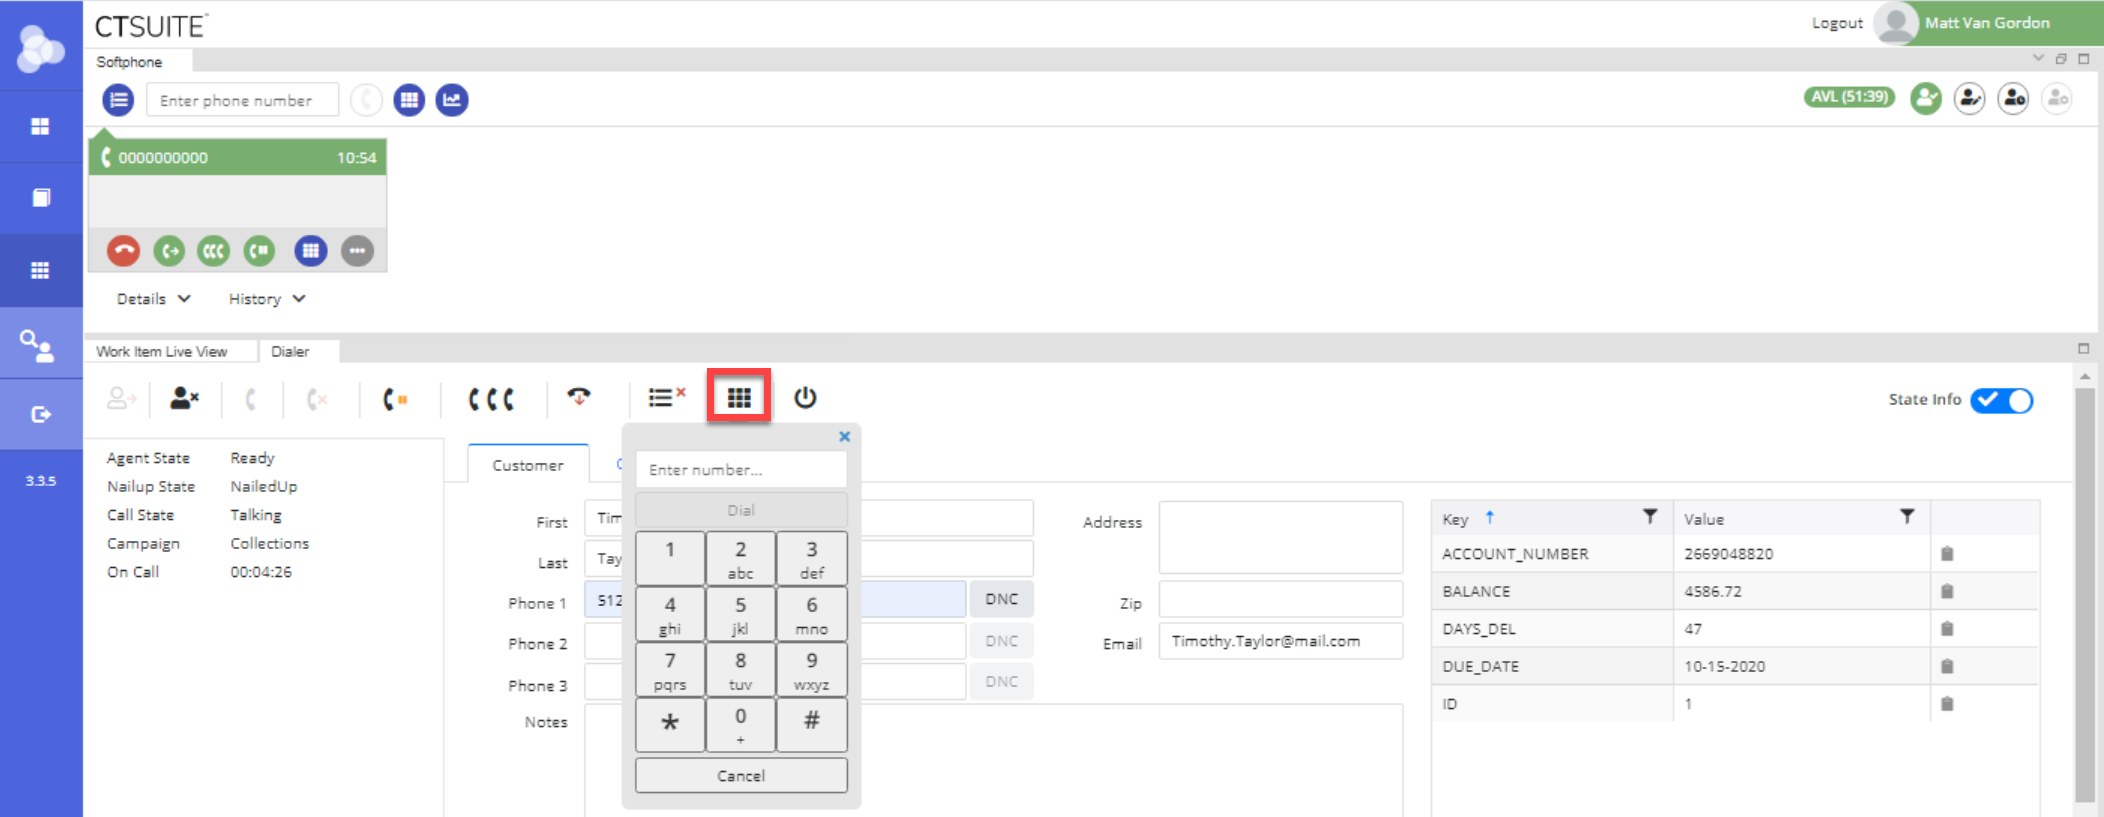
DTMF
This button opens a dial pad for entering touch tones into a phone system. This is not a way to dial an outbound call.
For example: If the number POM dialed has an auto attendant and asks which department they wish to go to, the agent would use the DTMF dial pad to select a number.
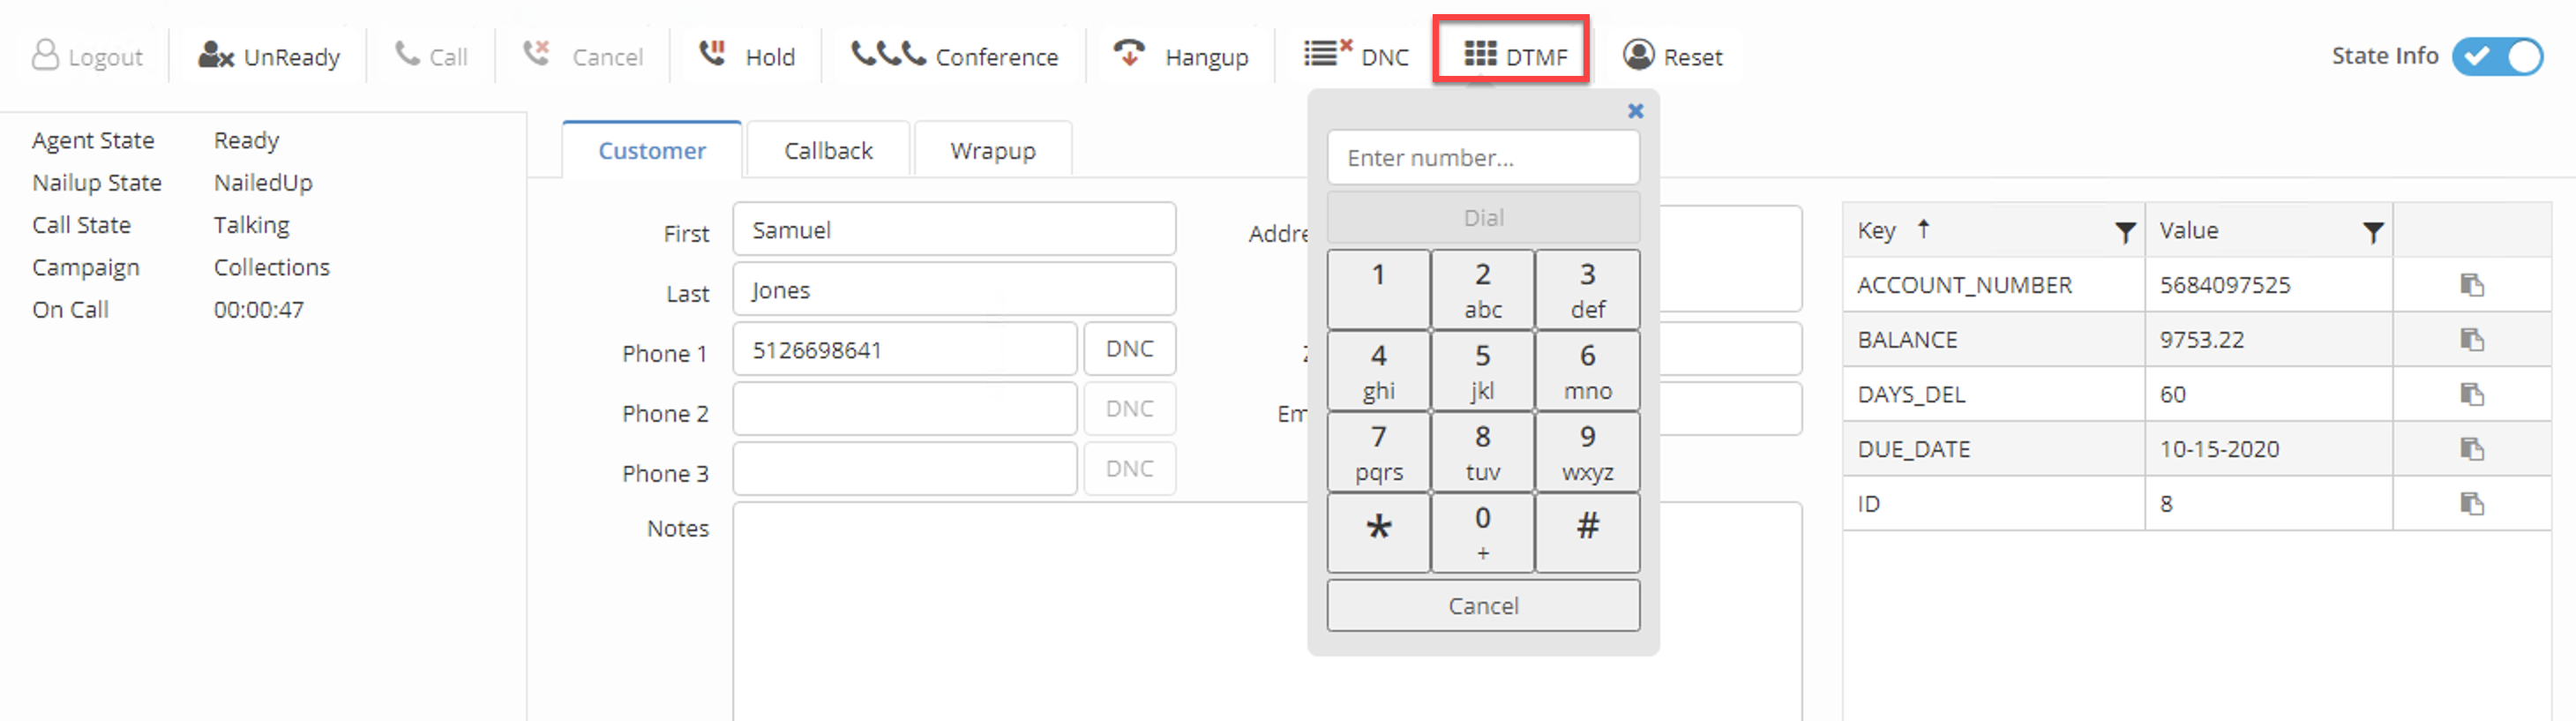
DTMF number pad in Classic layout
DTMF number pad in Flex layout
Reset POM
To reset the connection with POM, click Reset in the call control toolbar
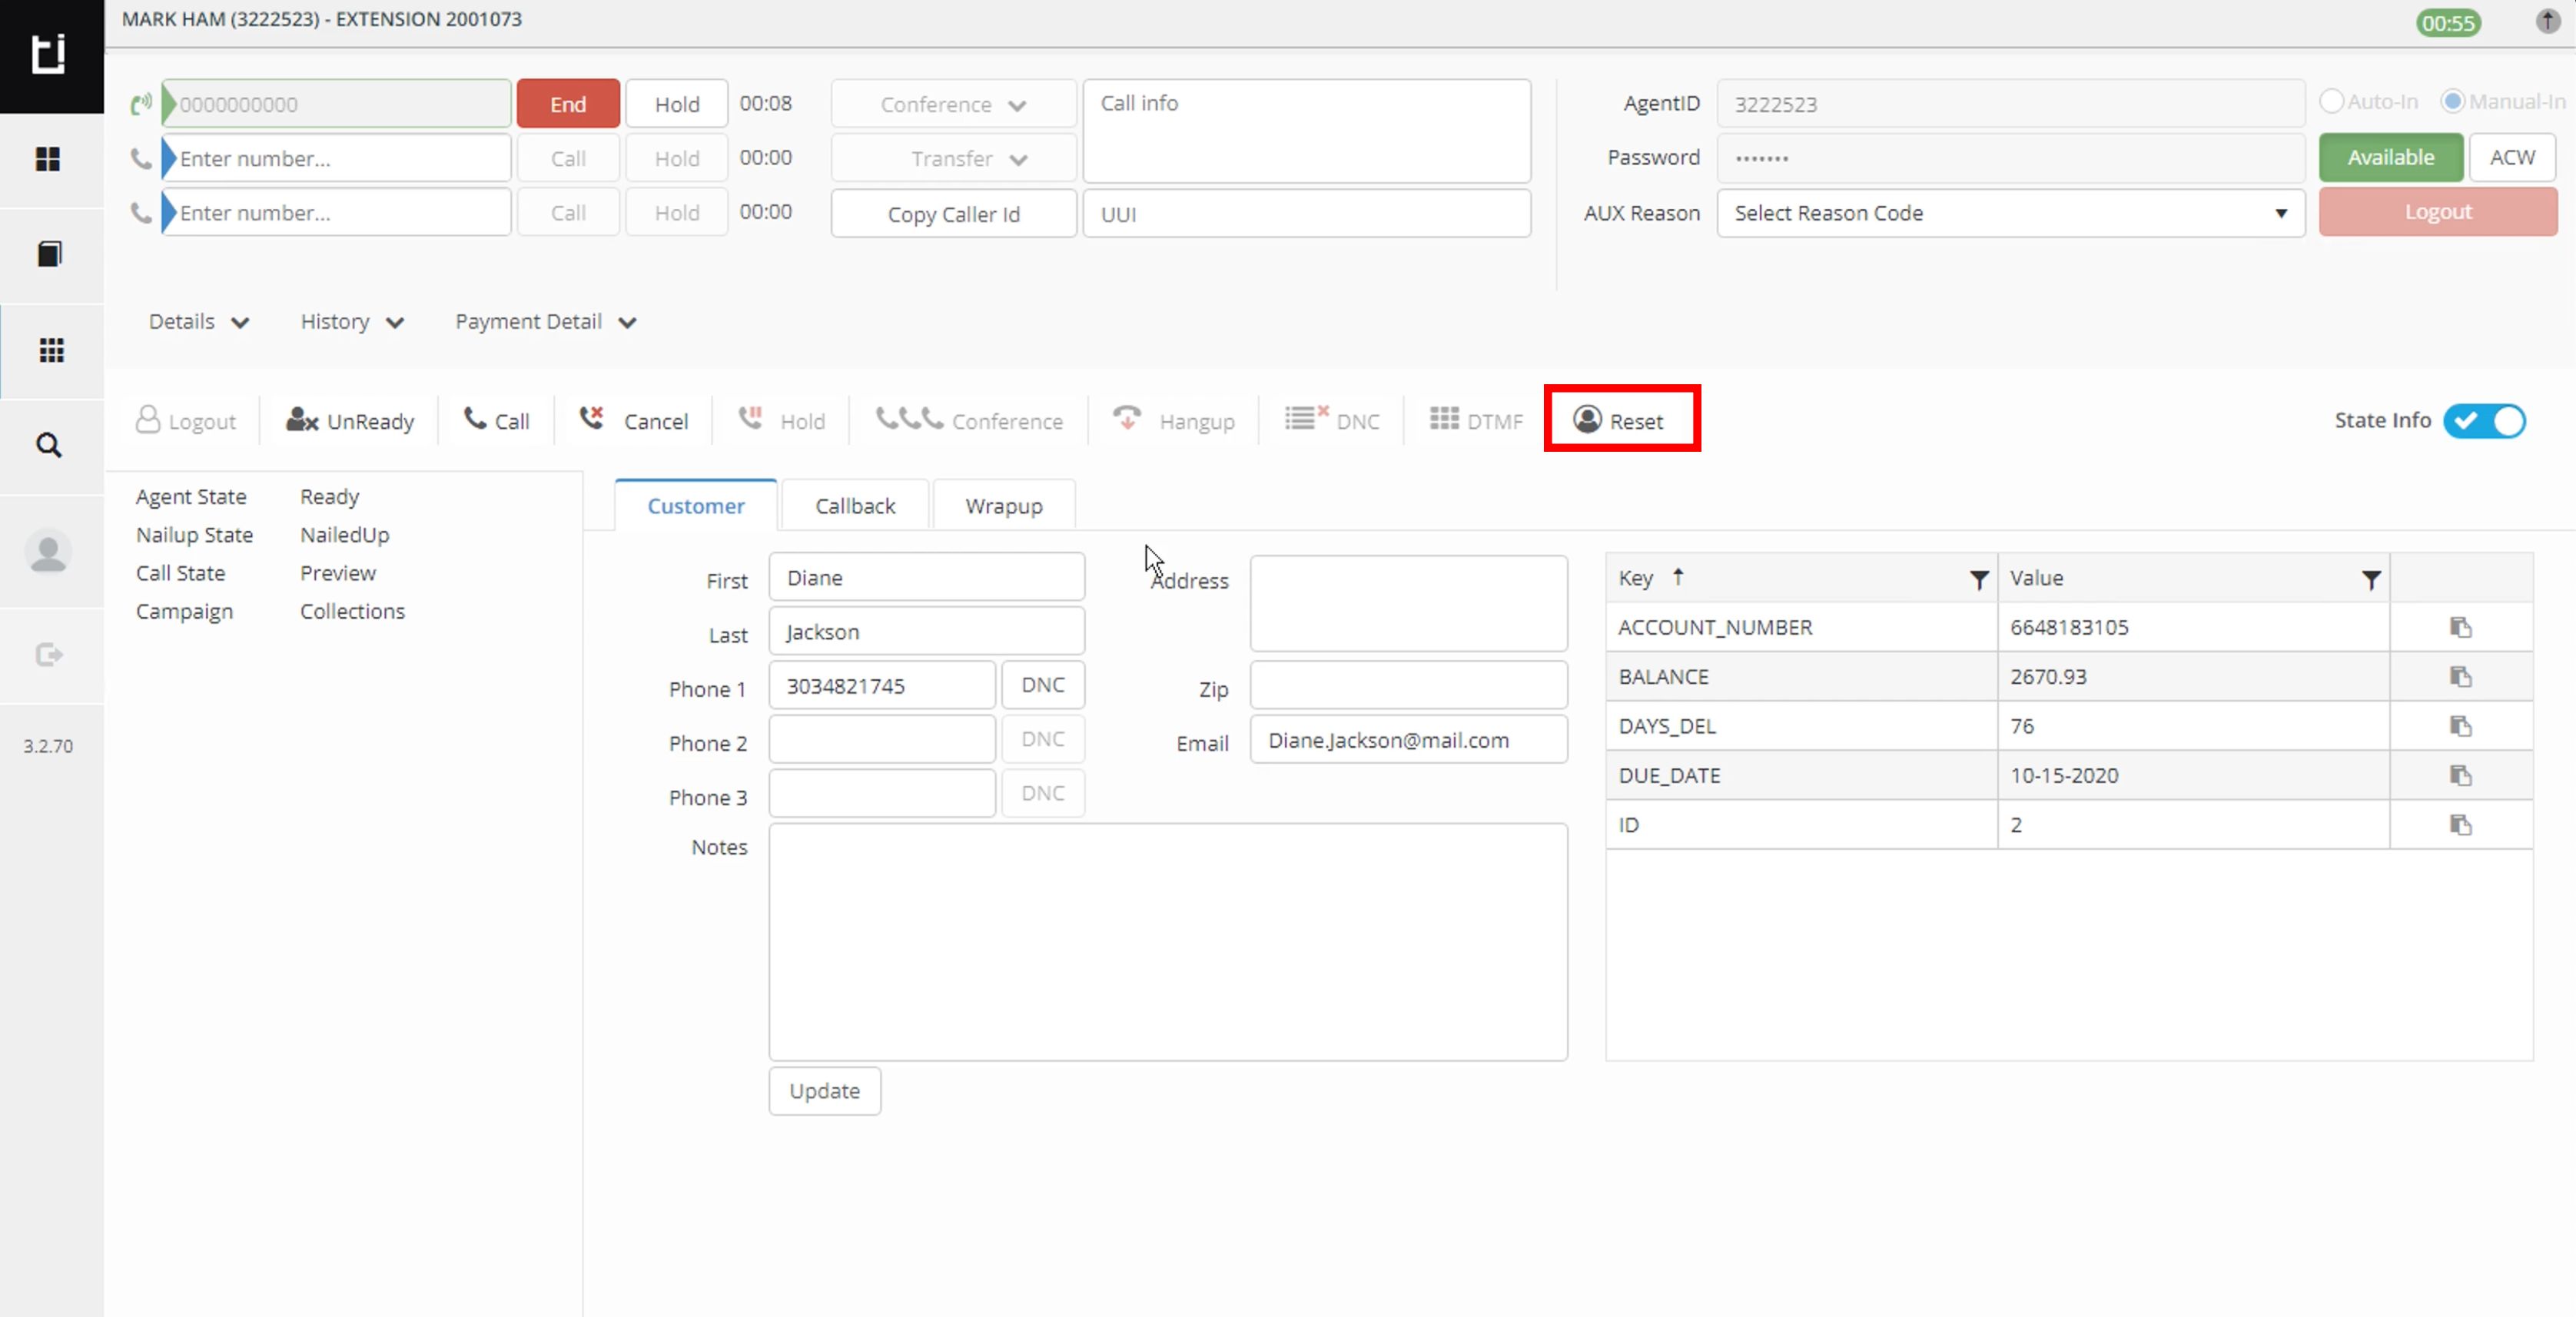
Reset POM in Classic layout
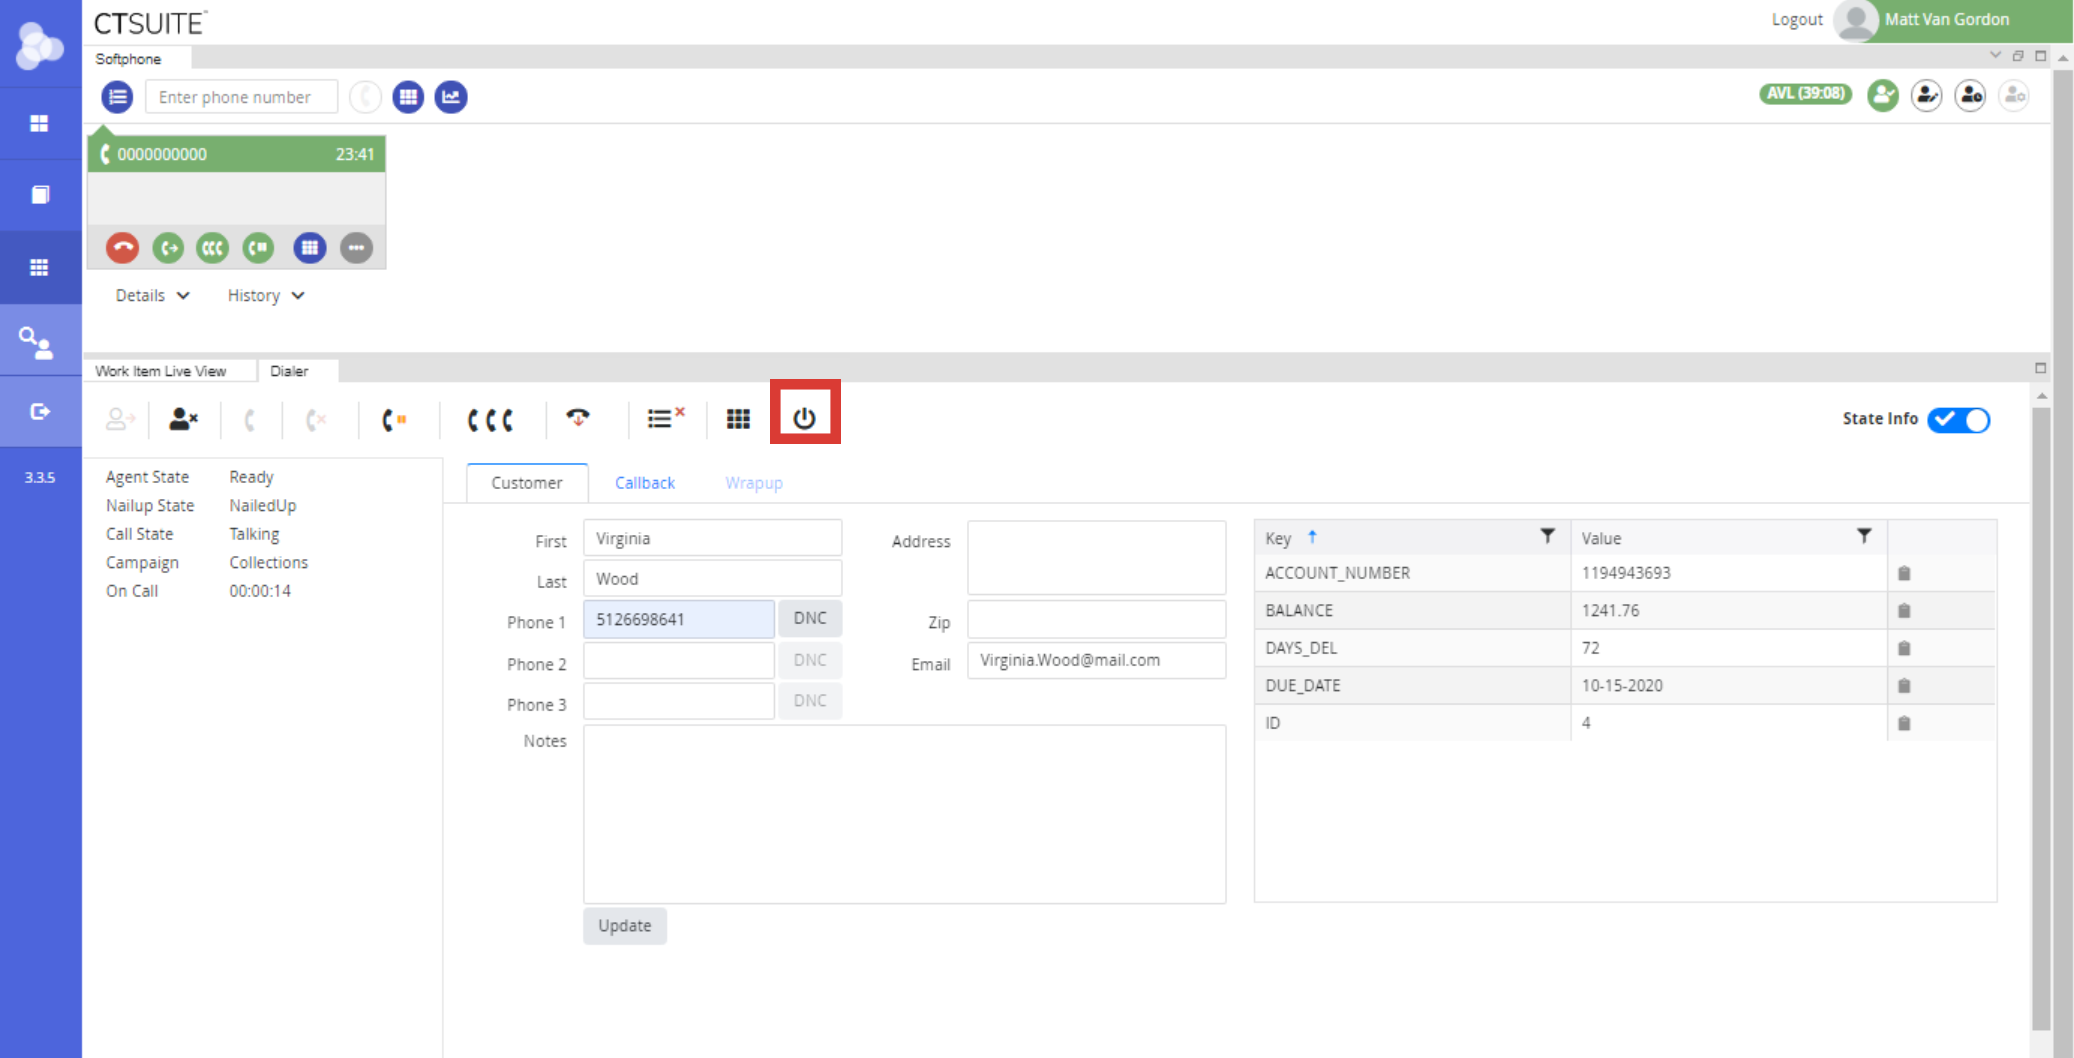
Reset POM in Flex layout
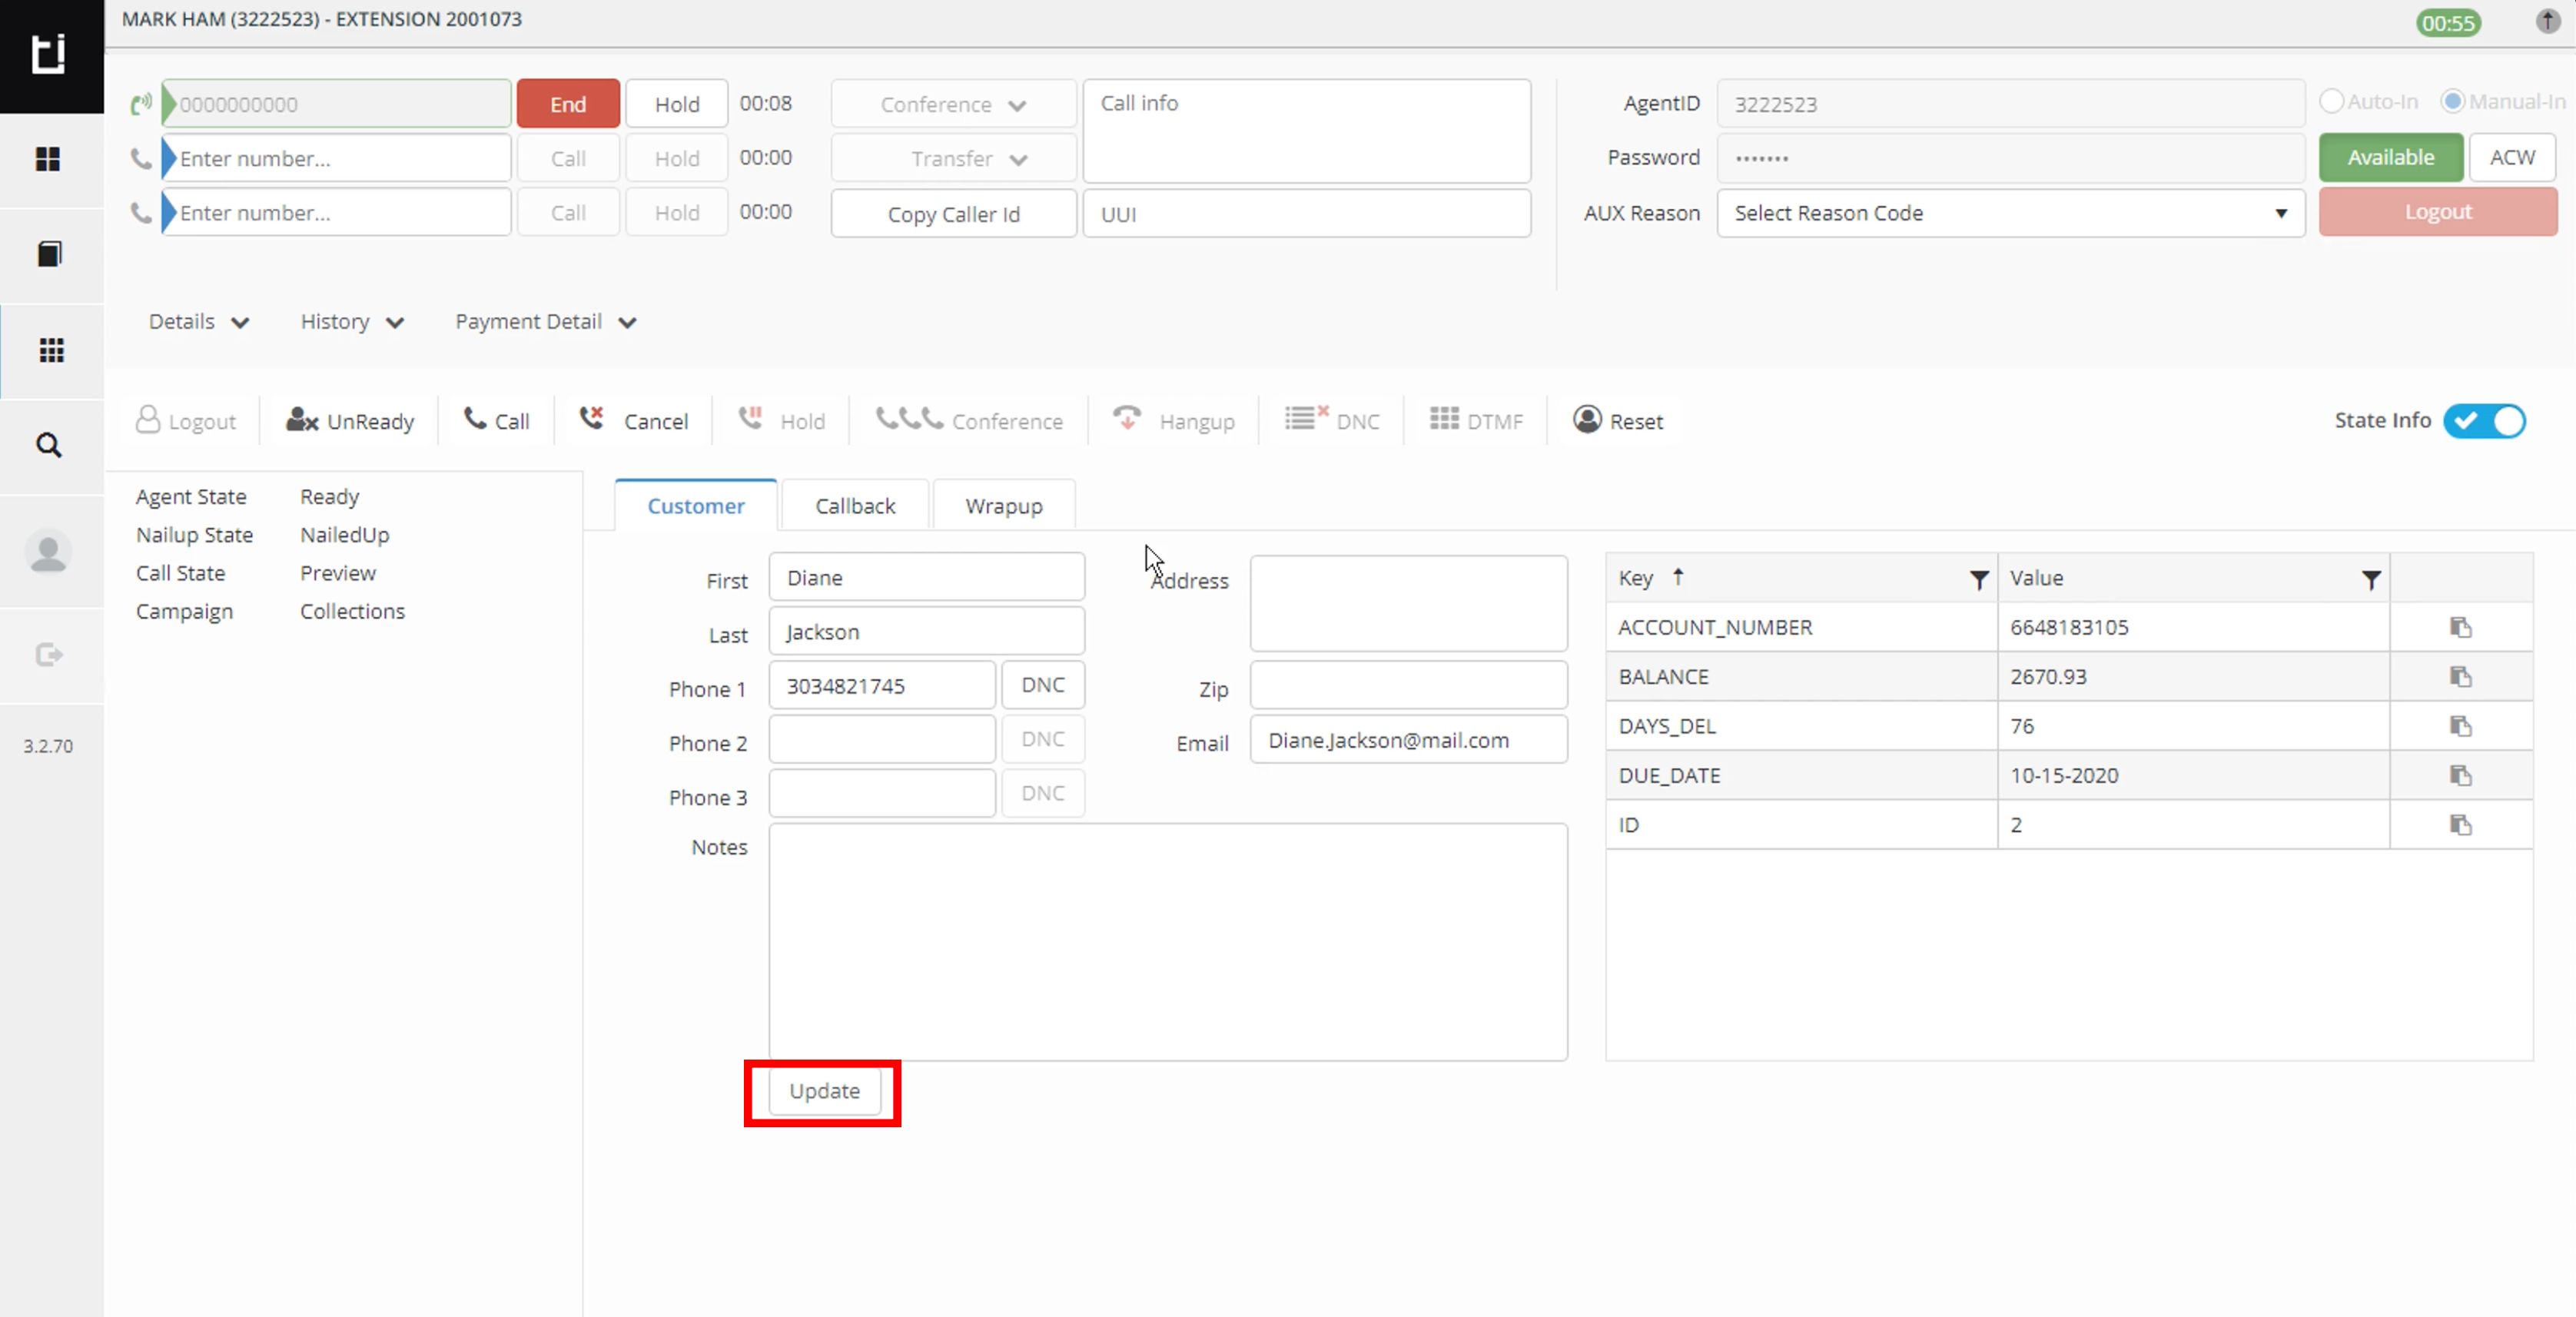
Updating Customer Info
When the agent has been NailedUp with a call, they can modify the customer information and click the Update button. This will immediately save any changes to the customer information.
Update customer info in Classic layout
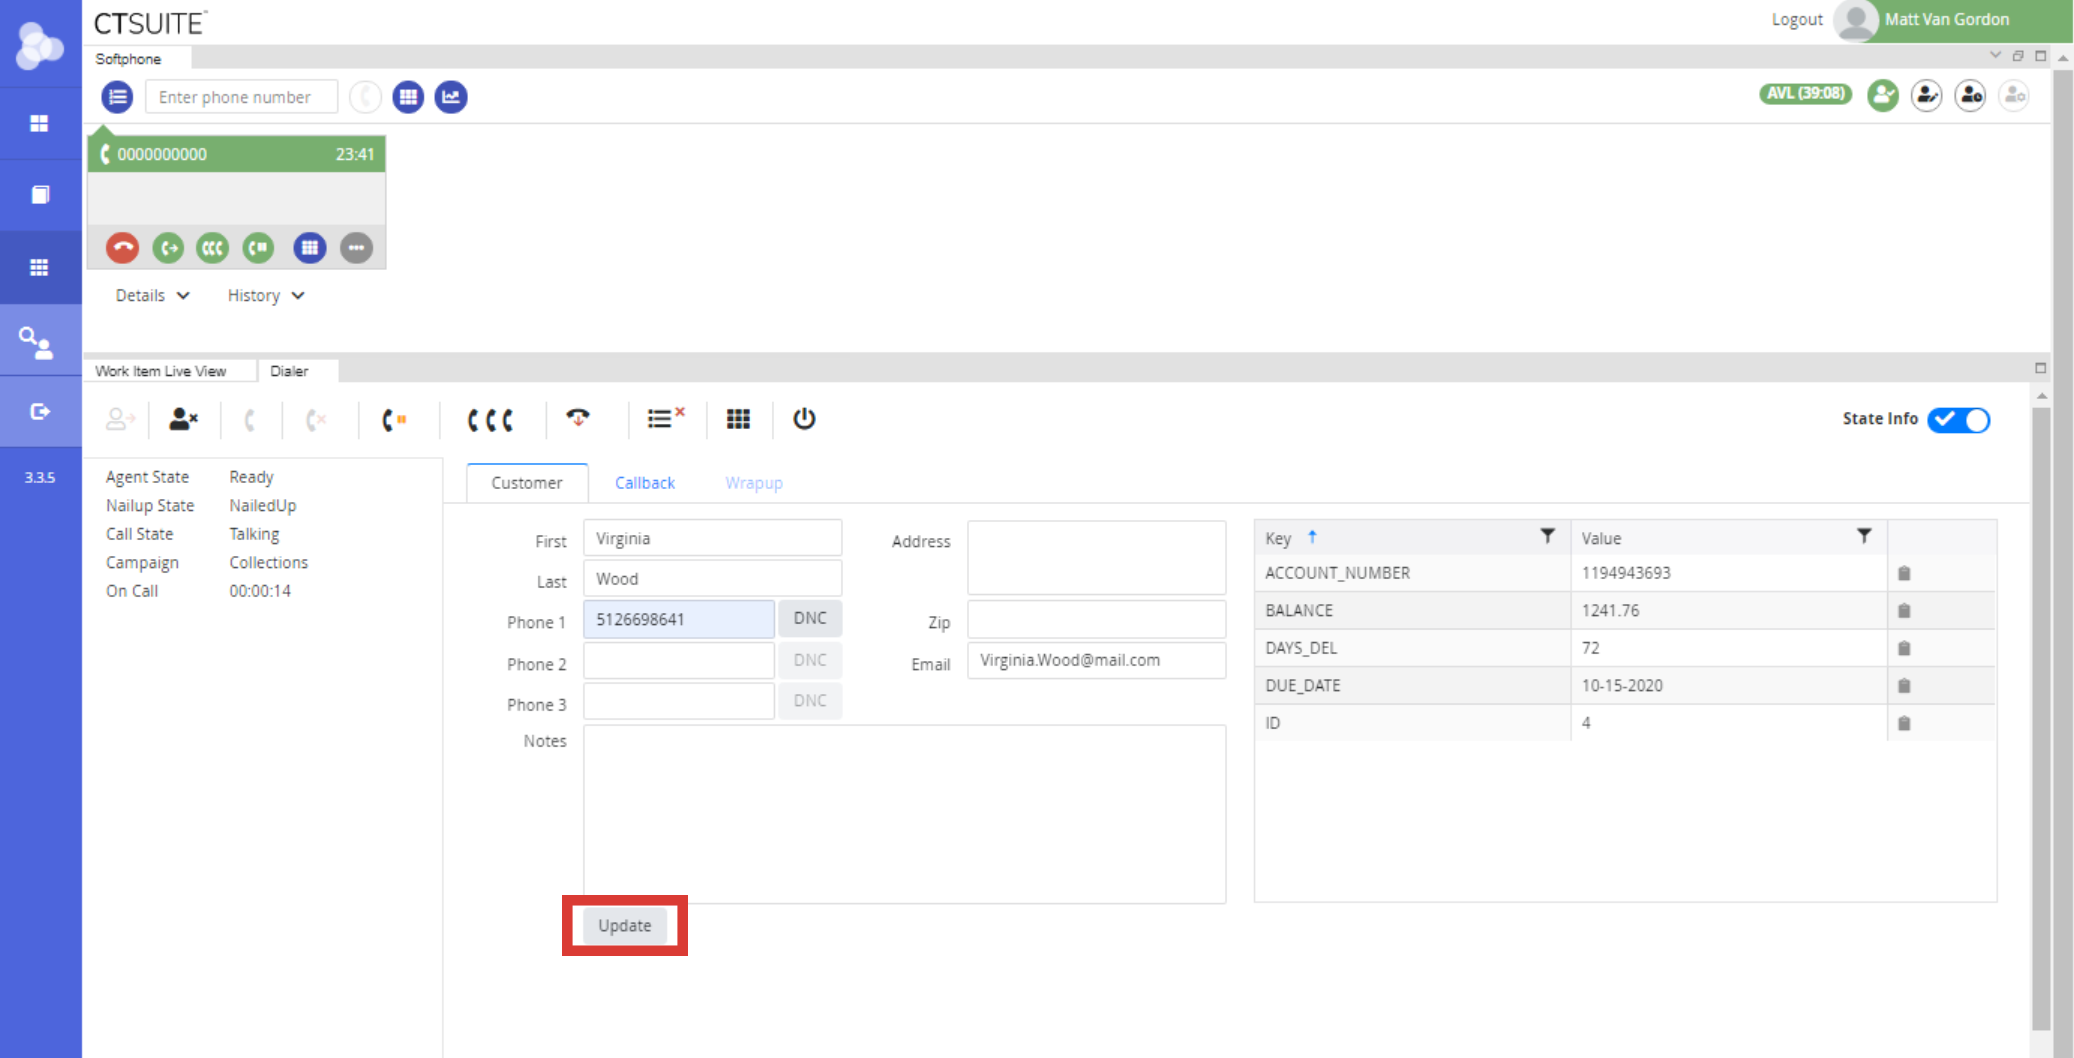
Update customer info in Flex layout
To copy information from the KVP Grid, click the Copy icon next to the value you wish to copy.
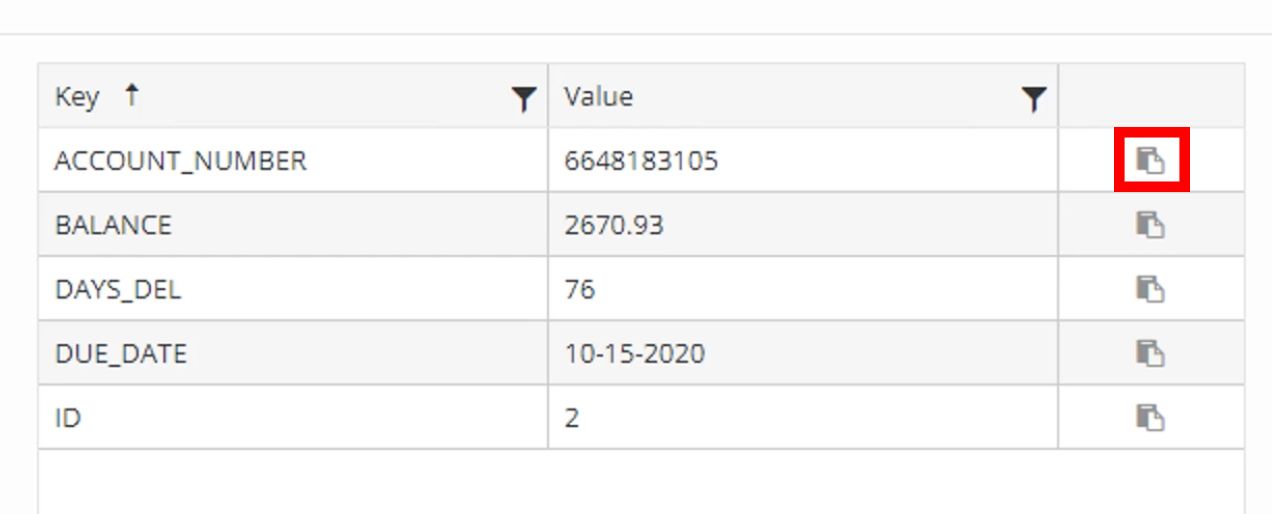
KVP Grid appears the same in Classic and Flex
The Status shows how much time has elapsed while on a call. It also shows the Call State which updates when Talking.
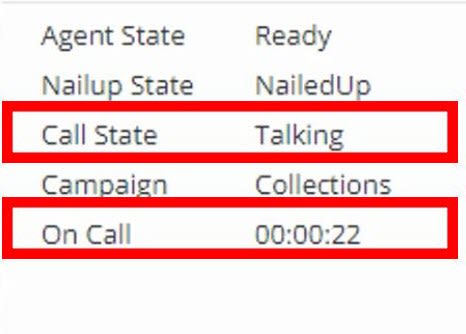
Status appears the same in Classic and Flex
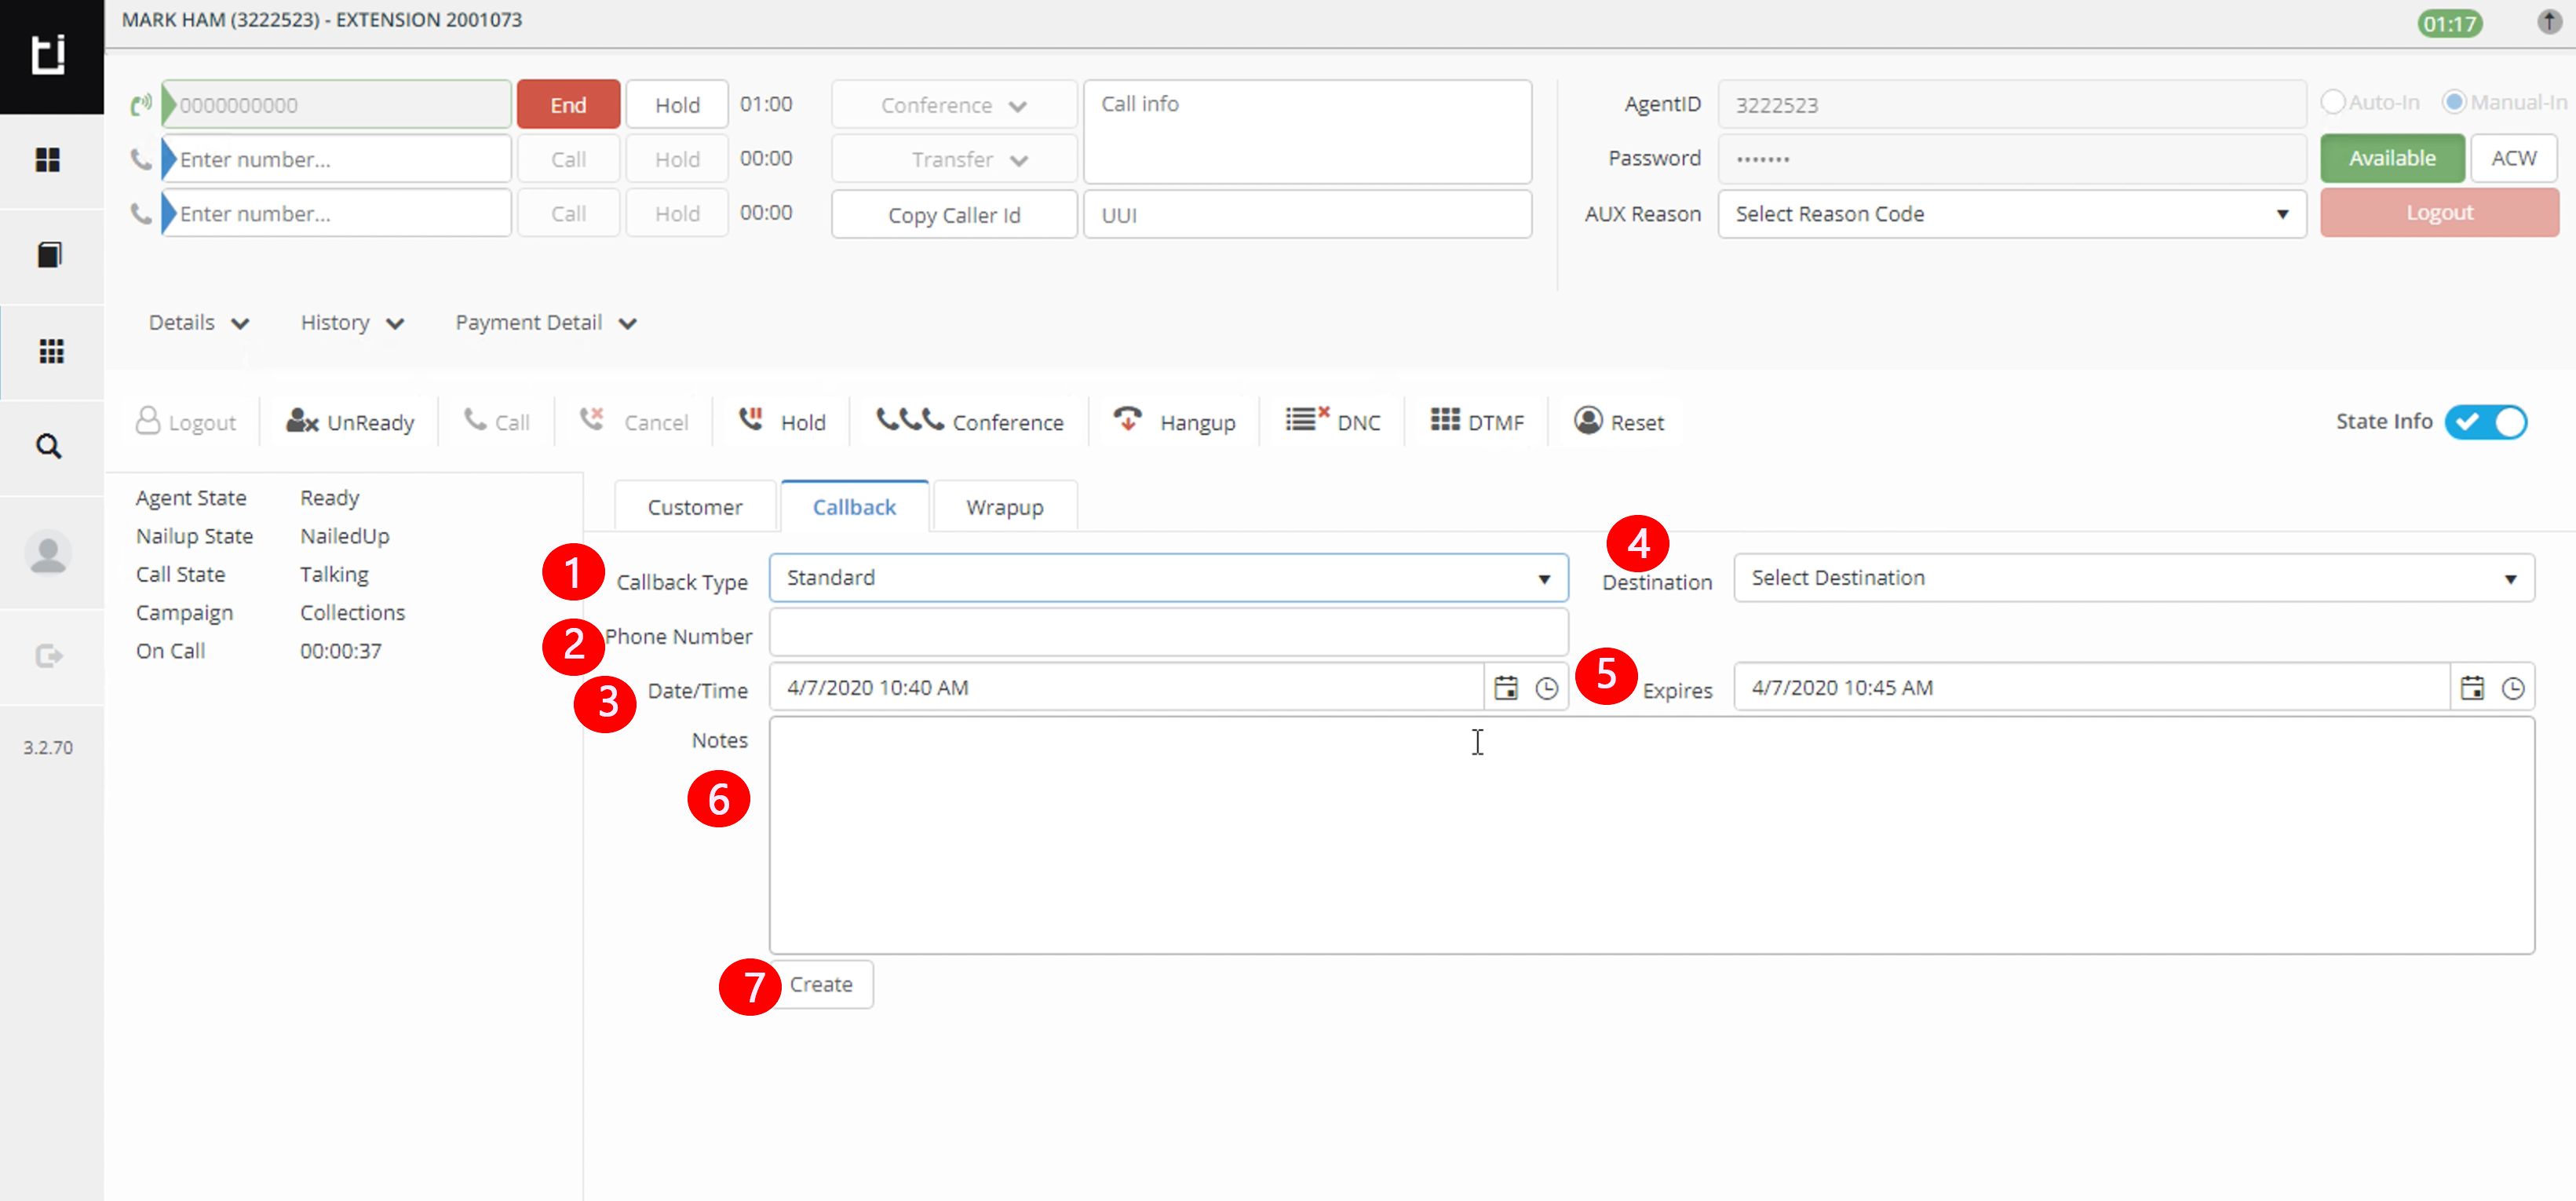
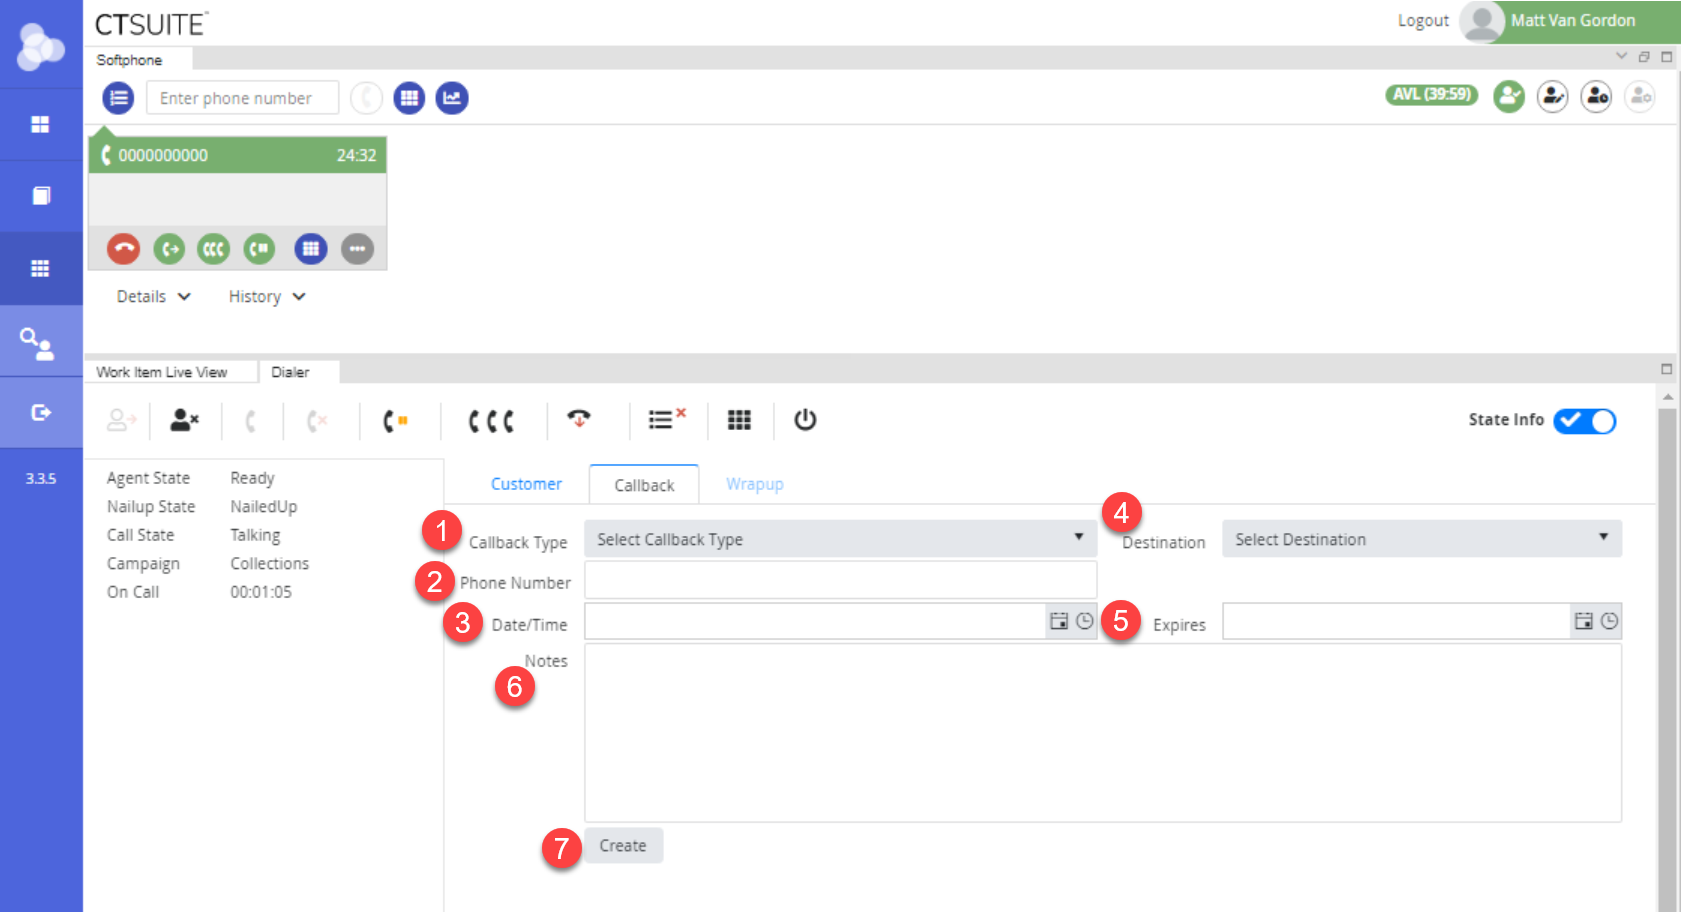
Callback
Once the Agent is NailedUp with a call, they can schedule a Callback at any time. This allows POM to engage an Agent at a later time with the current call. The Agent can add notes which will be displayed to the receiving Agent during Callback.
To do this:
Select the Callback tab.
Callback in Classic Layout
Callback in Flex Layout
- Callback Type: Select a callback type from the drop-down. Examples: Agent, Campaign.
- Phone Number: Enter the phone number.
- Date/Time: Select the date and time the callback will occur.
- Destination: Select the job to associate the callback to.
- Expires: Select an expiration date for the callback.
- Notes: Add notes regarding the callback.
- Create: Creates the callback.
Overwrite Callback
To overwrite a Callback just created, create a new Callback before wrapping up the call. The previous Callback will be overwritten by the most recently created Callback
The callback will be initiated and delivered to an available agent within the Callback Type and Destination set at its creation, slightly before the set time. If an agent is not available, the callback will be postponed to a set time delay and will try to connect to an agent again at that new time. The retry time and other related settings can be set in the Avaya Aura Experience Portal
Prefix Number
A prefix Number can be set in Avaya Aura Experience Portal, This will make it so that outgoing calls from POM will add this Prefix number in front of any number entered in the costumer Phone fields as the time the call is dialed out. The Prefix also affects the Callback Feature and will add the prefix to any number entered in the Phone Number field when the callback is initiated.
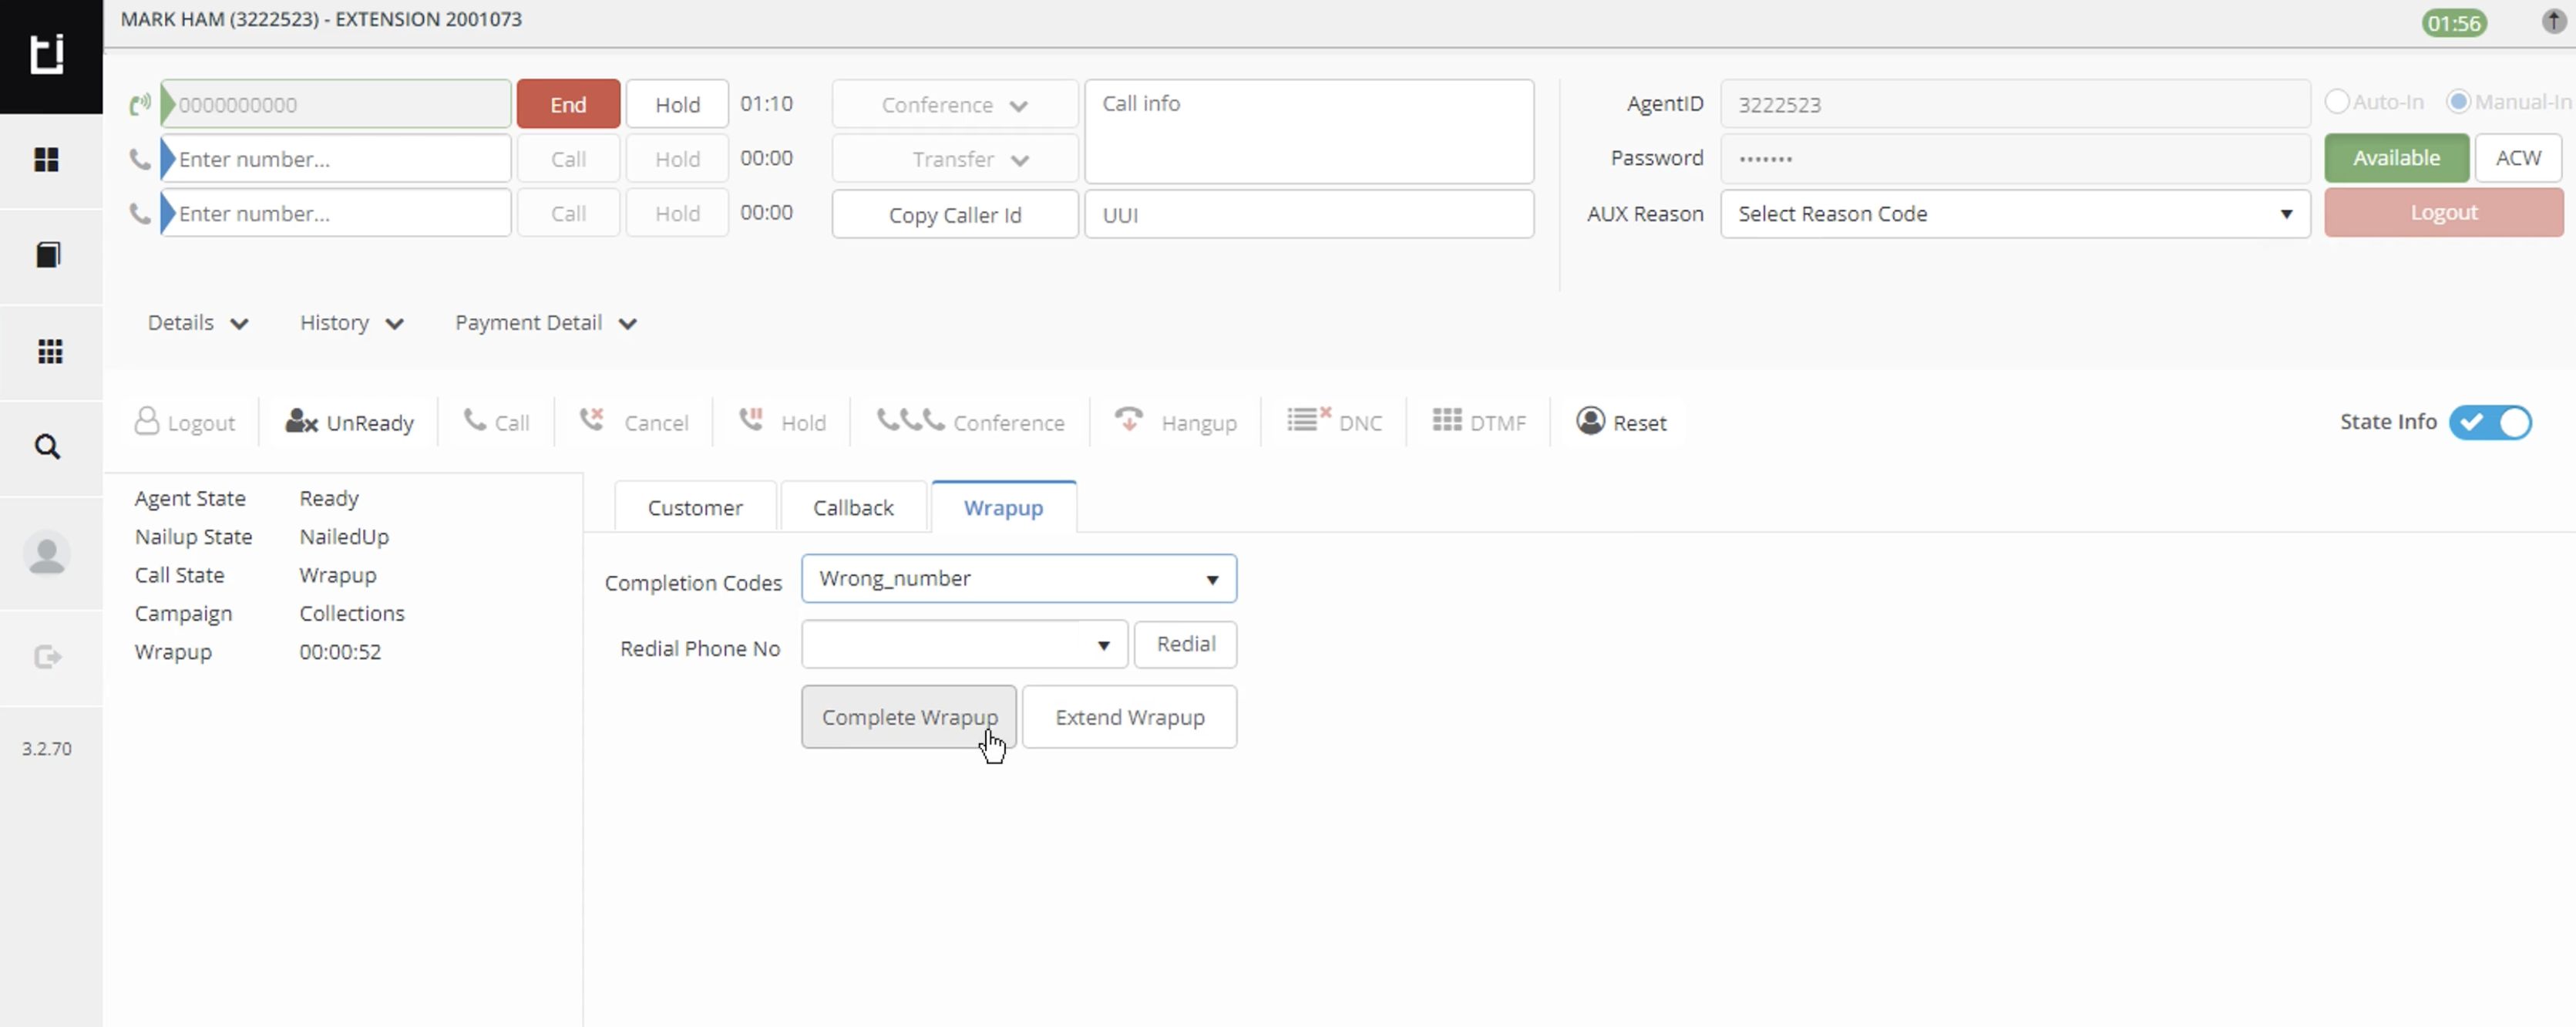
WrapUp
Once the POM Call is completed the Agent can assign a completion/WrapUp code. They can do this during a call by selecting the tab, or after the call has finished. The selection is stored on the POM server for reporting purposes.
When in the WrapUp tab, select a completion code from the drop down.
If the Wrapup is on a timer, the time can be extended by clicking Extend Wrap Up.
Wrapup in Classic Layout
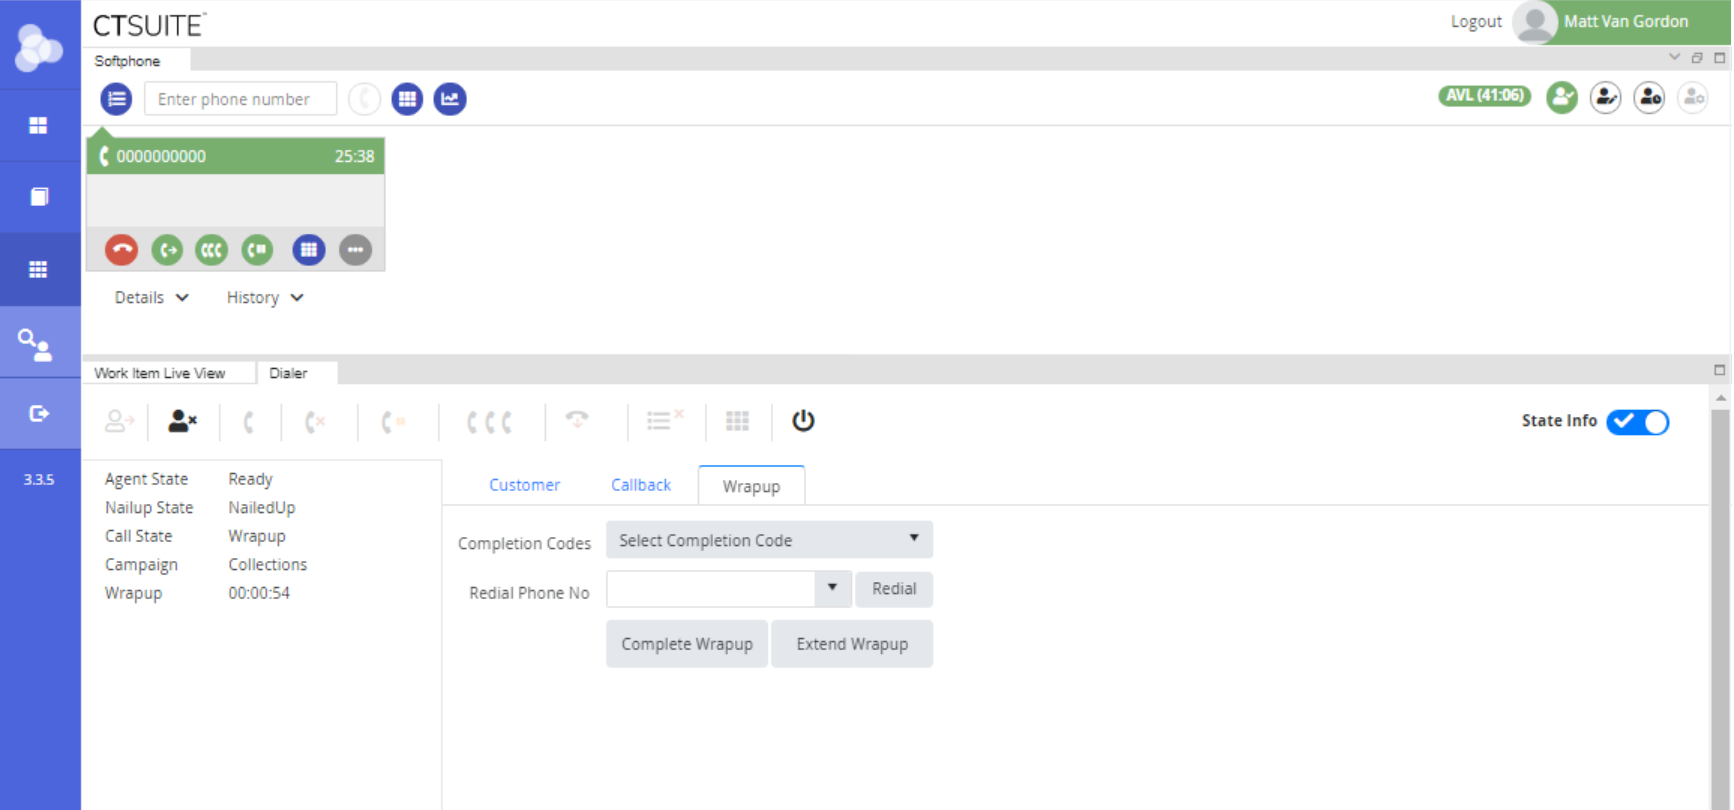
Wrapup in Flex Layout