The CT Suite Softphone is located on the top of the CT Suite web client interface and allows you to control your phone and your agent state. The softphone is synchronized with your desk phone (if applicable), and you may change states using either option.
The sections below will describe how to begin using CT Suite.
Agent Controls
The Agent controls appear on the right side of the softphone pane.
This section covers how to control agent states, and how to log in and out of the Avaya ACD using CT Suite. For instructions on how to log into the web application, please see the section Starting CT Suite.
To login to the Avaya ACD, the agent should click the login button.
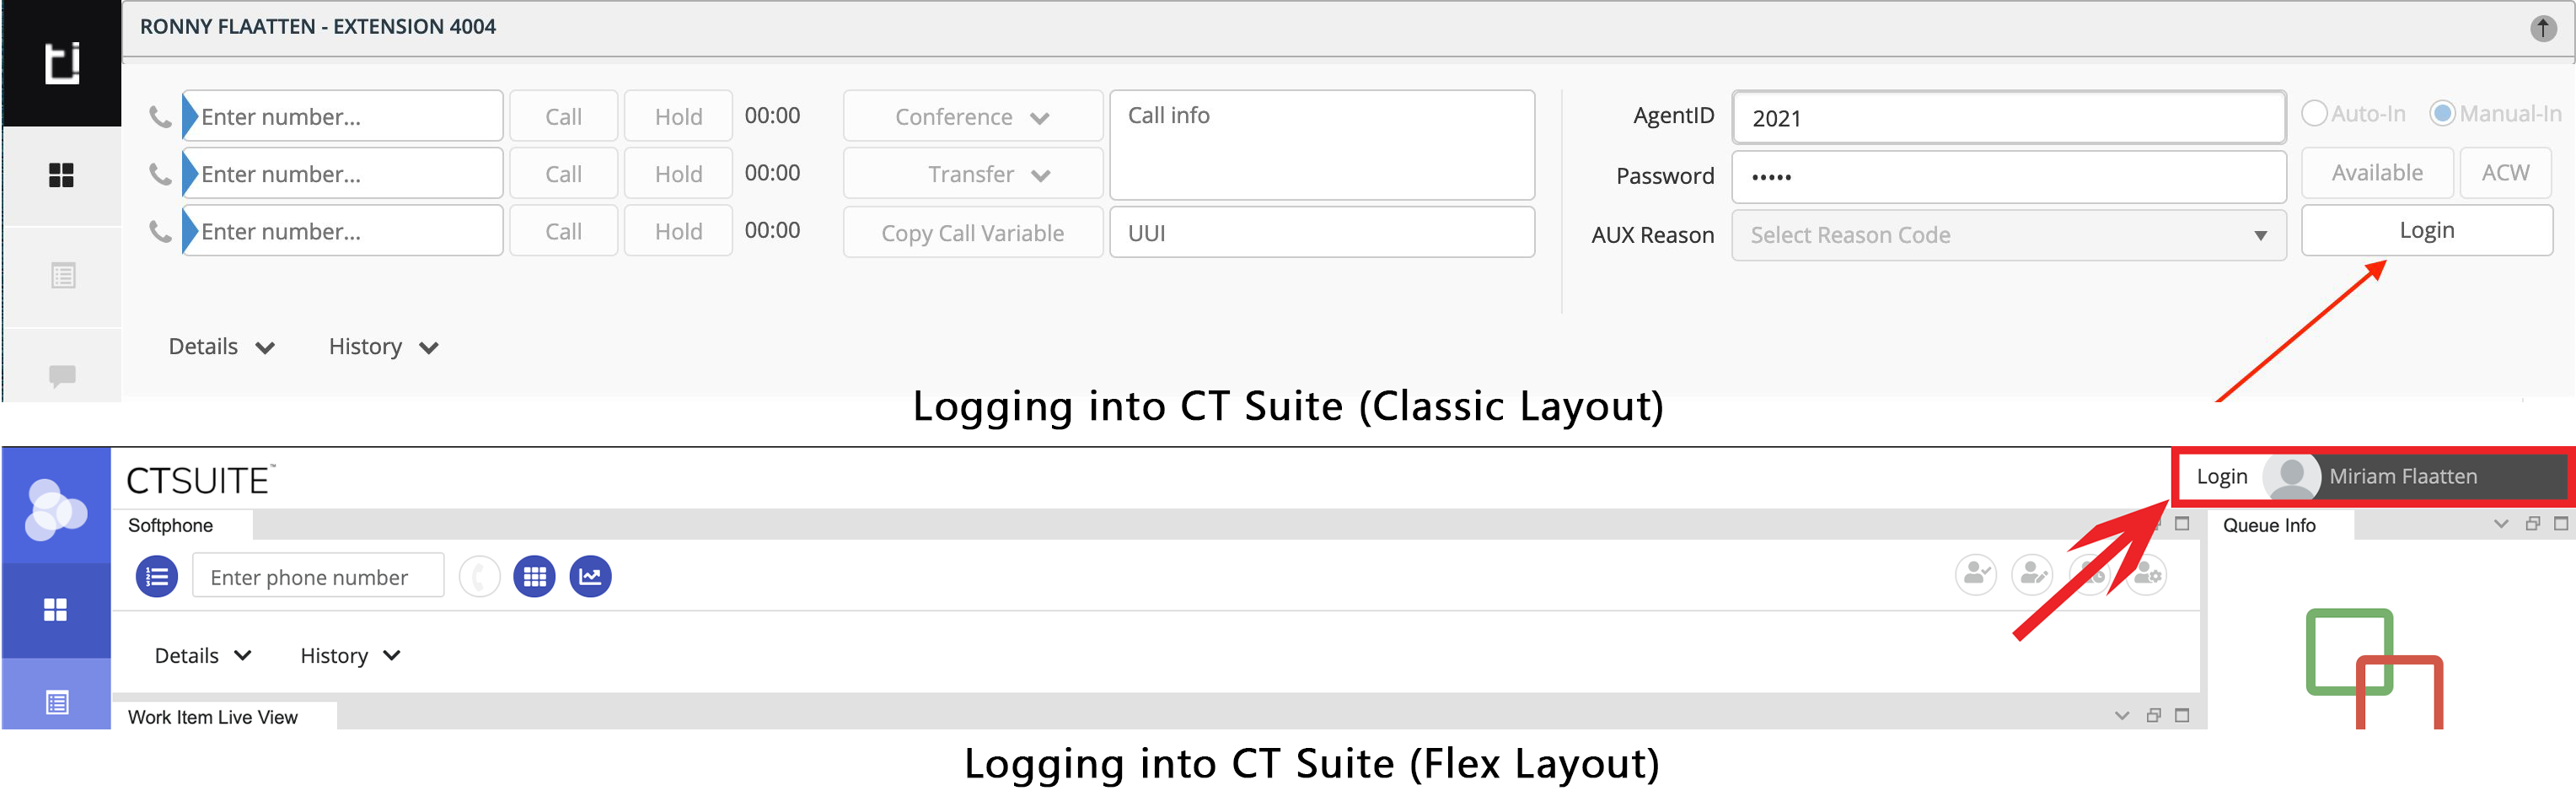
The Agent ID and Password fields should already be populated for you; however, you may override and/or enter your Avaya ACD Agent ID and Password if needed, prior to clicking the “Login” button.
Once logged in, the user may now select a state and control other settings. There are quick buttons for Available and ACW (After Call Work), while an AUX state / reason code is selected by using the drop down.
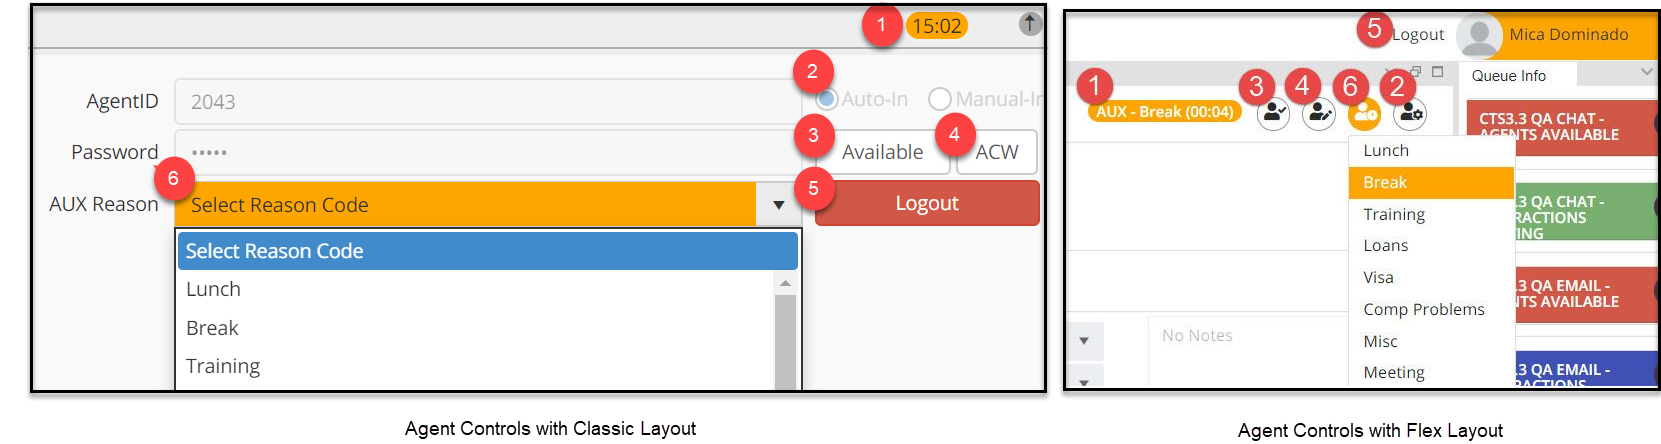
- Timer: How long the agent has been in the current state. The color indicates the state (orange = AUX, Green = available, blue = ACW)
- Agent Mode: If enabled, allows the agent to toggle between Auto-In and Manual-In. The Auto-In setting will automatically move the agent to the next state in the programmed call flow at the end of each ACD call. Manual-In puts the agent in ACW after each call, and requires the agent to manually put themselves into Available when ready.
- Available: Sets agent status to available, which allows them to receive queued calls and work items
- ACW: Sets agent status to After Call Work, which prevents new items from queuing to the agent, allowing them to finish a task before taking the next call or work item
- Logout: Logs agent out of the ACD
- AUX Reason: Sets the agent status to the AUX state for the reason selected and prevents new items from queuing to the agent
Call Controls
Once you have logged into the ACD, you can now receive and make calls using the CT Suite softphone. Your audio will be transmitted to your headset using one of several methods that will be configured by your administrator.
This section covers how to use the softphone controls to place, answer, hold, conference, transfer and end calls. Your desk phone (if you have one) is synchronized to this softphone and you may control the phone using either option.
To make an outbound call, type a phone number or extension into the first line appearance. *Note: There is only 1 dial line in Flex Layout.
Click the Call button to place the call
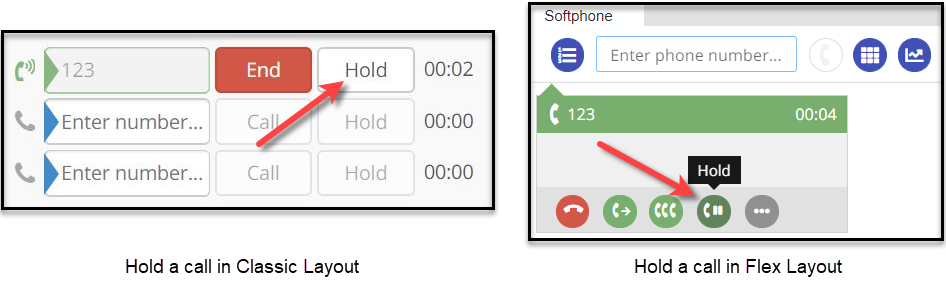
Once you have a call in progress, you can place the call on hold by pressing the Hold button or end the call by clicking End.
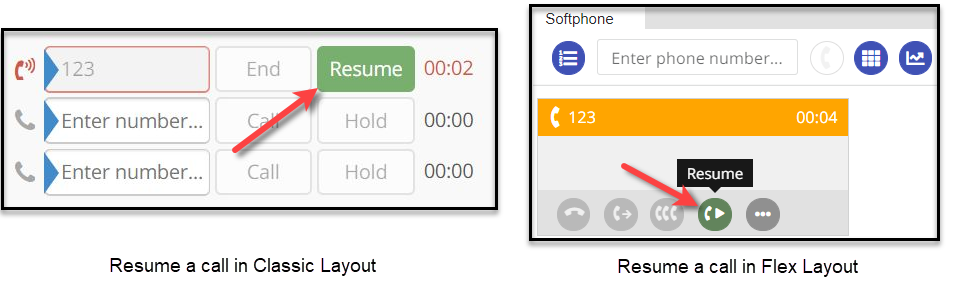
Resume a held call by pressing the Resume button.
Conference or Transfer - Classic
To Conference with or transfer to another number you will need to first place your current call on Hold then dial the number you wish to conference to on your second line. (Dialing a call on the 2nd line will place line 1 on hold)
Before you Conference the two parties, you can switch between the lines by clicking Resume. This will place the alternate line on hold and resume your call with the line that was on hold.
When you are ready:
- to put all parties into a conference, click the Conference drop down button and select the line that should be added to the call in progress
- to transfer the line, click the Transfer drop down button and select the line that should be transferred to the new party.

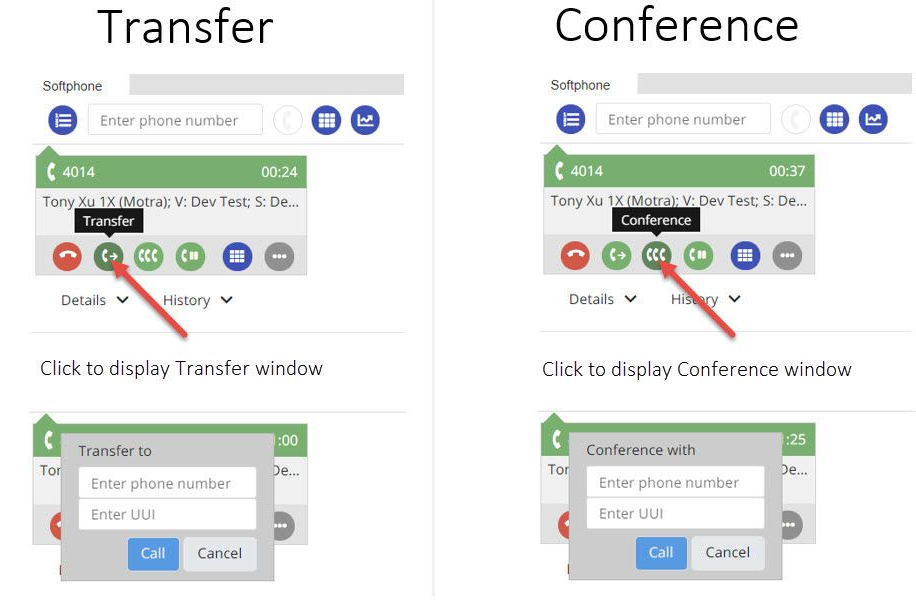
Conference or Transfer - Flex
With a call in progress, click on either the Transfer or Conference button. Once clicked, a form will appear where you will enter the phone number you wish to transfer to or conference with. You can also enter the UUI if applicable. Click the Call button to dial the number.
Once the Call button is clicked, the first line will go on hold, and the second line will appear.

Once answered, the agent can speak to the party on the new line before proceeding. The agent can also switch back-and-forth between lines by holding and un-holding either line.
Clicking the Complete Transfer button will transfer the first caller to the newly dialed party and end the call for the agent.
Clicking the Complete Conference button will join the first caller, the agent, and the newly dialed party onto the same call. If any party hangs up, the remaining parties would still be joined on a call.